
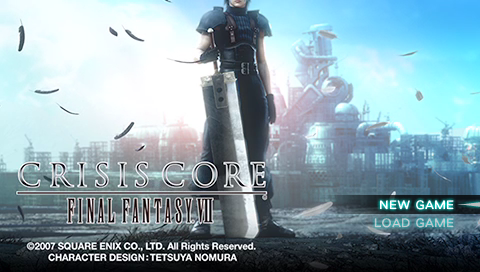
Crisis Core Version Guide
– Page 1: Crisis Core Version Guide – Top
– Page 3: Japanese ↔ English
– Page 4: North America ↔ Europe
– Page 5: Miscellaneous
Japanese Original ↔ Post-Original
– GRAPHICS
– GAMEPLAY
CUTSCENES
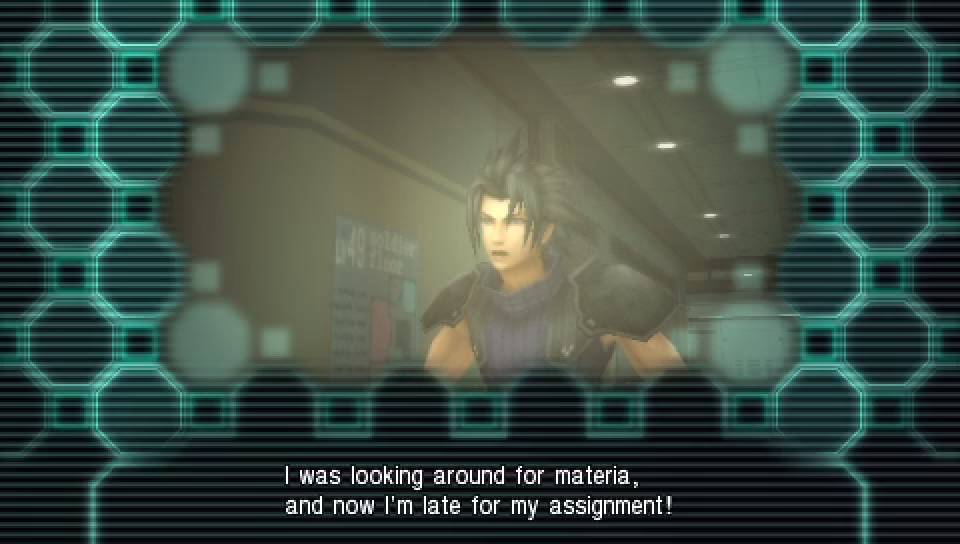
Apart from the obvious situation that the lip movements in the English game were slightly edited to fit the English dialogue (both in the pre-rendered- and real-time cutscenes), there are two scenes where the original release didn’t have voiced dialogue at all.
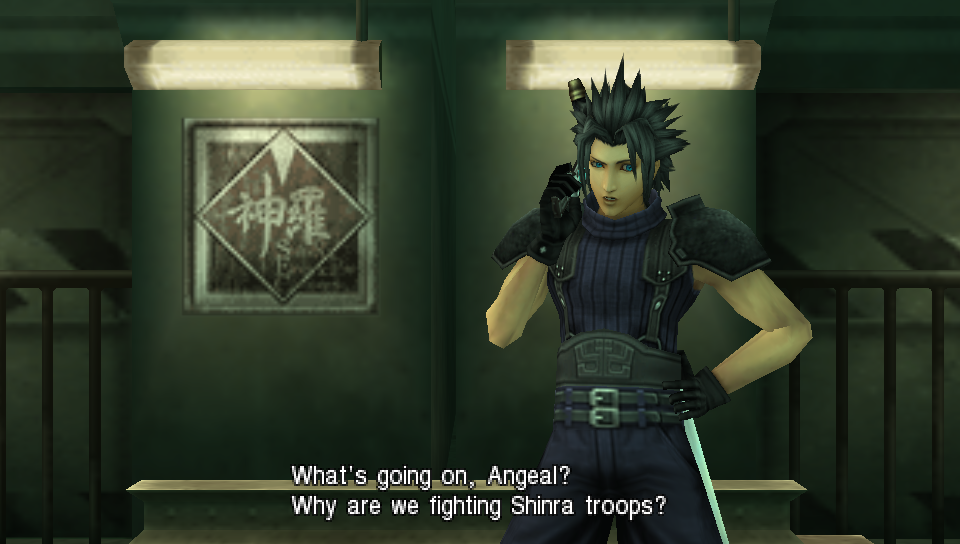
Prologue: Sector 1 Station Platform
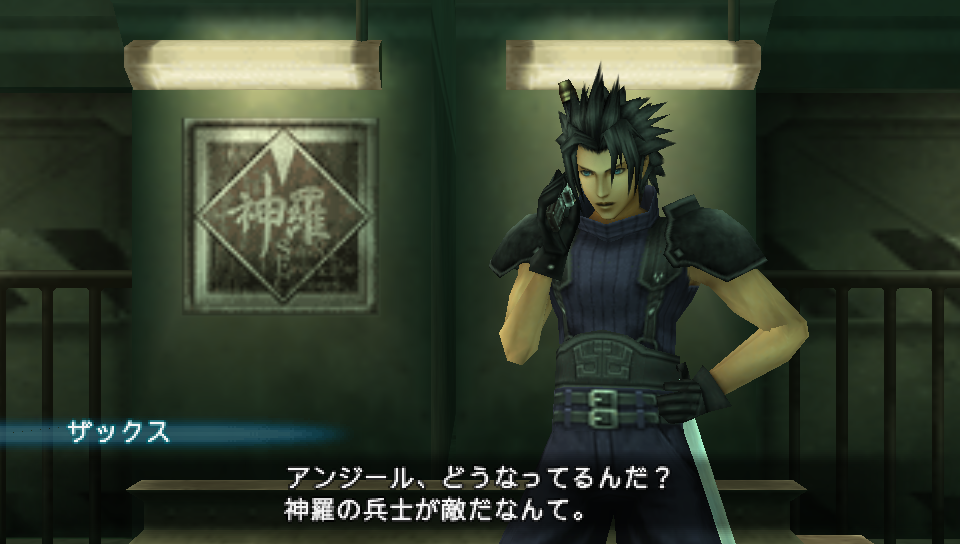
Japanese Original:
The dialogue between Zack and Angeal is not voiced and each line of dialogue requires player input to move along the story.
The necessity of player input can lead to the moderately humorous scenario of Shinra infantrymen spawning indefinitely and Zack standing in the line of fire for however long the player wishes.
Post-Original:
The dialogue between Zack and Angeal is now voiced and the player has no say in how fast the cutscene progresses.
When Zack asks Angeal why they are fighting Shinra troops, Zack now uses his hi-polygon face which allows for a wide range of facial expressions. The keen eye will notice many slight changes in Zack’s expressions when comparing the Japanese intro with the voiced intro.
Chapter 4: Aerith’s Ribbon
Japanese Original:
The scene with Zack buying Aerith a ribbon is not voiced and the player decides the timing for when a line of dialogue exits.
Post-Original:
Voices have been added to this cutscene and thusly the player no longer controls the timing of each line’s exit.
The Subtle Changes

In the process of changing the lip movements to fit the English voice clips instead of the Japanese ones, other minor changes occurred as well.
At the end of Zack and Aerith’s date at the playground, one of Zack’s bangs is partially obscuring his face in the Japanese version. In later releases, Zack’s hair has been moved so his face is in full view.
When compared under a microscope, it is likely that we may find more subtle changes like these. There is also the fact that plenty of signs in the game were changed, along with a certain 3D statue, as we shall see in the graphics section of this page.
GRAPHICS
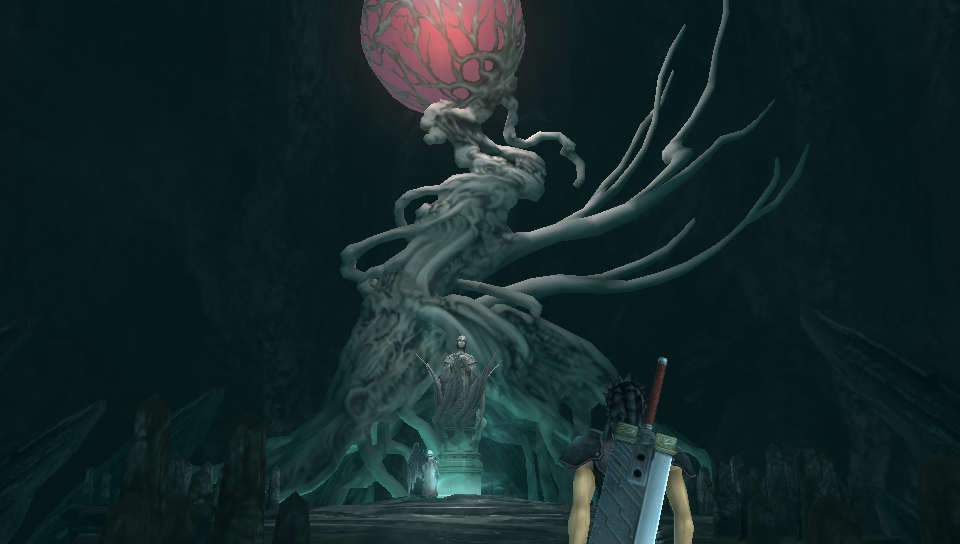
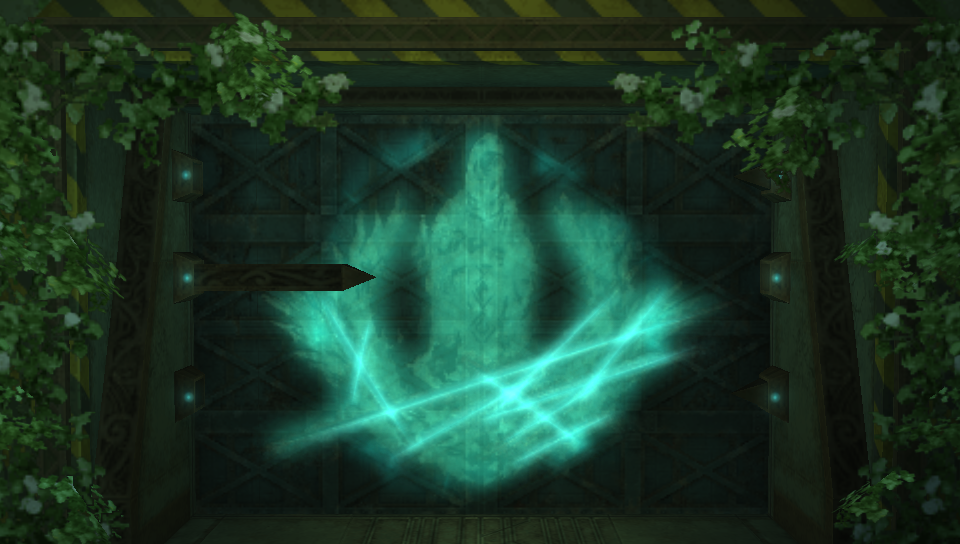
Goddess Statue
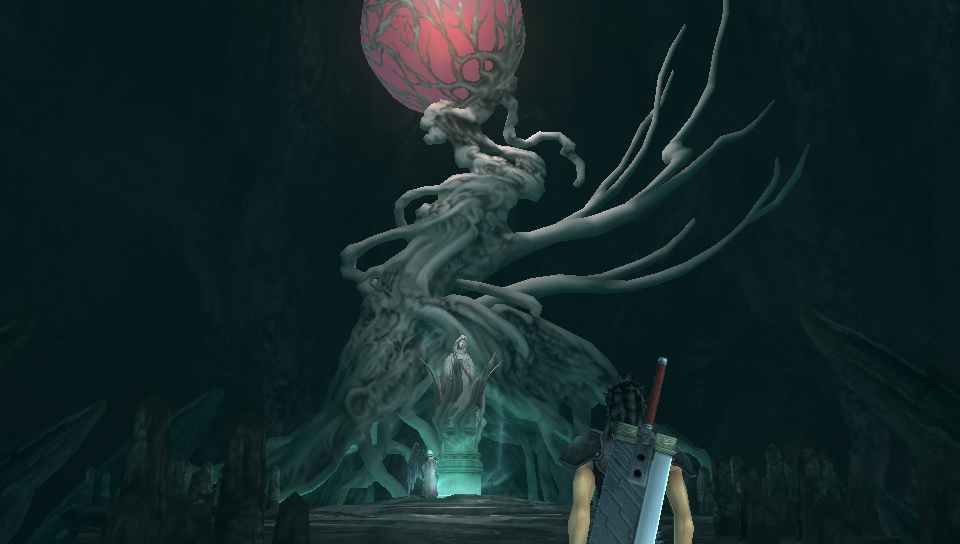

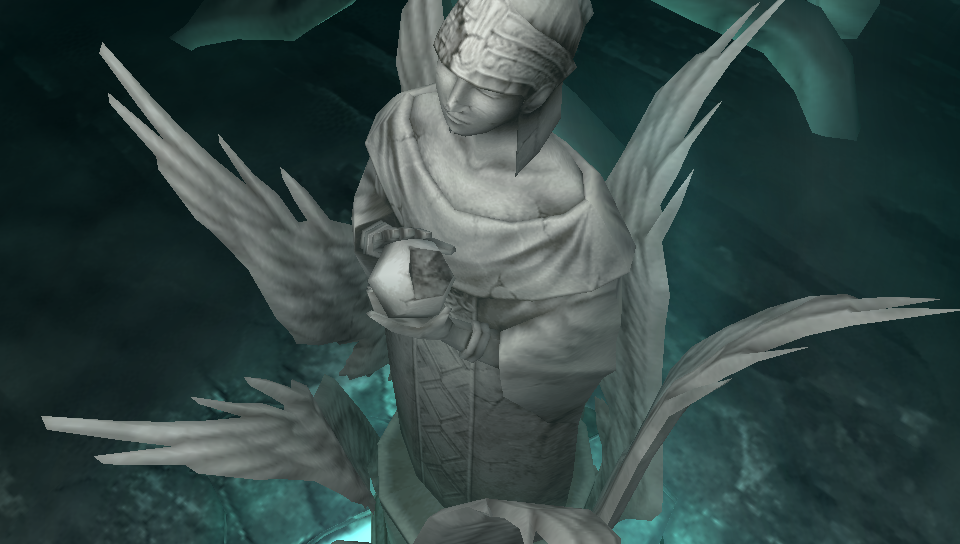


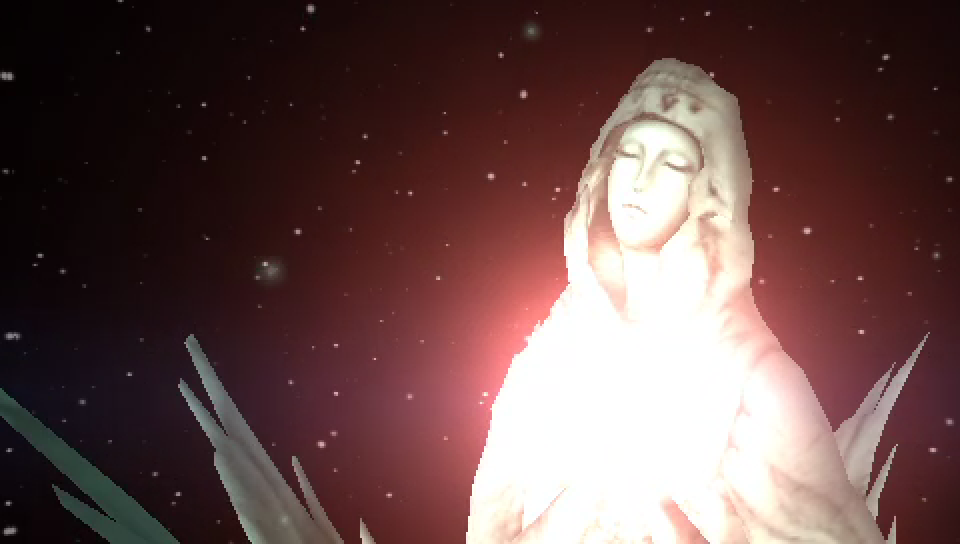


Japanese Original:
The statue holds similarities to Christian iconography, most notably to depictions of Mary: Mother of Jesus. The shroud and the tiny facial features line up with many classical depictions of Mary.
The hands of the statue, and the broken orb it is holding, blend in with the bust and can be difficult to spot due to the flat design of the model.
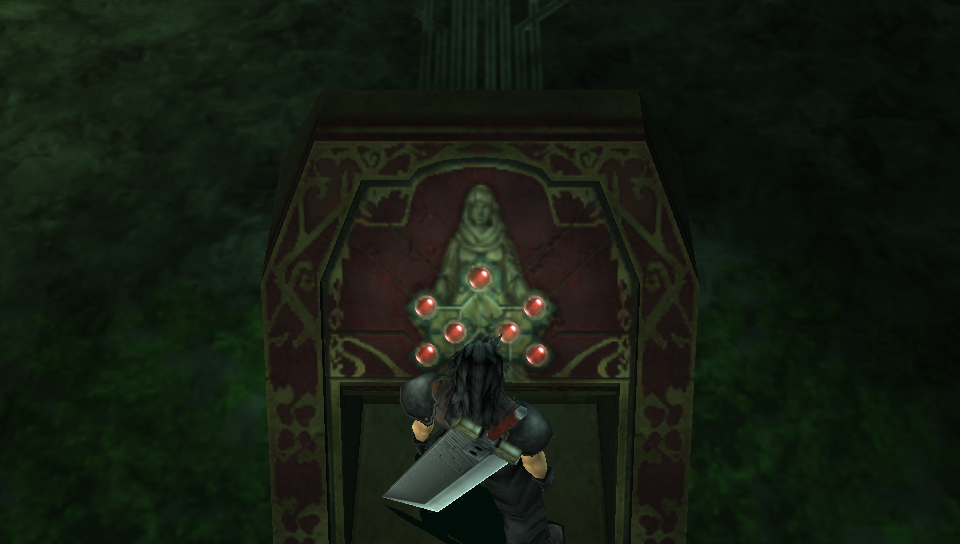
The same statue design is seen in two-dimensional form throughout the Banora Underground’s sealed doors and on the pedestal where Zack must place seven Goddess Materia in order to progress.
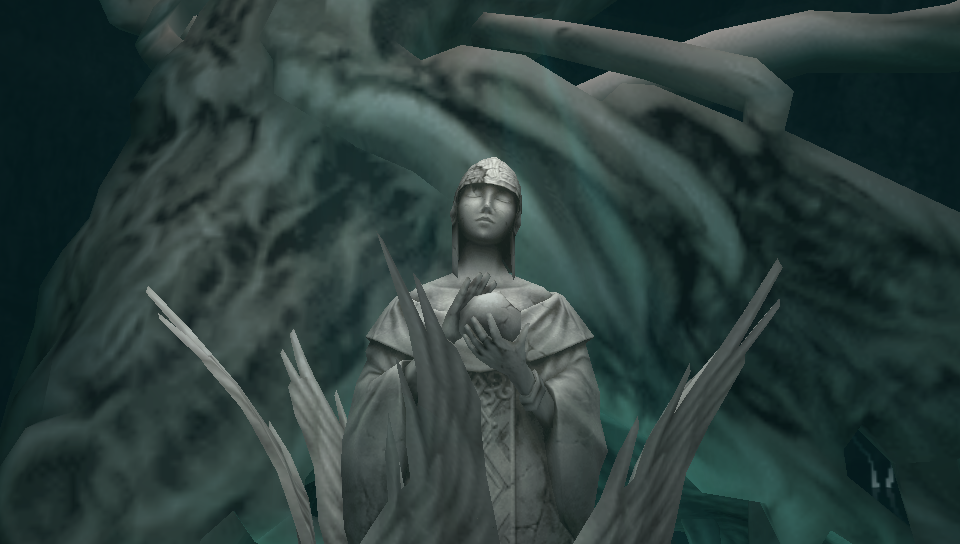
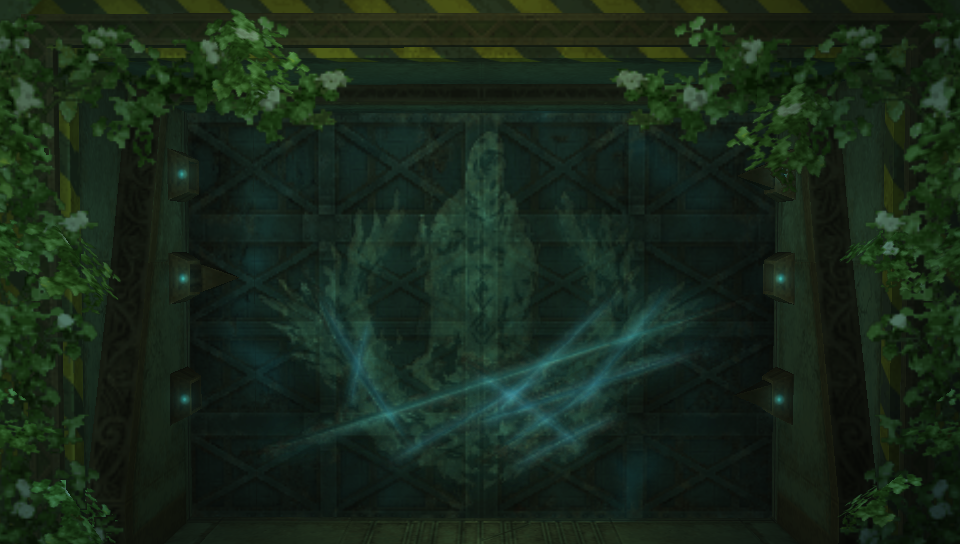
Post-Original:
The elements that might have been associated with paintings of the Christian Mary have been removed. The entire wardrobe has been changed and the face has been widened, along with wider proportions for the eyes, nose and mouth.
The bust is now more distinctly three-dimensional. Along with the hands and the broken orb, these elements now stick out more prominently.
Though the statue, as seen in the “Light of Doom” area where Zack battles Genesis, was changed the game still uses the old design for the paintings and silhouettes found elsewhere in the Banora Underground.
One of seven goddess doors of the prison area “Cage of Binding”. When Zack uses a key to open the door, it briefly lits up.

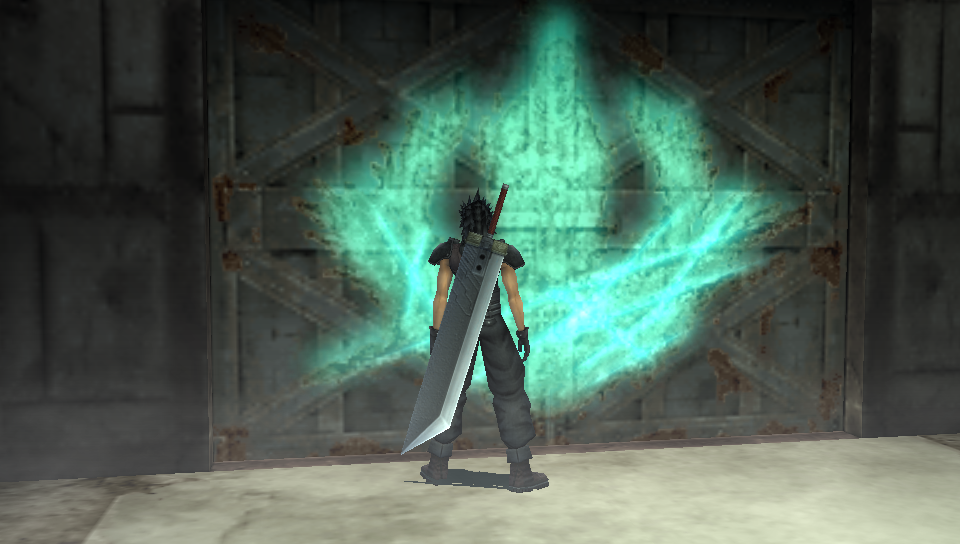
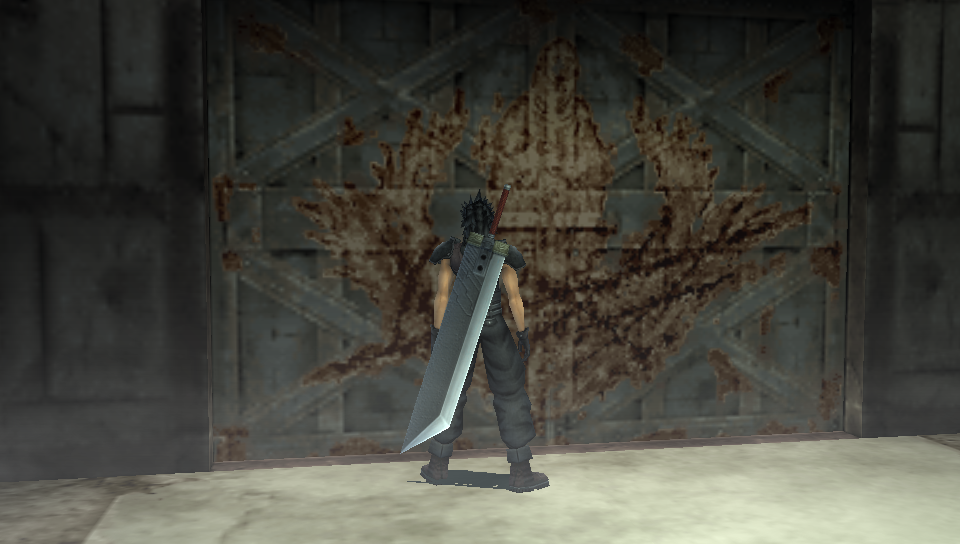
Goddess pedestal and goddess door of “Portal of Severance”.

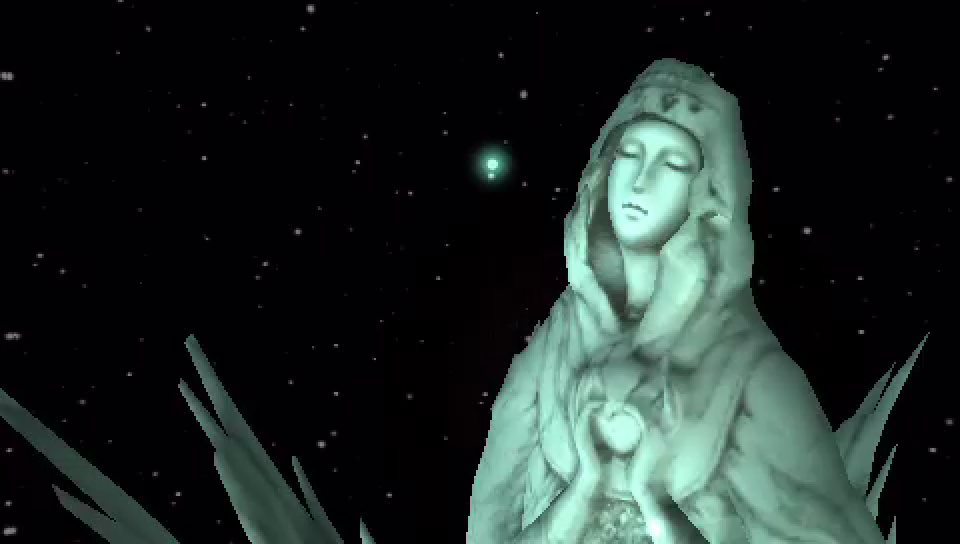
It is assumed that the goddess statue was changed to avoid complaints from Christian representatives. This is the logical explanation but if a comment from the game’s staff is ever found then it shall be added to this article.
Save Point

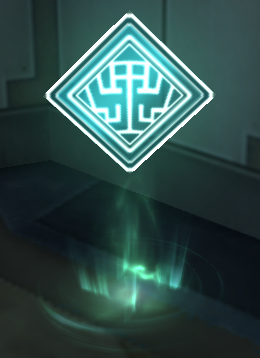
Japanese Original:
“S” and “Save” are written on the rotating square.
Post-Original:
The text has been replaced with the SOLDIER symbol. This change is also reflected in the icons that mark out save points on the area maps.
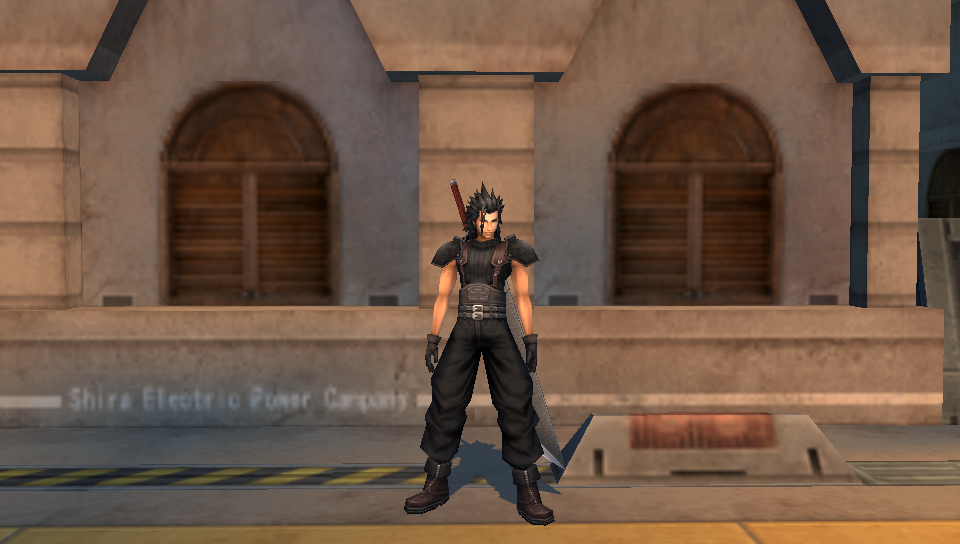
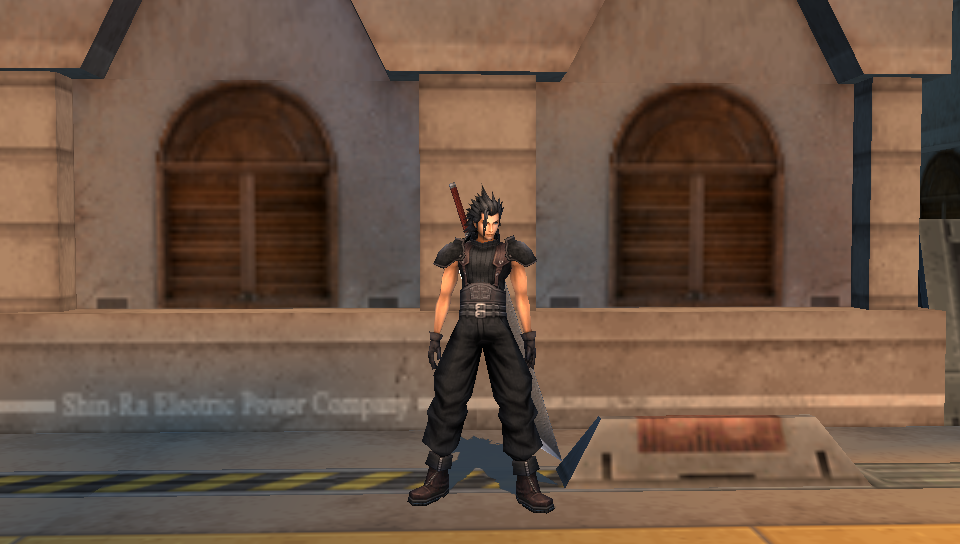
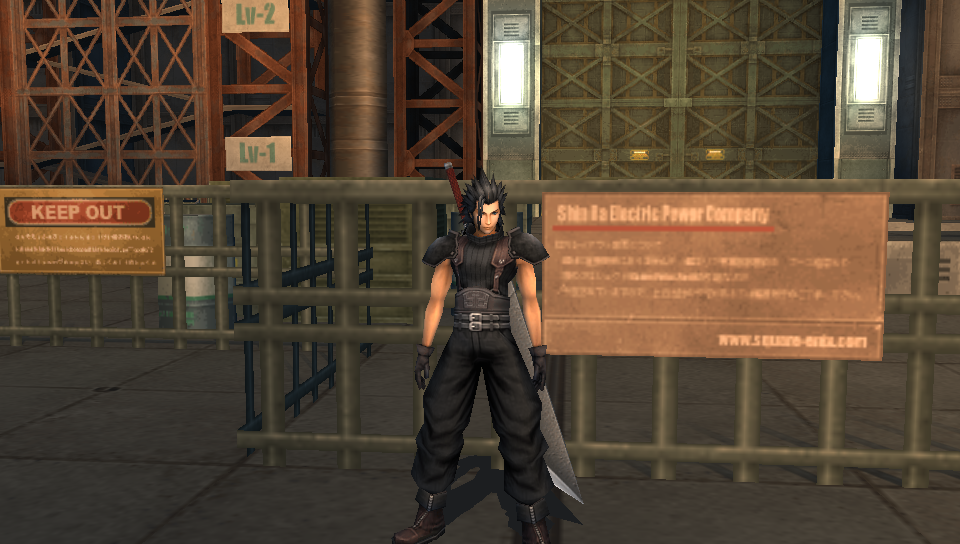
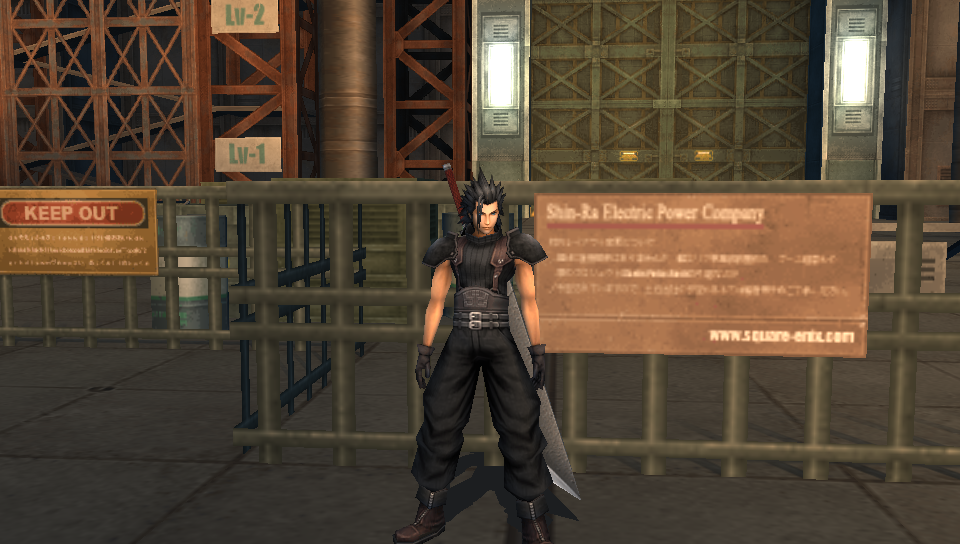
Signs
Environmental background text received edits after the initial release of Crisis Core. Japanese screenshots to the left and English screenshots to the right.
SOLDIER Floor

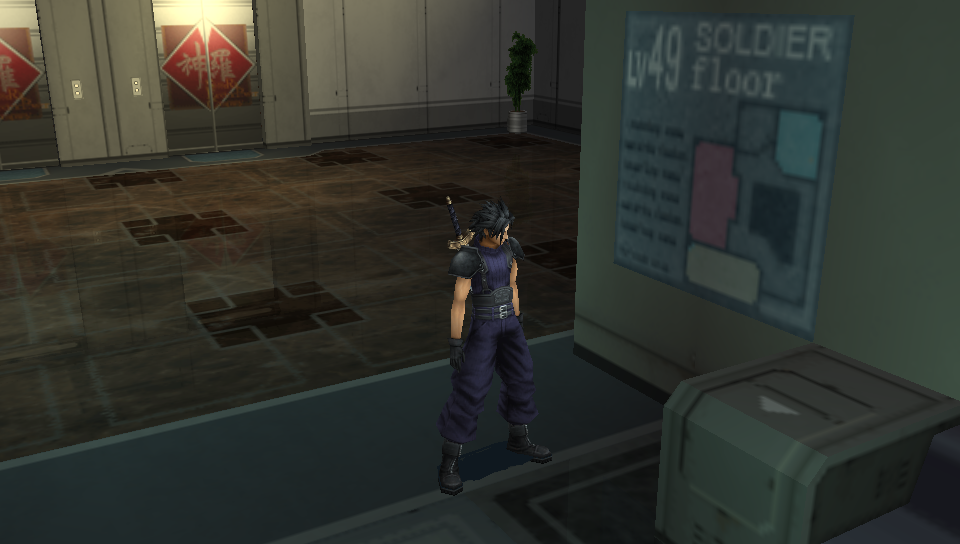
The old sign remains in the pre-rendered Digital Mind Wave cutscene where Zack realizes he forgot not just his materia but also his sword.
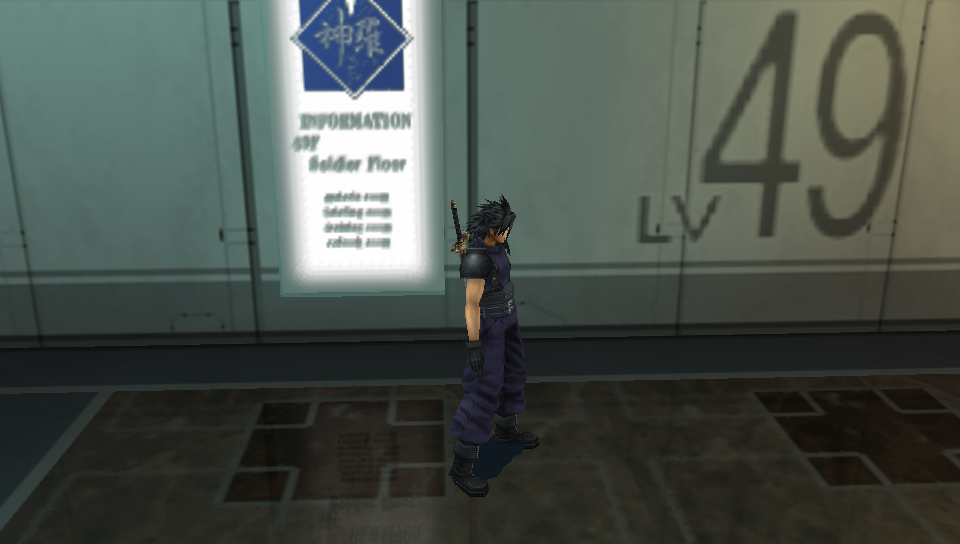
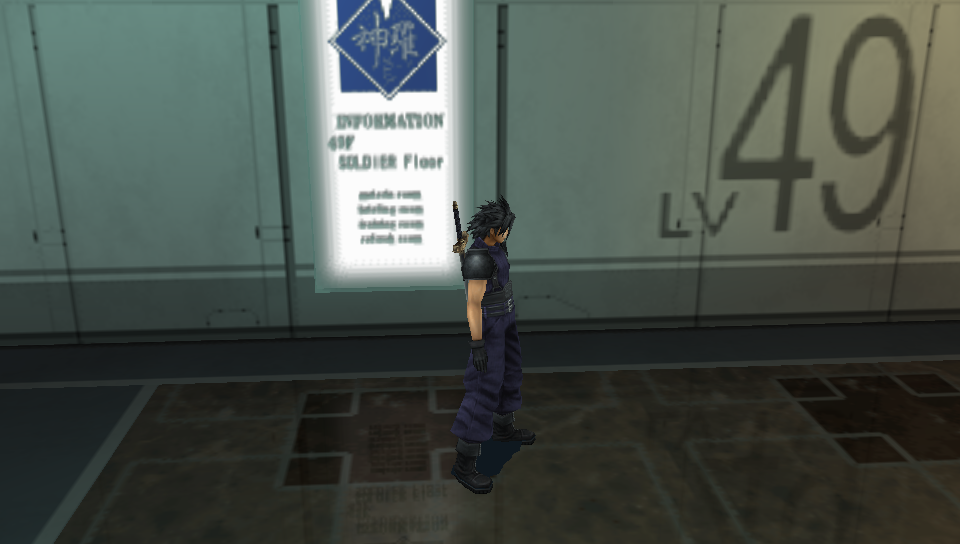
Though difficult to spot, the old version of the sign is there in the same, aforementioned DMW cutscene.

Sector 5 Slums – Market


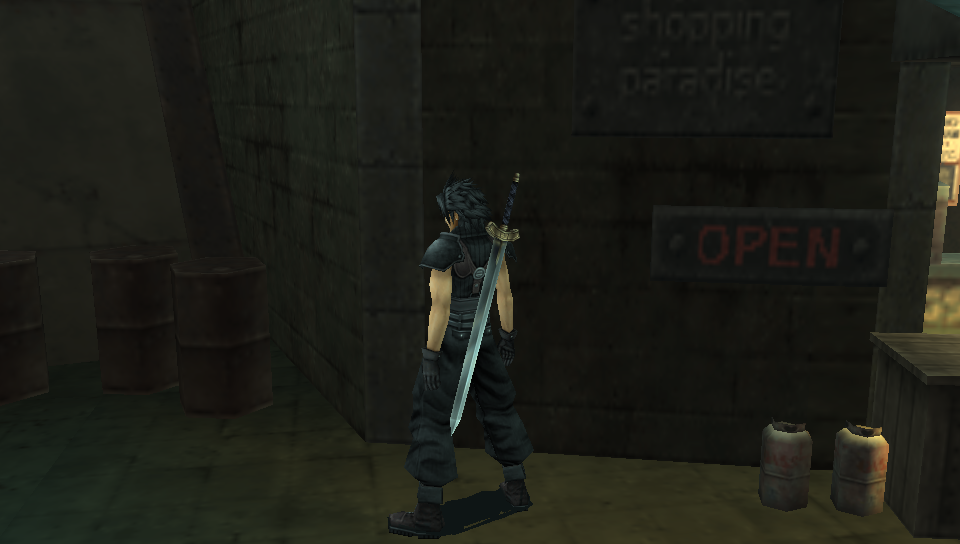
The “OPEN” sign was retouched to look less fuzzy.
Sector 0 – Highway

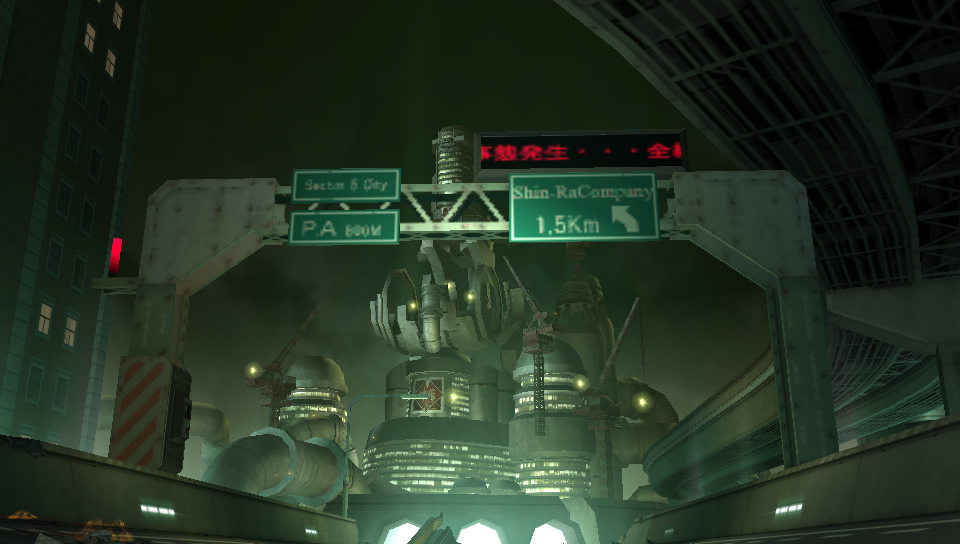
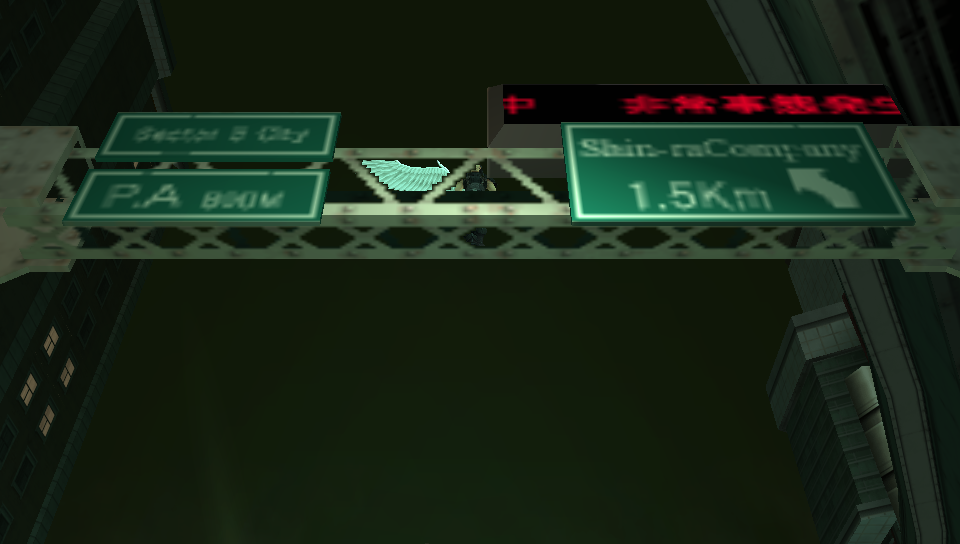
The sign that ambiguously said either “Sector 8 City” or “Sector 6 City” now unambiguously spells out the latter. “Shin-raCompany” was changed to “Shin-RaCompany”.
Junon
The spelling error was fixed and the text became much clearer. Three areas in Junon shows this text repeatedly along the resident walls:
Lower Junon – Level 3
Lower Junon – Level 6
Upper Junon – Level 6
Junon Airport
The stark white of the text in the later releases provides a stronger contrast with the rest of the sign. The text for the “Shin-Ra Electric Power Company” title was changed to a wider font and is now easier to read, along with the change to a distinctly white text.
The contents of the board appear to be the same though, with a link to “www.square-enix.com” at the bottom right. There are four rows of Japanese text below the “Shin-Ra Electric Power Company” title. Suggestions for what this highly pixelated text might be saying are welcome!
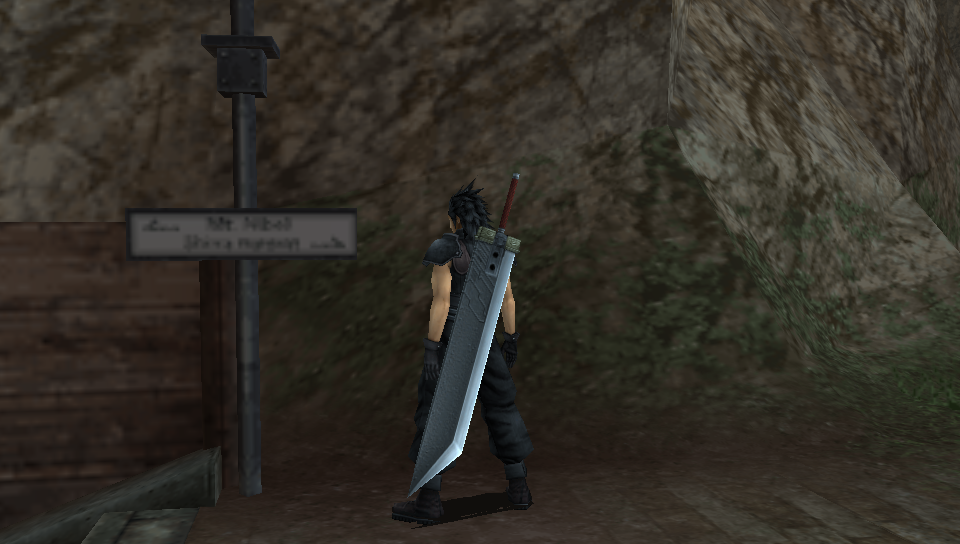
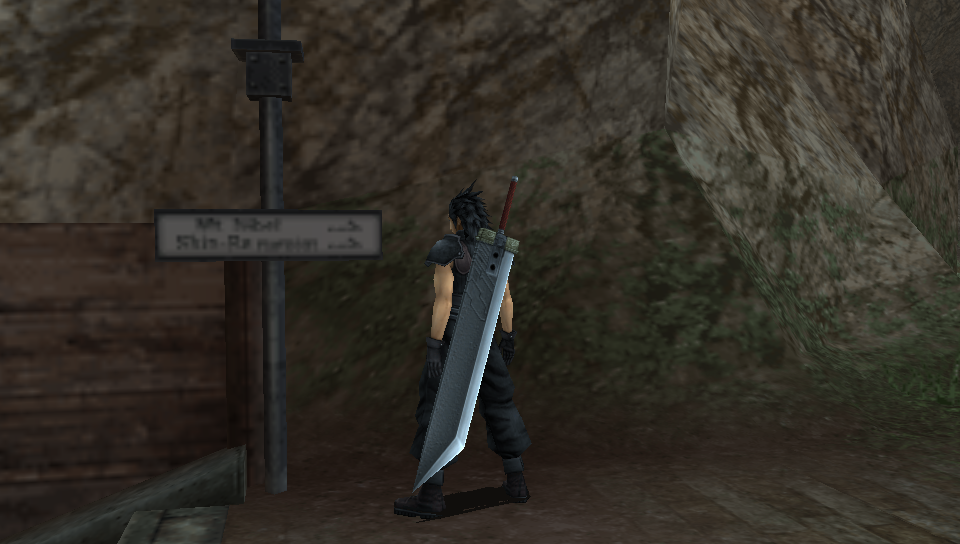
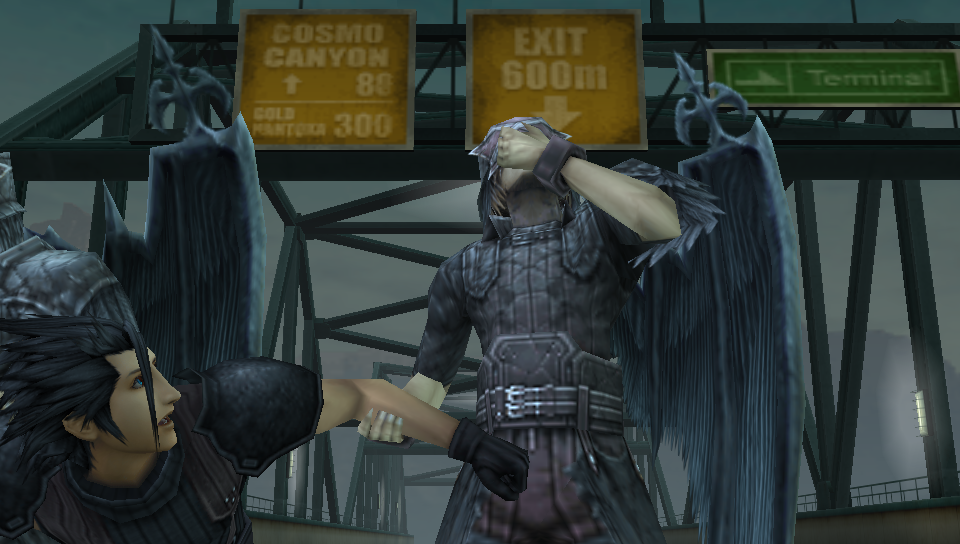
Nibelheim
In the first Nibelheim area there are four signs that point to Shinra Manor and Mt. Nibel. The sign text saying “Shin-Ra Mansion” became more readable in the post-original releases and the cases where the arrows pointed in the wrong direction were corrected. Let’s investigate each sign, moving clockwise from the Nibelheim gates.
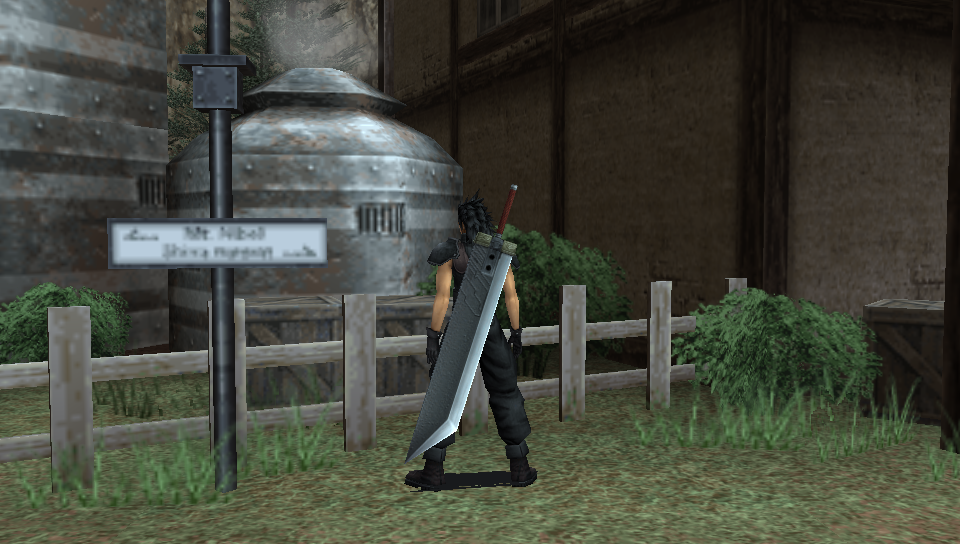
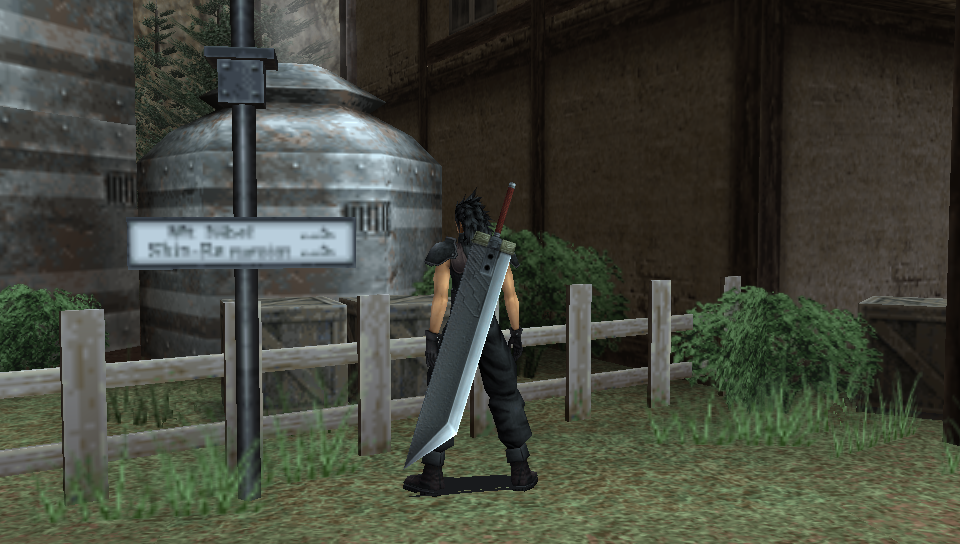


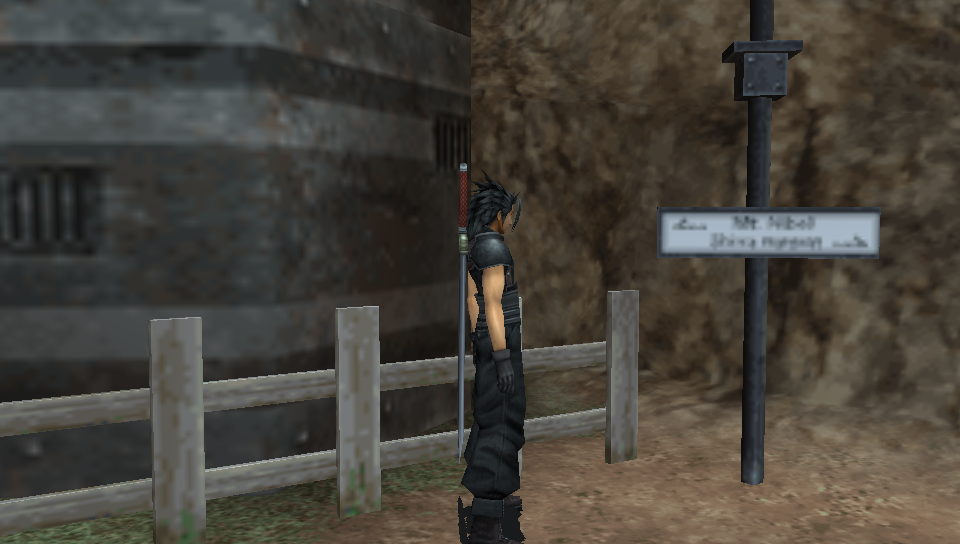
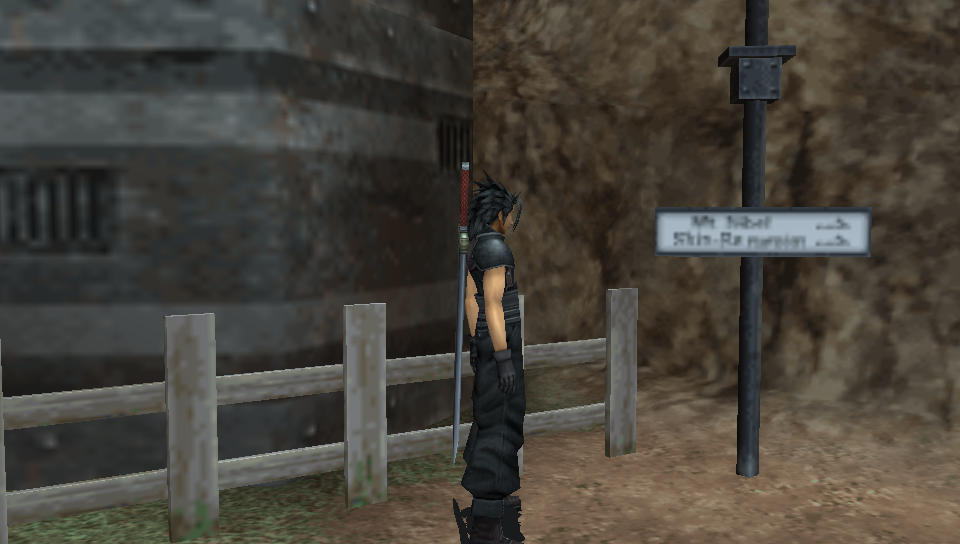
In the nighttime version of this map, when Cloud and Zack finally escape Nibelheim, the signs from the Japanese version, errors and all, are used regardless of which iteration of Crisis Core you are playing!
Nibelheim – Outskirts
The outskirts of Nibelheim only has this one sign and there is no equivalent nighttime map. The arrow pointing in the wrong direction was corrected here as well.
Highway
The “Tarminal“, written in bold style, was corrected to “Terminal”. The Tarminal/Terminal sign is seen in two different spots.
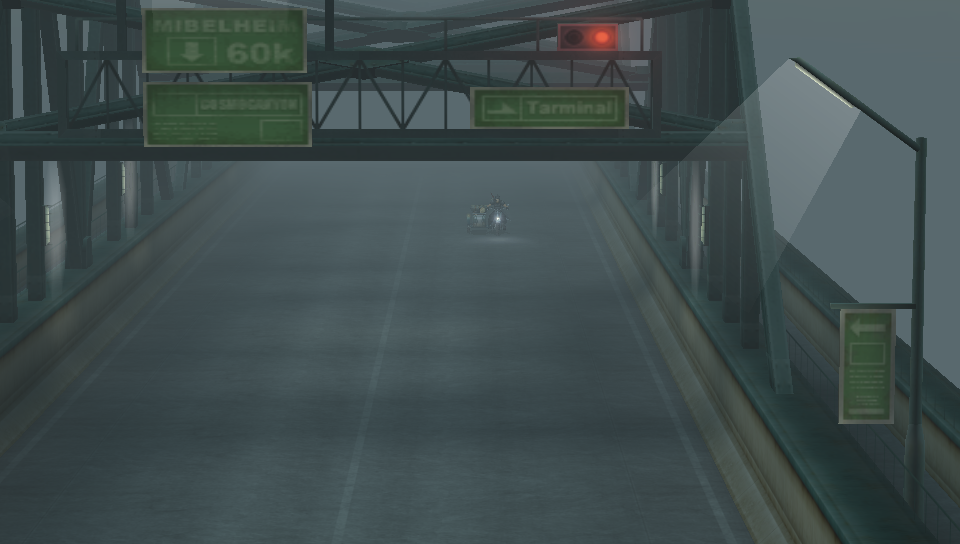
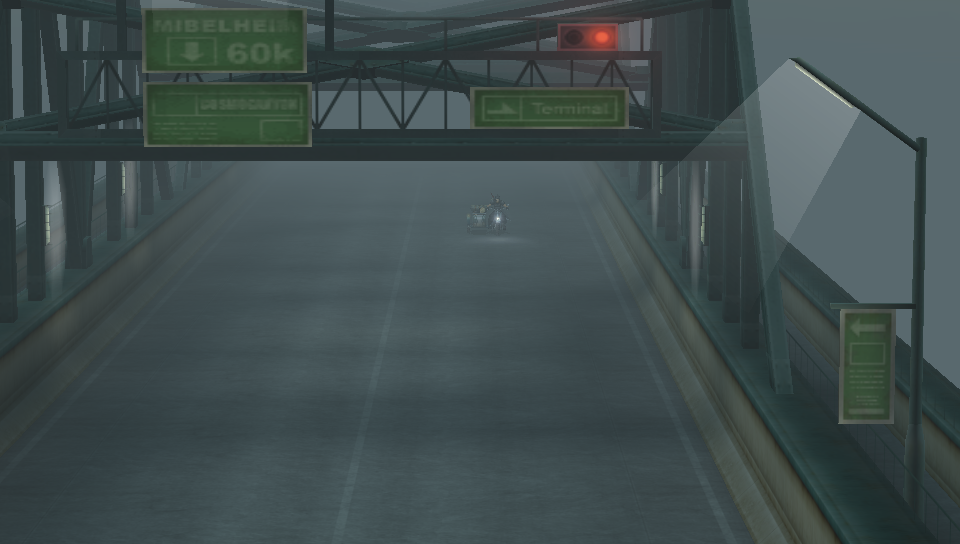

The error with the sign that reads “MIBELHEIM”, when it should read “NIBELHEIM”, was never fixed!
Genesis “Apocalypse” Crest
The octagonal “Apocalypse” crest is used in two contexts: Zack’s DMW limit break “Apocalypse” and Genesis’s “Apocalypse” attack used in the final battle against him.
Japanese Original:
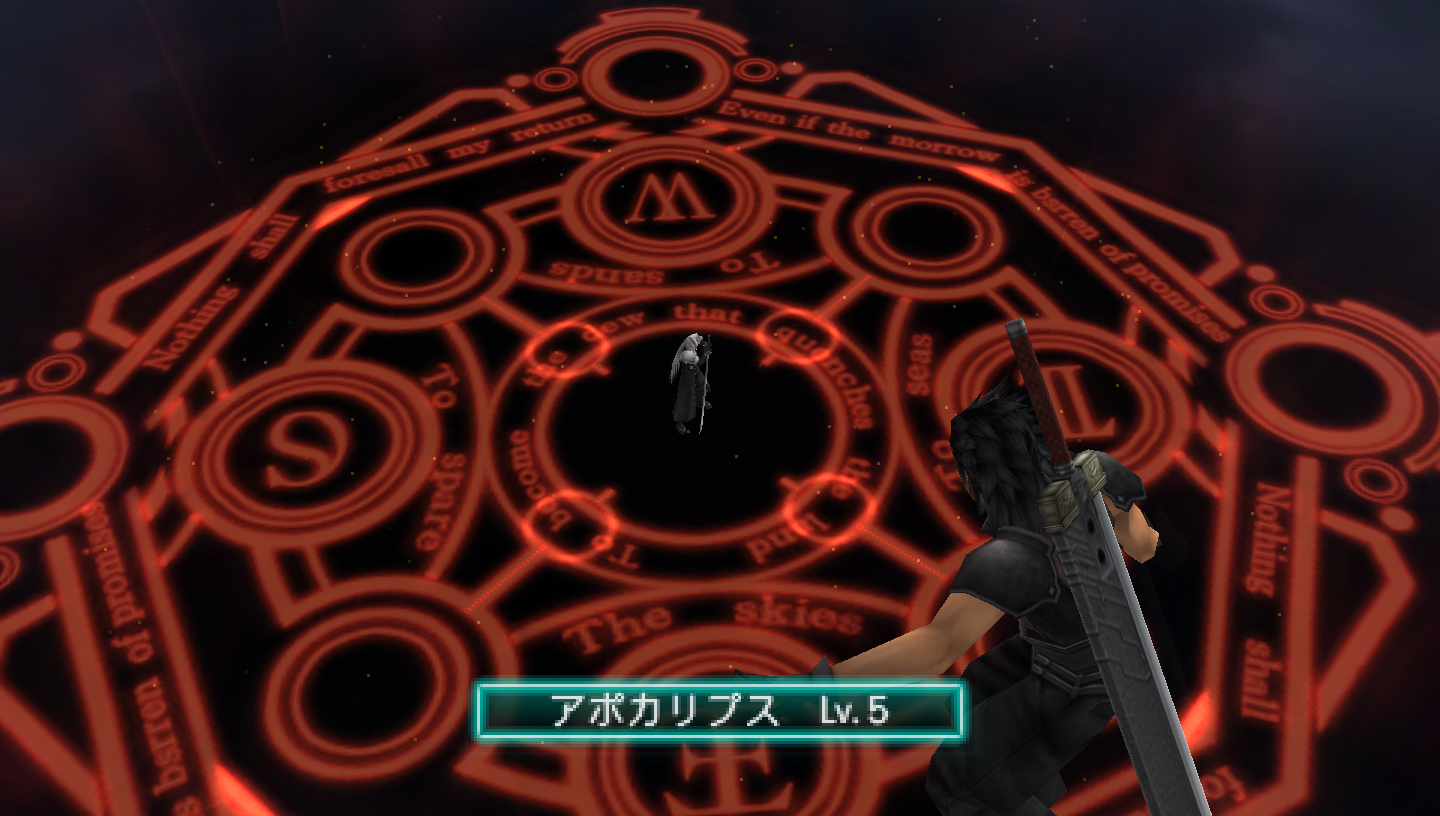

Even if the morrow is bsrren of promises
Nothing shall foresall my returnTo become the dew that quenches the land
To spare
To sands
To seas
The skies
Instead of “barren” it reads “bsrren” and the “t” in “forestall” is missing.
“To sands” and “To seas” should be “The sands” and “The seas” respectively, if we use the final English localization as reference.
Post-Original:
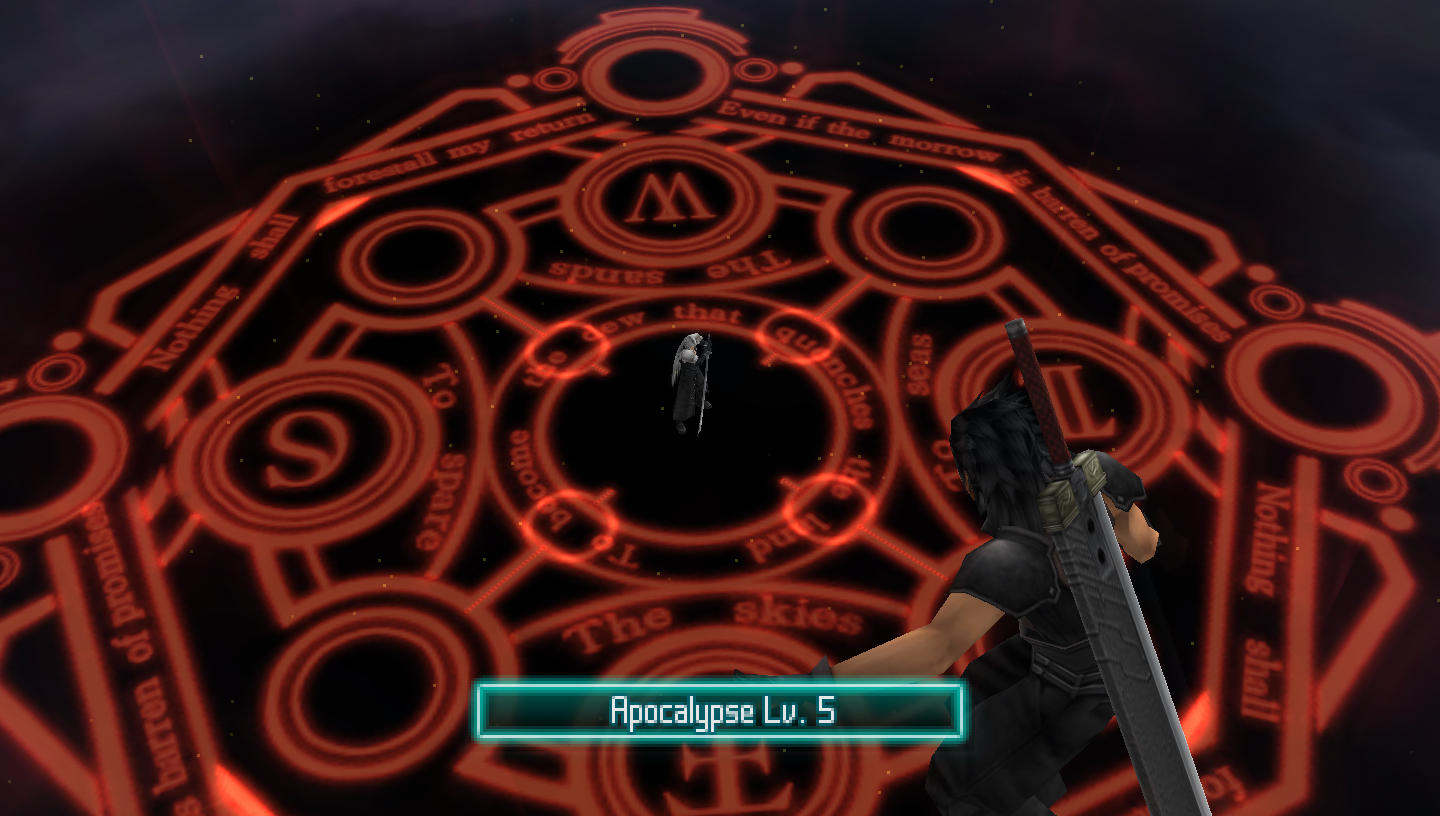

Even if the morrow is barren of promises
Nothing shall forestall my returnTo become the dew that quenches the land
To spare
The sands
To seas
The skies
The two typos have been corrected and “To sands” have been changed to “The sands”.
However, the mistake with “To seas” remains.
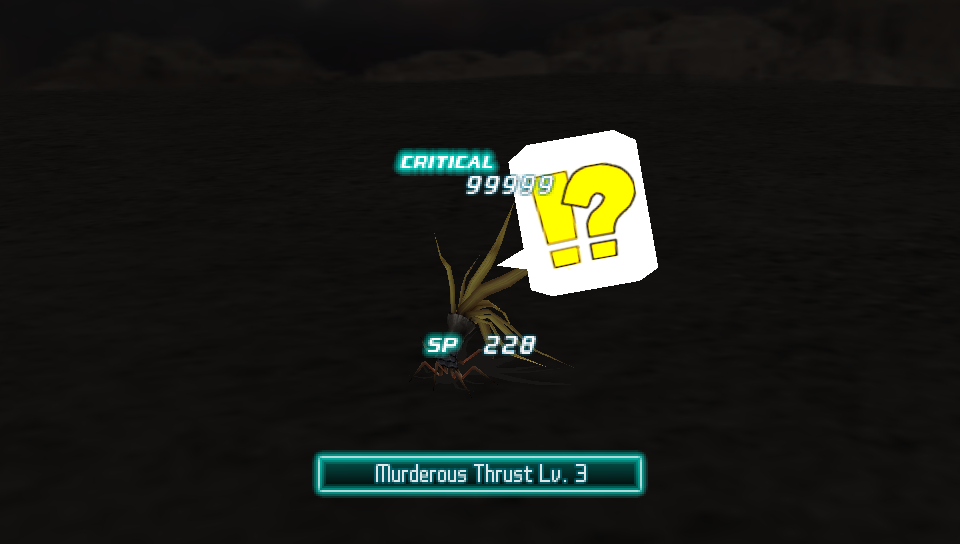
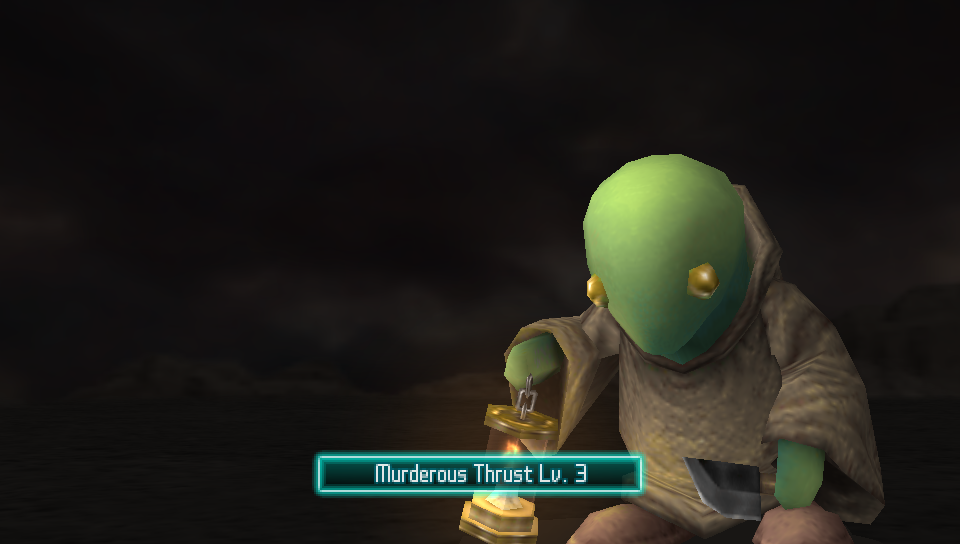
Murderous Thrust
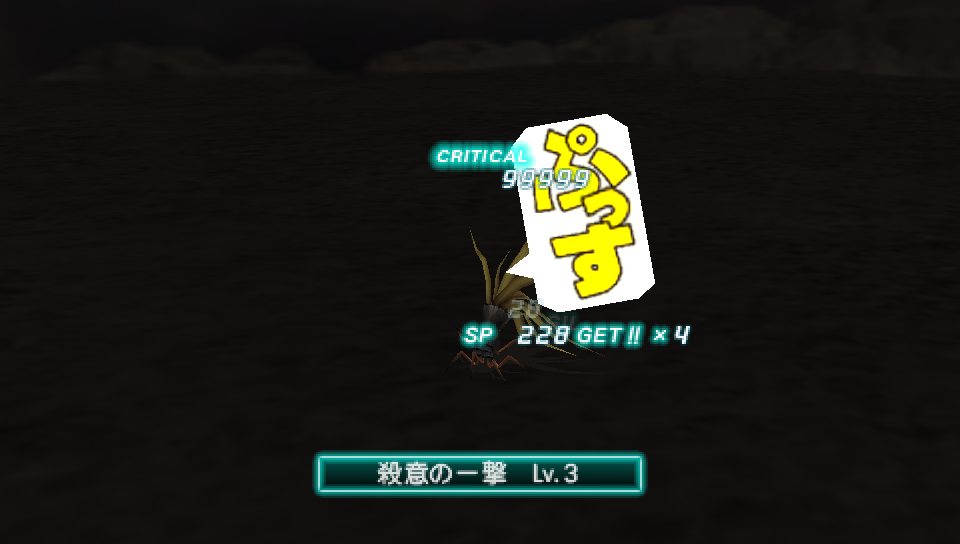
Japanese Original:
When the knife from the Tonberry summon hits an enemy, a speech bubble contains the text “ぷっす “in a cartoony font. This “ぷっす” represents the sound of a small stab or puncture.
Post-Original:
The speech bubble from an enemy being stabbed with the Tonberry knife reads “!?” in a cartoony font.
It also looks like mountains/hills/mounds in the background were raised and added after the original.
Menus
Mission Cleared
Japanese Original:
When a mission is cleared, or when an entire set of missions are cleared, this is marked with a piece of paper with a stamp on it that reads 済 which means “complete” or “settled”.
Post-Original:
The piece of paper and Japanese stamp have been replaced with a simple “checked” [✓] symbol.
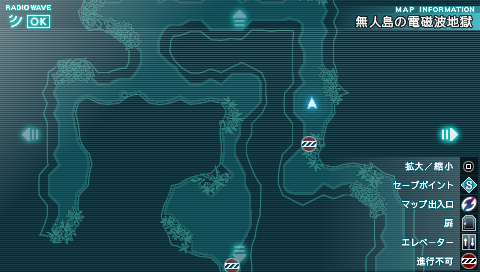
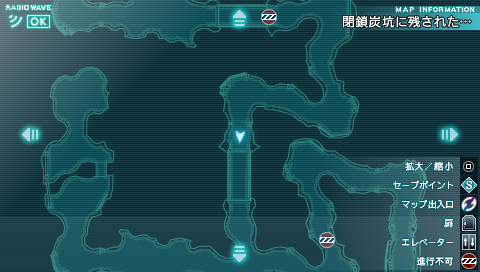
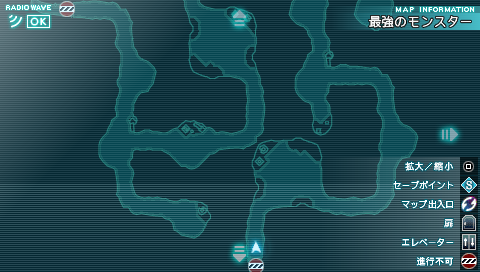
Map symbols
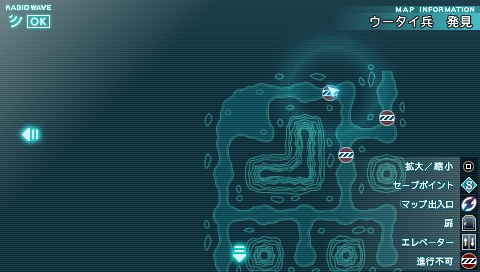
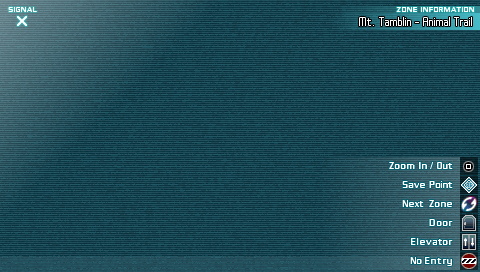
Japanese Original:
When a map can be displayed, the top left shows a wave symbol with a box containing the word “OK”.
When no map can be displayed, the “OK” in the box is replaced with a cross.
The “Save Point” icon matches the model used for this game.
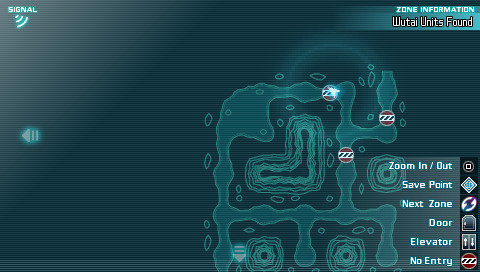
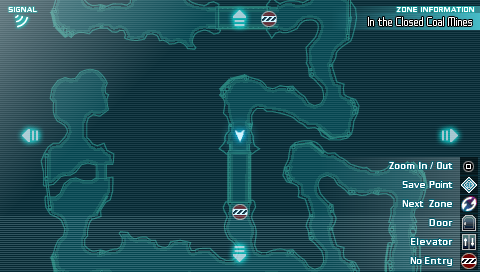
Post-Original:
When a map can be displayed, there is a wave symbol to the top left. The box from the Japanese original is gone.
When a map can’t be displayed, the wave signal is replaced with a cross. Yet again, the box is nowhere to be seen.
The “Save Point” icon matches the SOLDIER-logo model used for these releases.
Zack’s Body Temperature

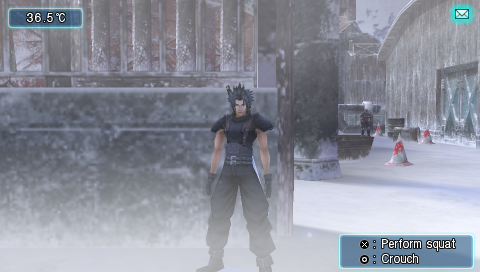
Japanese Original:
No unit is written for Zack’s body temperature in the Chapter 5 minigame, though the values match that of common human body temperatures when written in the celsius unit.
Post-Original::
Celsius (°C) is written as the unit for Zack’s body temperature.
GAMEPLAY
Circle & Cross Button Conventions
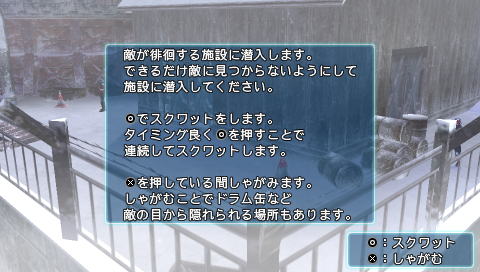
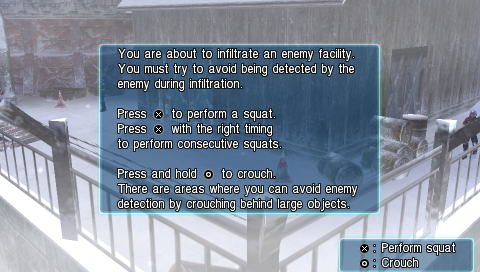
Japanese: The Circle button is the OK/Select/Action button while the Cross button is the exit/quit/return button.
Non-Japanese: The Cross button is the OK/Select/Action button while the Circle button is the exit/quit/return button.
The difference here with the buttons being reversed is a standard difference between Japanese and non-Japanese PlayStation games.
The reversing of the buttons also happens for the sneaking minigame where Zack must keep up his body temperature, despite no action being more of an action command than the other.
In Crisis Core, this basic circle-versus-cross configuration can’t be changed.
Difficulty Modes
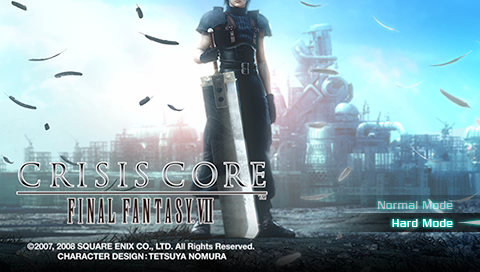
Japanese Original:
When choosing NEW GAME, the game starts instantly. There are no difficulty modes to choose between.
Post-Original:
When choosing New Game, you are given the choice between Normal Mode and Hard Mode difficulty. Normal represents the mode that the original Japanese release had to offer, while Hard gives the enemies more HP.
Game Over Conditions
Japanese Original:
When Zack suffers a KO during a mission, the player gets a Game Over screen. No progress or battle spoils are saved and the player returns to the start menu.
Post-Original:
When Zack suffers a KO during a mission, the player is returned back to the last save point while keeping all the spoils from the mission.
The player can exploit this system. The prime example is that the player might steal 99x Phoenix Down from Minerva, lose the battle, then use the stolen Phoenix Downs for Materia Fusion and/or sell them for gil. This way the grinding path to become powerful enough to defeat Minerva can be significantly shortened.
Availability of Mission 6-4-1
Japanese Original:
Clearing mission 6-3-6 unlocks mission 6-4-1. You can continue to unlock missions one by one until you reach 6-6-6.
Mission 6-3-6 is available at the earliest in Chapter 2. In a playthrough that isn’t a New Game+ save, it would be supremely difficult to continue beyond 6-3-6 and all the way to 6-6-6 at this early stage in the game.
Post-Original:
Mission 6-4-1 is only unlocked once you have cleared both mission 6-2-6 and mission 6-3-6.
Mission 6-2-6 is only available from Chapter 5, by clearing a series of missions after speaking to the City Planning Director/Executive on the first floor of Shinra HQ.
Mission Map Gateways/Limits
A decent number of mission maps had superfluous- or downright inaccessible areas cut out to set their limits in places that made more sense. None of the removed traversable ground ever held any treasure.
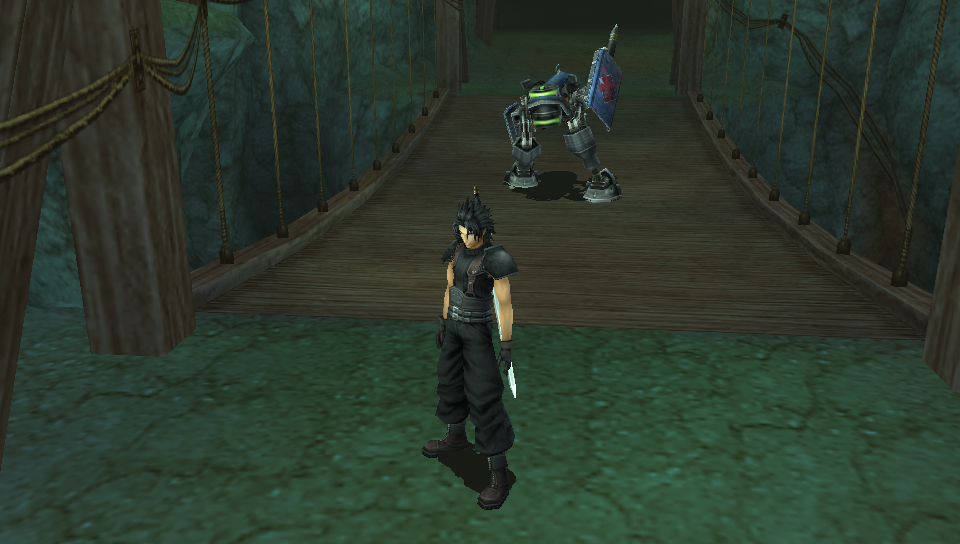
Mission 4-1-3: Pursue the Deserters


The removed area did not even include enemy encounters and so its removal makes sense. One reached this section of the map in the Japanese game by sneaking past the mission target. One has to circle the mission boss on the left side, as one first approaches it, in order to avoid triggering the battle.

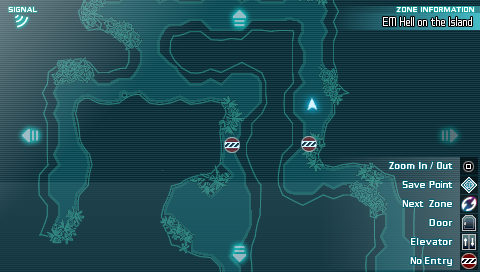
The removed area held normal enemy encounters and you had to sneak past the mission target in order to reach it.

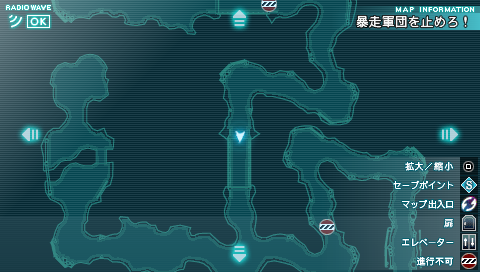
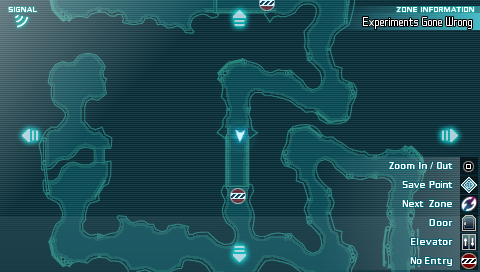
The area south of the bridge in the middle is inaccessible because the mission target is standing on the bridge. Only with cheat devices may you get to the other side, which is what has been achieved in the screenshot below. The area beyond the bridge has normal enemy encounters where you’d expect. As previously stated, there is no hidden treasure in these areas.
The same situation from mission 1-3-4 repeats here. With cheats one can teleport behind the Sahagin and confirm that, indeed, enemy encounters are present as expected and that there is no hidden treasure.


Sneaking past the Cactuar on the right side (as one first approaches this mission target) would let you explore the superfluous stretch of area just beyond it.
Banora Missile Countdown

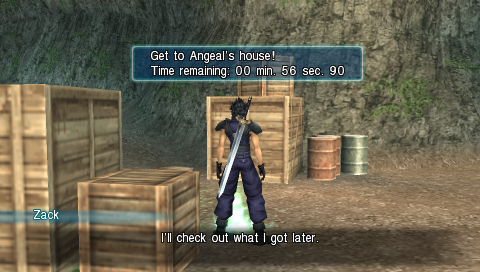
Near the end of chapter 2 the player must reach Angeal’s house within a time limit. By taking the time to step on lifestream/mako/glowy spots before reaching the house, the player can be rewarded with items.
Japanese Original:
Stepping on a lifestream spot, opening a chest and/or trying to enter the apple orchards area will cause Zack to stop in his tracks for a while, but the countdown will still continue.
Pausing the game or entering the main menu, thankfully, does pause the timer.
Post-Original:
While Zack’s movement is inhibited by stepping on a lifestream spot, opening a chest or trying to exit the area, the timer will pause until the player gains control over Zack again.
In the case of the treasure chests, the timer will briefly remain paused even after the player regains control over Zack, until the opened treasure chest fades away.
Pausing the game or entering the main menu also pauses the timer.
Shinra HQ Floor 67 Sidequest
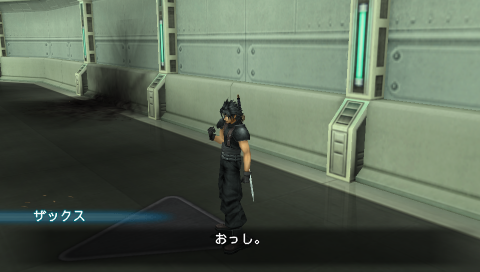

In Chapter 4, Zack can accidentally release Crimson Hounds (in-game called “Experiment No. 97”) that will escape to the prison floor of Shinra HQ. Within the time limit, Zack has the option to steal jail cell keys from the Guard Hounds, use the keys to open the prison cells and take the rewards inside.
Japanese Original:
After each Crimson Hound is defeated, regardless of whether a prison key was stolen or not, there is a pause where Zack will say “おっし” [All right.] while doing a victorious pose.
The countdown freezes for this moment and then resumed when the message is exited.
When opening the gate into- and out of the jail area, you will lose three seconds from the countdown due to loading times. The timer will at first appear to freeze when you open the gate, but once player control is resumed the countdown catches up to the seconds that were lost.
Post-Original:
After each Crimson Hound is defeated, control of Zack immediately resumes. There is no intermediate reaction by Zack. However, the line “All right.” was translated and exists as an unused text entry for this area.
When opening the door into- and out of the jail area, the timer freezes and zero time is lost. The countdown has been changed to freeze properly during this loading transition from one area to the next.
Tifa & Cloud outside the Nibel Reactor

Japanese Original:
If you exit from the Nibel Reactor during Zack’s and Sephiroth’s investigation, Tifa and Cloud are not waiting outside despite the story dictating that they should.
Investigating the game files reveal that there is no unused NPC text for Tifa and Cloud at this point!
Post-Original:
If you exit from the Nibel Reactor during Zack’s and Sephiroth’s investigation, Tifa and Cloud will be waiting outside and Zack can trigger NPC dialogue with them. The oversight from the Japanese release has thusly been corrected.
Here is the script triggered by talking to Tifa & Cloud respectively.
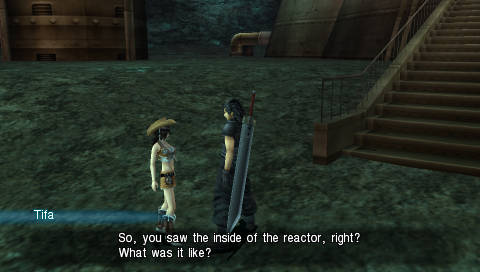
Tifa: So, you saw the inside of the reactor, right?
What was it like?
Zack: I…can’t tell you.
Tifa: Zack? Is something wrong?
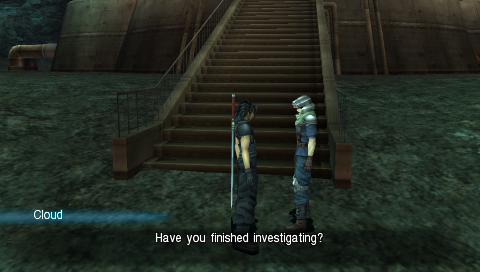
Cloud: Have you finished investigating?
Zack: No…not yet.
Cloud: Then you should go back.
Don’t worry, I’ll keep watch here.
Gongaga Reactor: Gil & Mako Stone Bonuses
At the ruined Gongaga reactor there are four treasure chests Zack can access by clearing some rubble. These are the treasures and their contents, presented clockwise starting from the west-most chest:
– Behind fences: Griffon enemy. Zeio Nut rewarded after its defeat.
– Behind two drum cans: Hypno Crown.
– Behind fences: 6000 gil.
– On top of two drum cans: Griffon enemy. Osmoga materia rewarded after its defeat.
Japanese Original:
By first cutting down the rubble for the treasures that don’t hide Griffons, you will receive 2000 gil and/or one MAG Mako Stone when defeating either Griffon.
Clearing the drum cans in front of the chest with the Hypno Crown unlocks the 2000 gil reward for when you defeat one of the two Griffons. Cutting down the fences behind the chest that contains 6000 gil will reward you with one MAG Mako Stone when you defeat one of the two Griffons. The 2000 gil and MAG Mako Stone bonuses are only received once.
Post-Original:
The bonus rewards of 2000 gil and one MAG Mako Stone have been removed. The order in which the rubble is cleared now has no effect on the rewards.
Banora Chapter 10: Camera Bug
When the chapter starts with Zack, Cloud and Lazard reaching Banora, at one point the camera will scroll to show a lifestream pillar emanating in the distance.
Japanese Original:
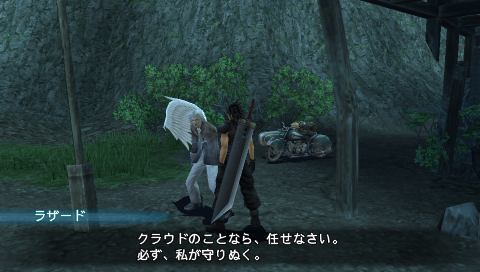
When the camera scroll ends and the player regains control over Zack, the camera scroll will resume if they speak to Lazard or Cloud within a few seconds.
Post-Original:
The camera scene bug was fixed and can’t be replicated no matter how quickly you trigger dialogue with Lazard and/or Cloud.
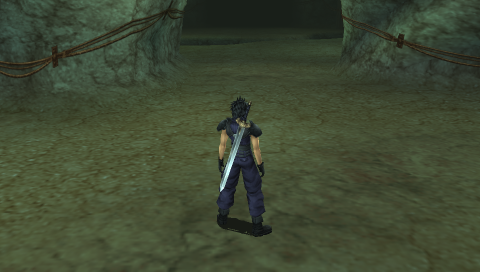
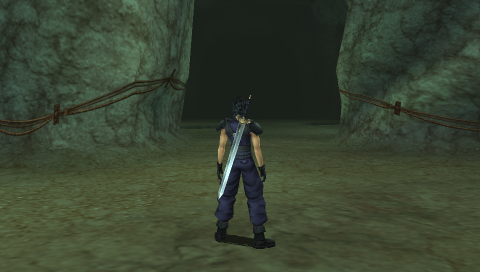
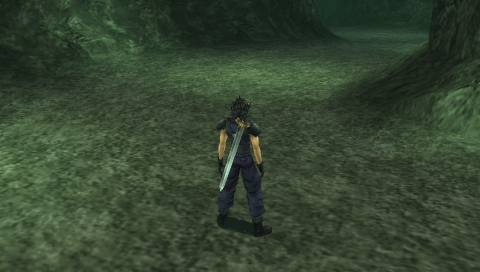
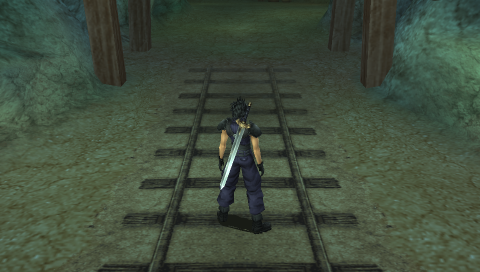
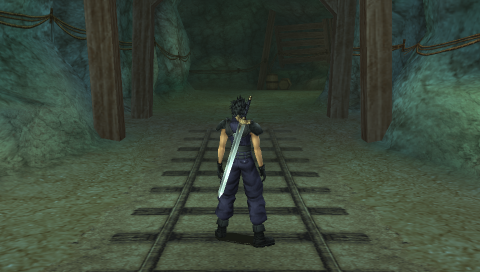
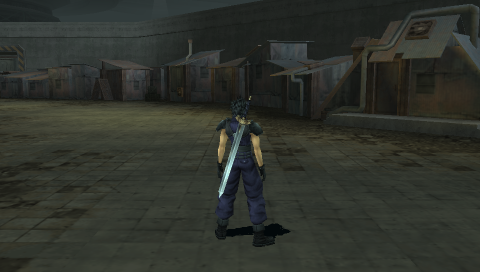
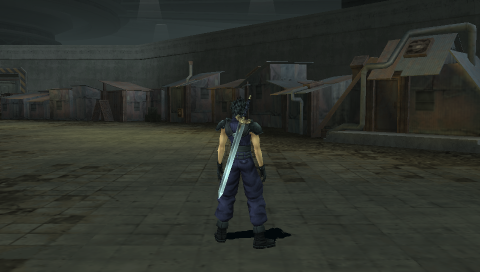
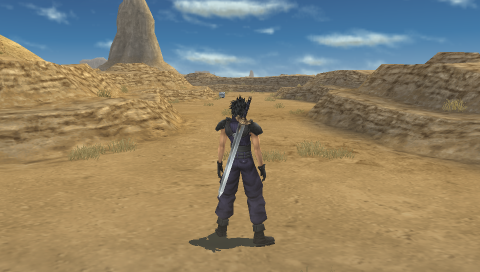
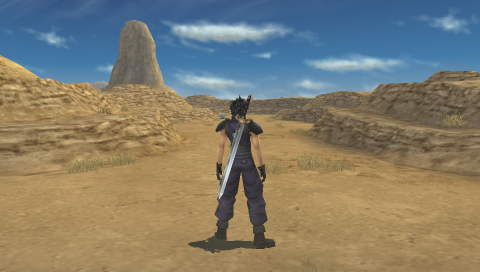
Camera Angles
The majority of missions had the camera changed so it was more behind Zack rather then above him. With this change the player can see further off into the distance and thus easier survey larger areas.
With some missions, the difference is negligible while in others the camera change is quite dramatic. As always, Japanese screenshots to the left and English screenshots to the right.


– Page 1: Crisis Core Version Guide – Top
– Page 3: Japanese ↔ English
– Page 4: North America ↔ Europe
– Page 5: Miscellaneous
