DCFFVII Research Thread

jeangl123

Pro Adventurer
AKA
Jean
https://web.archive.org/web/2007082...88547&archive=1138751820&start_from=&ucat=36&

So this was apparently from the old official DoC website. I saw this curious bit about Tifa's character.

Tifa
"One of the allies who Vincent worked with 3 years ago. Ran the bar "Seventh Heaven" in the city of Edge, built near Midgar. Edge was attacked by Deep Ground, and she is also disappeared/hasn't been heard from. "

So Tifa was intended to disappear at one point?
 

Makoeyes987

Listen closely, there is meaning in my words.
AKA
Smooth Criminal
Wrong thread to bring this up, but in Dirge of Cerberus, Vincent and the WRO in general didn't know what happened to Edge because it's empty when they arrive during the story.

Cloud, Tifa and Barret manage to help evacuate the survivors of Deepground's attack on Edge. We never see this however. Because that would be too awesome.

So the website teased their whereabouts to not spoil the story and their return later on during the war to retake Midgar.
 

jeangl123

Pro Adventurer
AKA
Jean
Wrong thread to bring this up, but in Dirge of Cerberus, Vincent and the WRO in general didn't know what happened to Edge because it's empty when they arrive during the story.

Cloud, Tifa and Barret manage to help evacuate the survivors of Deepground's attack on Edge. We never see this however. Because that would be too awesome.

So the website teased their whereabouts to not spoil the story and their return later on during the war to retake Midgar.
Oh sorry I didn't know this was the wrong thread. Thanks for the information!
 
I wouldn't go so far as to say this is the "wrong" thread for plot questions. The word "Research" in the thread title is a broad term and the game's plot has been discussed a few times here but it is rare. I also don't know where anyone would go for general "FF7 Plot Questions", as there's no such dedicated thread as far as I know. :monster:

Cloud, Tifa and Barret manage to help evacuate the survivors of Deepground's attack on Edge.
I am unaware of any source that specifically states this series of events for the trio. It's a reasonable assumption but nothing is said about where the trio was and what exactly they did when Edge was attacked.
 

Makoeyes987

Listen closely, there is meaning in my words.
AKA
Smooth Criminal
I thought this was your gameplay research thread but okay :monster:

And, well yeah, nothing outside of Vincent is clearly shown but Cloud, Tifa and Barret are alive along with everyone else not eaten by Omega in Edge. I'm not sure what other outcome is supposed to be inferred by the story unless one assumes they somehow got captured and then escaped or something. We see them all show up once more in good health when they're back with the WRO and invading Midgar. They had to have gotten there somehow.
 

jeangl123

Pro Adventurer
AKA
Jean
Yeah this does line up with Cloud and Barret's descriptions now.
Cloud
A central character in the battle for the life of the planet 3 years ago, and one of the allies who Vincent worked with. Afterwards he ran a delivery service out of the city of Edge, built near Midgar. Where is he now, as the Deep Ground attack various places/every place in the world...

Barret
One of the allies who fought with Vincent 3 years ago. Former leader of the anti Shin-Ra organization AVALANCHE. After the battle he searched for energy to replace Mako, mining oil fields and such. Has he gotten involved with the fight against Deep Ground as well?
 

Makoeyes987

Listen closely, there is meaning in my words.
AKA
Smooth Criminal
It's such a shame there's no back up of the Dirge of Cerberus (or any Compilation title's) website, given it relied on Flash and it's now functionally dead, even on the archive. Because seeing these profiles again would be helpful and interesting.
 
Color me frustrated. I was so confident that the .swf files for all character profiles (on the official Japanese website for Dirge, from which the above translations almost certainly are based) would still be saved in the Wayback Machine. But the only character profile actually saved...IS GODDAMN CAIT SITH :wacky:

cait-sith_swf.png

Type in swf in the search window here to find all the flash videos. The three files "saved" on August 2021 are obviously not legitimate as the URLs were already dead by that point.
If you have no other means to play it properly you can drag over the swf file to Ruffle, right-click on the green screen and select play.

The character select screen is also saved but it's useless without the corresponding character files actually present.

character-select_swf.png

The fact that the other character files are not saved also means that they've been lost since April/May 2014, back when the flash-based official Japanese website was deleted.

- Download link to all saved swf files, 32MB zip file
 
Last edited:
The Vincent icon on the left led to something that required flash player of course.
That leads back to the Single Player site I linked earlier. If the site could load properly it would show the equivalent to "dc_main.swf" :

dc-main.png

If you select Multi Player Mode you are brought to the PlayOnline site. If you select Single Player you are brought to the main selections for that campaign, including links to info about the game's character.

dc-main_single-player.png

I do enjoy the character info blurbs that got translated though because they make you consider that Reeve and the WRO don't know where Cloud, Tifa and Barret are at the beginning of the story. Like Mako said:
Vincent and the WRO in general didn't know what happened to Edge because it's empty when they arrive during the story.
So that lines up with the info screens from the site. I am more inclined to take info from the official JP website seriously because they are one step closer to the original sources than for example an English website would be.

As it stands, we don't know exactly how Cloud, Tifa and Barret ended up with WRO. Did they too receive text messages from Reeve, just like Vincent did at the beginning of the story? Did Cloud have a heads up about Deepground earlier than Vincent because of communication with Reeve? Were Cloud and Tifa even in Edge when the attack on the city happened? If they were, did they barely escape tooth-and-nail or did they manage to save a few people while getting away from Deepground's attack?

Know these things, we do not.
 

ForceStealer

Double Growth
Were Cloud and Tifa even in Edge when the attack on the city happened? If they were, did they barely escape tooth-and-nail or did they manage to save a few people while getting away from Deepground's attack?
I remember in my original playthrough when Reeve first says that Edge was attacked and could only think, "Well they must be fine, that has to be the worst place in the world to lead off your attack." :lol:
 

The game will never allow you to map the same button to two or more actions. With my save file editing program, McDirge, I went around this and tested how Zoom Climb might be made easier this way.

Mapping Zoom and Melee/Lower-Weapon to the same button makes it so that you NEVER interrupt the Zoom Hover with a melee strike. But mashing this two-action button on one device alone, for example the keyboard, will physically not accept inputs fast enough to result in a Zoom Climb. You can't gain any height.

So in order to achieve a Zoom Climb, where you are guaranteed to never interrupt with melee, you need to combine two devices. Only then will inputs be accepted by the game fast enough. Any of the following device combos work:
Controller + Keyboard​
Keyboard + Mouse​
Controller + Mouse​

You technically only need to have one device with a two-action button assigned and then in conjunction mash a simple Zoom with the other device, but for easiest height gain you have both devices with illegal button mapping.

Video recorded on console.

I did attempt to trick the game into allowing two-actions-same-key assignments by having two keyboards at once, removing and adding keyboards, mouse etc. This did not work and I have no suggestions on how one might achieve illegal button mappings without a save file editor or other cheat device. So the pro of this technique, if it was ever unlocked, would be that you no longer have to worry about ruining the climb with a melee button. The challenge instead would be in mashing the two devices at the same time.
 
In the past I have stated that the accessory L Adjuster Gamma is broken because it will not improve your long-range accuracy more than the L Adjuster (the lower-level equivalent of the accessory). Deeper analysis has revealed that every item with an "L Adjuster" property is broken!

The Long-Range Adjustment Bug

Background
When firing a shot the game will calculate how far away the surface is that you are aiming at (relative to the end of Vincent's gun), be it a target or just the environment. The calculated distance will then determine which "bullet trajectory scatter/deviation" will be applied on the shot.

The game first checks if the distance is shorter than 12 meters. If it is, the bullet will travel according to "Short Range Accuracy" stats. If the distance is longer than that but shorter than 38 meters, "Medium Range Accuracy" stats will be used. At 38 meters or more, the Long Range Accuracy will be at play.

The values (and rank letters) shown in the game's menus for these accuracy stats are not useful. Let us look at the invisible, internal values that items possess. Values will be rounded for ease of reading.

Ultima Weapon
0.01 - Short
0.01 - Medium
0.01 - Long
Nova L Barrel
4.0 - Short
0.3 - Medium
0.0 - Long

Equipping the two will then give us their combined stats. There are no bugs/glitches associated with this simple sum of range-accuracy values.

Ultima Weapon + Nova L Barrel
4.01 - Short
0.31 - Medium
0.01 - Long

The higher the value, the higher the potential angle at which the bullet may deviate from the central point of where your reticle was aiming. Ergo, a value of 0 will mean zero deviation from where your aim was at. The above values aren't that extreme in terms of bullet-scatter so let's equip the Lucky S Barrel instead for when talking about the Range-Accuracy adjusting items.

Lucky S Barrel
8.0 - Short
9.3 - Medium
15.7 - Long
Ultima Weapon + Lucky S Barrel
8.01 - Short
9.31 - Medium
15.71 - Long

In the game you can find the Adjuster accessories which can be upgraded to their Gamma counterparts. They have values, invisible to the player, which are intended for use when adjusting the corresponding accuracy range.

S Adjuster - 25
S Adjuster Gamma - 100
M Adjuster - 20
M Adjuster Gamma - 85
L Adjuster - 15
L Adjuster Gamma - 80

What does the formula look like when we equip S Adjuster to our Ultima Weapon + Lucky S Barrel example?

Current Short-Range Accuracy * (100 - S Adjuster Value) * 0.01 = New Short-Range Accuracy

Meaning that when equipping S Adjuster, we will get...
8.01 * (100 - 25) * 0.01 = 6.0075
..and when equpping S Adjuster Gamma we get...
8.01 * (100 - 100) * 0.01 = 0

The adjuster value of 100 in S Adjuster Gamma is truly potent since it makes everything be multiplied with the value 0, ensuring that your short range accuracy will now be perfect.

The same math is then applied when equipping M Adjuster.
Current Medium-Range Accuracy * (100 - M Adjuster Value) * 0.01 = New Medium-Range Accuracy

M Adjuster: 9.31 * (100 - 20) * 0.01 = 7.448
M Adjuster Gamma: 9.31 * (100 - 85) * 0.01 = 1.3965

The M Adjuster accessory, on its own, is doomed to never quite get you to a perfect value of zero because its potency is not equal to that of its short-range sibling. Still, both the Lv1 and Lv2 M Adjusters work how they are supposed to. The same can not be said for L Adjuster.


The Twist(s)
What is the formula for when we equip L Adjuster?

Current Long-Range Accuracy * (100 - Current Long-Range Accuracy) * 0.01 = New Long-Range Accuracy

You are reading that correctly! The values that are supposed to adjust the accuracy, 15 for L Adjuster and 80 for L Adjuster Gamma, are ignored. This is why it doesn't matter which one you have equipped. You will get the same improvement regardless.

15.71 * (100 - 15.71) * 0.01 = 13.241959

This error is not unique to L Adjuster and L Adjuster Gamma. The same is true for all items/equipment that try to call an "L Adjustment" function, be the item used or unused. What many players may not know, because the game doesn't explicitly tell you and will rarely show it, is that the Sniper Scope actually has both M Adjustment and L Adjustment features!

Sniper Scope
M Adjuster Value - 15
L Adjuster Value - 20

The medium-range adjustment works perfectly fine with the Sniper Scope. In fact, it is only by combining the Sniper Scope and M Adjuster Gamma that the player can achieve a perfect value of 0 for medium-range accuracy. That is because their values stack!

9.31 * (100 - (Sniper Scope + M Adjuster Gamma)) * 0.01 =
9.31 * (100 - (15 + 85)) * 0.01 = 0

Alas, the L Adjuster value of the Sniper Scope is completely ignored. But will at least the long-range accuracy effect stack if we equip both the Sniper Scope and the L Adjuster accessory? No! The erroneous function...
Current Long-Range Accuracy * (100 - Current Long-Range Accuracy) * 0.01 = New Long-Range Accuracy
...is only called ONCE. This is why it doesn't matter if you have both Sniper Scope and L Adjuster equipped. The order in which you equip the two items also change nothing. In our Ultima Weapon + Lucky S Barrel example, we are still stuck with this result for our long-range accuracy:
15.71 * (100 - 15.71) * 0.01 = 13.241959

Equipped with this knowledge we at least know that equipping the Sniper Scope is equivalent to also having the L Adjuster accessory on, erasing all potential meaning in having that accessory equipped alongside the Sniper Scope!


If only we could properly combine the Sniper Scope and the L Adjuster Gamma, using the intended formula. This would yield a perfect accuracy since the two items would stack their values perfectly.
15.71 * (100 - (Sniper Scope + L Adjuster Gamma)) * 0.01 =
15.71 * (100 - (20 + 80)) * 0.01 = 0

Thankfully there are equipment configurations where perfect long range accuracy stats can be achieved, like with the Feather Hydra + Long Barrel (any Long Barrel will do). The deviation you get from Ultima Weapon + Long Barrel is also extremely tiny. Without diving into the game's invisible values like I have a player will never notice the L Adjustment bug. This error in the code is true for all versions of the game.
 
Last edited:
Mechanics of the Ch10-1 Five-Box Cardkey Quest

Basic Look
The fifth box destroyed, not counting the box with gil in it, will reveal the cardkey to help you progress through the stage. Before that point randomness will decide whether a destroyed box reveals an enemy or an item.

ch10-1_5-box-room_marked.png

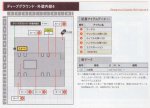
The DCFFVII Official Complete Guide does a good job at illuminating on the hidden randomness.

DC_Complete_162_crop.jpg

※1 小隊長が出現(※2)すると中に入っているアイテムが消える。また1~5​
 の入ったカーゴのうち、5つ目に壊したカーゴからはカードキーが出現し、​
 中のアイテムは消える​
※2 カーゴを壊したときにー定の確率で出現する。確率はEASYが1/3、​
 NORMALが1/2、HARDが2/3になる​
*1 When the platoon appears (* 2), the items inside will disappear.​
Also, among the cargo boxes containing 1 to 5, the card broken from the fifth cargo box will appear,​
and the items inside will disappear​
*2 Appears with a certain probability when destroying a box. Probability is 1/3 for EASY,​
1/2 for NORMAL, 2/3 for HARD​

So if we are not dealing with the guaranteed cardkey drop from the fifth box, we have to deal with the probability of an enemy showing up instead of an item when a cargo crate is destroyed.
Difficulty Mode...Enemy Spawn Rate (Original Japanese Release)
Easy Mode.....1/3
Normal Mode...1/2
Hard Mode.....2/3

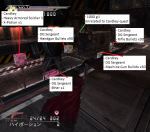
The guide only mentions the DG Sergeant (that's what 小隊長 got officially localized as) as the potential enemy type to pop up. This is incomplete. The box that may reveal an X-Potion will only spawn a Heavy Armored Soldier S if the RNG determines that an enemy is to show up here. Because the Heavy Armored Soldier S (HASS) is a heavy hitter, my strategy in my All S Rank run was to leave this box for last so that only a cardkey may be gained from it.

The official Japanese guide may contain a few errors but this is nothing compared to the many errors and flaws in the BradyGames guide. The latter does not even inform about the enemy spawn probabilities. So what are the probabilities?

Difficulty Mode...Enemy Spawn Rate (Post-Original)
Normal Mode....1/2
Hard Mode......2/3
Ex Hard Mode...2/3

No difference between Hard and Ex Hard. Both have 2/3 chance of enemy spawn, 1/3 chance of item.


Deeper Look
The cardkey may appear if, and only if, exactly five boxes have just been destroyed.

ch10-1_boxes-destroyed.png
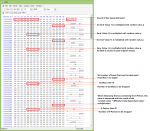
In the example above, the number of actually destroyed boxes is stored in [pcsx2.exe+609B30] and eax stores the value "5", grabbed from a table in memory that contains a lot of variables for these five boxes.
5 XOR 5 = 0
This is the only scenario where our XOR operation will yield the value 0.

The container [pcsx2.exe+609B30] now has this result of 0 and it is compared with the value of 1. If the value in [pcsx2.exe+609B30] is lower than 1, then a small jump happens in memory (jb = jump if below) that ensures a cardkey will come out of the box that was just destroyed.


If the condition for a cardkey to show up has not been fulfilled, the game will pick between spawning either the enemy or the item corresponding to that box.

When any of the five boxes is destroyed the game generates a random value inbetween 0 and 1, not including the exact value of 1.0 (and possibly excluding the exact value of 0 but that's unclear and less relevant). We can express the random value of p as 0 < p < 1.

This random value is then multiplied with a given value depending on the difficulty mode.
Easy......p*6
Normal....p*4
Hard......p*3
Ex Hard...p*3

The result of this multiplication is then rounded down to the closest whole integer.
For example:
p = 0.8
p*6 = 4.8
The result in this example is rounded down to exactly 4. We see thus how each difficulty mode limits itself to generating a discrete set of integers from this multiplication with the random value.
Easy: 0, 1, 2, 3, 4, 5
Normal: 0, 1, 2, 3
Hard & Ex Hard: 0, 1, 2

The value from the earlier multiplication is then compared with the value 1 when checking the next if-condition.

ch10-1_box-check_enemy-or-item.png

In the cmp (compare two operands) marked above, edx holds the value 1 and [pcsx2.exe+609B50] would be holding the value 4 based on our example with p*6.
If the operation yields that edx (value 1) is smaller than the value in [pcsx2.exe+609B50], a jump will occur that ensures an item will spawn from the box. If edx is equal to- or bigger than the value held in [pcsx2.exe+609B50], then an enemy will spawn from the box.

Given this logic we see how the enemy vs item RNG is created.
Easy Mode
p*6 = 0 -> Enemy​
p*6 = 1 -> Enemy​
p*6 = 2 -> Item​
p*6 = 3 -> Item​
p*6 = 4 -> Item​
p*6 = 5 -> Item​
1/3 scenarios where an enemy shows up and 2/3 scenarios where an item appears instead.

Normal Mode
p*4 = 0 -> Enemy​
p*4 = 1 -> Enemy​
p*4 = 2 -> Item​
p*4 = 3 -> Item​
1/2 scenarios for enemy and 1/2 scenarios for item.

Hard- & Ex Hard Mode
p*3 = 0 -> Enemy​
p*3 = 1 -> Enemy​
p*3 = 2 -> Item​
2/3 scenarios for enemy and 1/3 scenarios for item.


I was surprised by just how many of the values related to these RNG calculations were stored in a table rather than limiting most of it to instruction space.

ch10-1_box-table_post-JORG_marked.png

Further down in memory we get to the offsets relating to the remaining boxes and their potential rewards.

The game's difficulty modes are identified by the following values (though this unique difficulty-mode variable is not represented in the table above) :
0 - Easy
1 - Normal
2 - Hard
3 - Ex Hard

Finding the address for this variable and making the post-original game "believe" that it is playing on Easy mode will not unlock the enemy-vs-item spawn probabilities that were present in the original release. This is consistent with earlier experiments where the post-original game will interpret Easy mode as simply being Normal mode. It may be possible to unlock Easy-mode behavior by changing the code but I have not looked hard to try and confirm this.

The equivalent memory table in the original JP release is slightly shorter since it does not contain an equivalent to the Ex Hard difficulty mode and only has variables stored for the three difficulties Easy, Normal and Hard.
 
Last edited:
This shortcut in Shinra Manor eluded me until today because I hadn't investigated the ceiling collision thoroughly enough.


To the right of this red line (see snapshot below) the ceiling does not have collision. That's how we are able to climb above the ceiling and then subsequently hover over the locked metal door.

ch5-3_no-ceiling-collision-right-of-red-line.png

ch5-3_metal-door.png

By not opening the second wooden door we don't trigger the initial cutscenes with Lucrecia. Some chapters of the game don't like it when cutscene triggers happen out of order. Accordingly, a consequence from not opening this wooden door is that Vincent will spawn in a void when later cutscene- or mission triggers are activated. An additional effect here is that we never acquire the first Omega Report which under normal circumstances is a mandatory item. Though since the cutscene in the first floor lab of the Shinra Manor advance the player to the next checkpoint (advancing the game from Ch5-3 to Ch5-4), selecting Restart is enough to make the area load properly and allow Vincent to move normally again.

This is all a fun demonstration but getting Vincent to spawn in the void is actually the slower method. It is more time efficient for speedrunners to open the second wooden door, then retreat to the elevator and do the zoom climb over the locked metal door. This will mean fewer seconds spent on loading screens due to all the void shenanigans. At best this "Short Shinra Manor Basement" route will save runners 30 seconds.

In summary these are the zoom climbs/hovers and cardkey preservations planned for the speedrun route (Normal Mode Any%), with some room for adjustments and personalized routing depending on how comfortable you are with the physically taxing zoom climb technique.
Ch3, Silent Edge
- Hovering above the first barrier, ignoring the first cardkey.​
- Climbing over the wide barrier in Edge Plaza. Escort mission is now completely gone. Optional zoom hover to avoid the plaza snipers from spawning (loses one second).​
Ch4, Headquarters Under Siege
- Instant jump into basement.​
Ch5, Manor of Despair
- Preserving two cardkeys from Sahagin. Jump over the first barrier. One cardkey is automatically removed from inventory when moving to Cait Sith segment.​
- Skipping the trap room section, right before the Cait Sith segment, with a difficult zoom climb.​
- Shinra Manor Basement shortcut.​
Ch6, Deepground Strikes Back
- Cardkey preserved from Ch5 used to lower the first barrier. Cardkey picked up from Sweepers to skip the lengthy choppers section further down in Ch6.​
Ch8-1, Midgar Assault
- Hovering above the second and/or third barrier. Most efficient routing here still up for debate. Complications from the fact that this chapter's barriers only accept cardkeys when the right enemy/enemies has/have been defeated.​
Ch8-2, Fight for the Central Complex
- Climbing above the row of randomly activating/deactivating barriers if the RNG is bad.​
Ch10, Shinra's Dark Secret
- Preserving 2 or 3 cardkeys over the course of the stage. These will skip the gun turret section, the subsequent bridge and then the crowded "courtyard of death" where normally three DG Commanders must be beaten to get the cardkey. A longer zoom hover can be done to skip the gun turret section without raising the barriers, thus negating the need for an extra cardkey.​
Ch11, Beginnings
- Zoom climbing above the boss trigger for Dragonfly PT, never activating this boss.​

Estimated timesave is somewhere above 10 minutes. Ex Hard mode has a few extra zoom climbs.
 
Last edited:
The first speedrun submission of Dirge of Cerberus with the zoom climb/hover technique is now up on the leaderboard.
- NT's 1h24m35s in the new Any%

The old Any% runs have been grouped into the "No Major Glitches" (NMG) category. NMG does not allow the use of zoom climb and zoom hover. It does however allow other movement exploits like skipping the Ch10-1 barrier without zoom climb/hover and skipping the Ch5-1 sewer barrier by jumping into the wall. These huge timesaves are yet to be incorporated into a NMG run on the board. The minor glitch known as Limit Flex(ing), the Rosso quick-kill, is also allowed in NMG.

NT aims to achieve a 1h23m in the new Any% and confirms that a record in the 1h22m vicinity is reasonable but will be difficult. NT will sometimes use a keyboard to perform the zoom climb and typically switch to controller when the zoom hover requires a longer horizontal flight. This is different from the way CityHall runs, who uses only a PS2 controller. Personally I too favor using only the PS2 controller. A new runner of the game (who is yet to submit a run but is hard at work learning the game) alternates between keyboard and PS2 controller for the zoom climb/hover.
 
The Mechanics of the Crystal Feelers

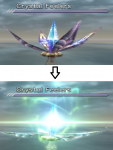
crystal-feelers_cutscene.png

The game's final chapter (Ch12-2, "A Finale Chaotic") begins with the task to destroy all six Crystal Feelers. These are crystalline flowers that can only be destroyed one at a time by a melee strike. This is only possible when their petals are down and the crystal core is exposed. Though the introducing cutscene shows all Crystal Feelers open at the same time, actual gameplay will only allow one Crystal Feeler (CF) to be open at a time. The challenge here is for the player to reach- and destroy an open crystal before it has time to close, while also dealing with the laser-firing Omega Buds that roam the area.

Speedrunners in particular have been hoping for a hidden, non-random element that may influence when a CF may open. This remains a dream that may only be fulfilled if some major glitches are discovered in the future to help clear the CFs in a quick and predictable manner. When the game acts as intended, and we only know the game to act this way, the check to determine which Crystal Feeler should open is solely based on randomness.

The Crystal Feelers themselves act the same across all game versions and game difficulties. The Omega Buds are a different story but we shall not be diving into that in this post.


The Roll of the Die
Let us orient ourselves. Although the in-game menu map for the area is blank, one can learn the cardinal directions by studying the game's coordinates. Please excuse the crudeness of this map I hastily threw together in paint. The numbers in the map will be explained soon.

map-of-CF-area.png

The submerged Omega Cocoon and the cocooning Weiss in it grants us the cardinal directions, with Weiss's head pointing north. Each blue circle with a purple outline is a Crystal Feeler. The red orb represent Chaos Vincent's starting position when the stage loads. Vincent always starts out facing straight north, with the camera pointing northeast and thus giving you a view of both the north- and northeast CFs.

Though the game's video output is interlaced 30 frames per second, Dirge of Cerberus does timers and calculations according to 60 physics frames per second. Every 120 physics frames (henceforth simply "frames"), or in other words every two seconds, the game checks to see if a new CF should open. If no other CF is currently active, then the game generates a random value to decide on which Crystal Feeler to open. This random value p is between 0 and 1, excluding the exact value 1 and possibly the exact value 0 as well. The random value is multiplied with 6 and the result is rounded down to the closest whole integer.

This RNG calculation may only generate the discrete set of 0-5. Each value corresponds to a unique Crystal Feeler in the area, matching the numbers in the map embedded earlier.

p*6 = 0 ► Open Southeast CF
p*6 = 1 ► Open South CF
p*6 = 2 ► Open Southwest CF
p*6 = 3 ► Open Northeast CF
p*6 = 4 ► Open North CF
p*6 = 5 ► Open Northwest CF

Ergo, the opening of a CF is equivalent to the roll of a 6-faced die. The only difference is that our in-game die is numbered 0-5 rather than 1-6. This roll of the die/dice is the same no matter how many Crystal Feelers have been destroyed. The consequence is that the more CFs have been destroyed, the higher the likelihood that the RNG check will pick a CF that has been disposed, restarting the timer for the die to be rolled again two seconds later. Many speedruns of Dirge have experienced massive time loss from the game repeatedly picking CFs that are already gone.


Additional Timings
If we visually measure the duration period for a Crystal Feeler staying open, based on when its petals start folding down and when the petals have folded back in, a CF is open for 8.84 seconds. The time window for when a melee strike will count as valid is a bit more strict than this.

Roughly 0.4 seconds after the petals have started folding down, the timer will initiate for how long you now have to destroy the CF with a melee strike: 468 frames, 7.8 seconds.

The image below represents the moment when the melee window opens (petals partially folded down) and when the melee window closes (folding sound effect plays).
cf_melee-cycle.png

When you hear the sound effect of the petals about to fold back up you know that the time is up and melee will no longer have any effect on the Crystal Feeler. The sound effect does indeed start playing a few frames before the actual animation of the petals folding back up.

The distance between two opposite CFs is 80 meters. Chaos Vincent runs, or rather "glides", with a maximum speed of 10 m/s. Assuming a constant velocity and a perfectly straight line, travelling between these opposite ends will thus take 8 seconds.

Taking the first 0.4 seconds a CF spends on folding down its petals and then the 7.8 seconds for the actual "melee window", we see how the duration of an open CF is relatively fine-tuned to match your maximum running/gliding speed even if you end up having to travel between two opposite CFs. Repeatedly using the dash will up Chaos Vincent's average speed to 11.71 m/s, meaning it will only take you 6.83 seconds to cover the distance of 80 meters. This may seem lenient but there is still always the chance that the laser from an Omega Bud will halt Vincent in his tracks, slowing down the player just enough that an open CF can't be reached before it closes.


When the game registers that a melee attack has destroyed a CF, a new 120-frame timer initiates. This represents the duration of the crystal's death animation where it disappears deep underwater. During this 2-second window the game will never open another CF. This timer for the death animation exists separately from the other 2-second timer that checks which CF to open. A consequence of this is that the timing for the next "should-a-CF-be-selected-to-open" check *can* be impacted.
*EDIT, 2022-11-28: It is common enough though for a CF to open up 2 seconds after one Crystal Feeler was destroyed, so in my initial research I may have overestimated or even imagined the death animation interrupting a roll.*​

If the death animation ends just after the aforementioned check has happened, you will have to wait at maximum 2 more seconds until the next Crystal Feeler opens up (assuming the game picks a CF that hasn't been destroyed yet). Meanwhile if the death animation completes just before the RNG check is about to happen, the RNG check will happen pretty much without delay. This is not something that a speedrunner can optimize but it does explain why, even with good RNG, there is a delay variation between having destroyed a CF and the next one opening up.

There are yet more intricacies to the 120-frame timer for the opening of CFs that are not fully documented. When a CF has just closed and the RNG checks begin again, the timer is usually desynced by +25 frames (0.4 seconds) compared to before the previous CF opened. The timer is still 120 frames (2 seconds) but over the course of a play session this countdown is not perfectly constant.


Victory Conditions
At no point when dealing with the Crystal Feelers is any actual HP depleted...technically. The graphical HP bar at the top right does represent 3000 HP and for each CF destroyed this bar gets 500 HP subtracted from it. But unlike other "bosses" the victory condition is not linked to the depletion of HP. For each disposed crystal a counter increments with a value of +1. When the destruction of a CF has elevated this counter to value 6 the Crystal Feelers phase/battle ends and the next phase, the Omega Cocoon phase, is initiated. If you look at the combatant data you will see that each CF technically has 10 HP but this data is unused.

When striking an open CF with a melee strike no damage digits are displayed, akin to how cargo crates don't display damage digits. The game actually has zero interest here in the power of your melee. The attack can have a potential damage of positive, zero or negative and the crystal will fall regardless. All the game demands is a successful melee strike and nothing more. Melee actually lands so quickly that the CF will have registered the hit before Chaos Vincent's melee animation has even begun to play.

If you set the "Number of Defeated Crystal Feelers" counter to 6 early the phase will not instantly end. The end-phase check for if you have destroyed enough crystals only happens right after a crystal's death animation has completed.

cf-end-phase-check.png
In the snapshot above, [pcsx2.exe+609B30] contains the pre-determined value 6: The total number of CFs that must be destroyed for the phase to end. [pcsx2.exe+609B50] stores the number of crystals actually defeated and moves this value into eax for the XOR operation.

If the result of the XOR operation is below 1, then the Omega Cocoon battle phase will initiate. This means the ONLY victory condition is to have 6 CFs destroyed. There are no theoretical workarounds even in the form of negative values etc. The XOR operator can be represented by the symbol ^.
6 ^ 0 = 6
6 ^ 1 = 7
6 ^ 2 = 4
6 ^ 3 = 5
6 ^ 4 = 2
6 ^ 5 = 3
6 ^ 6 = 0

Fascinatingly enough, while the "End of Phase" check happens only after a CF's death animation, the game will still do a check every two seconds to determine if you've reached the "cap" of 6 destroyed crystals. Using cheats to set this counter to 6, independent of actually destroying any crystals, the RNG checks for the opening of CFs cease completely. No crystals will be opening but this can easily be fixed by setting the counter to ANY value except for 6. Even with the aforementioned counter set to 6, and CF activity has stopped, the Omega Buds will continue acting as normal and continuously respawn after being defeated.


Closing Thoughts

In the past there have been speculations like maybe the distance between the player and the CF having an impact on how soon a crystal decides to open. With the new knowledge in hand, being aware that it's all just the roll of a 6-faced die every two seconds (these RNG checks don't occur while a CF is open), speedrunners will know to always stick extra close to the last remaining crystal on the field. There is no point in spinning, gliding back and forth, jumping etc. Stand by the last CF and prepare to use a melee strike when the petals have almost folded down.

It's possible that we will never discover an exploit to remove the random element of this battle phase which has harmed and outright ruined many speedruns. One small joy we can find though is the fun in knowing the probabilities for certain outcomes.

One of NT's old records had him experience a delay of 34 seconds between the destruction of the penultimate CF and the opening of the last CF. If we limit the scope of our probability analysis to this interval, we can estimate the game rolled 16 bad RNG checks and then on the 17th roll finally opened the last CF. We assume that no death animation interrupted the RNG rolls, so there was one roll every 2 seconds.

One way of expressing this scenario would be this: Using a 6-faced die, faces numbered 1-6, what are the odds of never landing a 6 during the span of 16 throws/rolls? Putting the numbers into this dice probability calculator, we get a probability of 5.41%. Definitely a really bad roll but not outlandishly so.

Another interesting example of a huge delay was when the two final CFs in one of City Hall's runs (the current Any% NMG record) refused to open for 22 seconds! We can estimate this as 10 failed RNG checks and the die landing correctly on the 11th check. Once again using the online dice probability calculator, we find in this scenario the probability of 10 failed RNG checks was 1.73%.

Of course probability estimations depend a lot on the scope of your analysis and there are many ways to expand your analysis of an RNG scenario.
 
Last edited:
Glitch: Infinite Machine Gun Ammo

A YouTuber by the name SCREAMO TV recently discovered a method of having unending machine gun bullets with no need to ever reload.

Requirements for the glitch
- Have 0 machine gun (MG) bullets in your inventory. The glitch will not work if you have MG bullets stashed away in other weapon slot magazines.​
- Have a machine gun in your current weapon slot.​
- Mount- and dismount from a gun turret either in Ch8-2 (Fight for the Central Complex) or in Ch11 (Beginnings). The dismount is the "switch" that activates the glitch.​

The MG will now have copied two traits from the turret: Infinite ammo and zero reload limitations. All other traits of the machine gun, such as power output, firing rate, bullet speed, killchain behavior etc will remain the same as normal. This glitch can not be carried over onto other bullet/gun types. SCREAMO TV demonstrated the glitch in Ch11. Here is my demonstration in Ch8-2.


When active, Infinite MG Ammo will always display that your magazine/clip has 1 bullet in it rather than 0.

Initially, the glitch will display that your total number of MG bullets outside of the gun clip is 0. After changing your equipment in the menu once, the 0 will have turned into an infinity symbol. Other events like selecting Restart, getting a Game Over, loading a checkpoint or Tempsave with the glitch active, will also have Infinite MG Ammo with the infinity symbol present. Infinite MG Ammo can be activated in all versions of DoC.

Events that cancel the "Infinite MG Ammo" state
- Switching weapons.​
- Acquiring machine gun bullets.​
- Changing the weapon frame (even when it's to another machine gun).​
- Changing equipment two times after initiating the glitch.​
- Changing equipment once, when the infinity symbol is present.​
- Mounting a gun turret when the infinity symbol is present.​
- Mounting any gun turret not in Ch8-2 or Ch11.​
- Transitioning to Ch12 (the Chaos Vincent chapter).​

Cutscene transitions will not remove the glitch and the bug will still be active if you load a checkpoint where you had the infinite mg ammo active. It is thus possible, albeit not practical due to the machine gun's low attack power, to activate Infinite MG Ammo in Ch8-2 and then carry it all the way to the end of Ch11. Your main obstacle will be the normally mandatory gun turret section in Ch10-3, as mounting the turret will cancel the glitch. But by preserving a cardkey and/or doing zoom climbs you can bypass this turret and keep the Infinite MG Ammo going if you so please.

ch10-5_infinite-mg-ammo.png

The act of preserving Infinite MG Ammo is kind of refreshing. It's a rare scenario of actually having to be mindful of MG ammo drops on the field, as picking up even just one such ammo drop will cancel the bug. For example at the very start of Ch10-4 there are two item cases by the stairs: The left one is Rifle Bullets and the right one is Machine Gun Bullets. You'll have to jump over the MG bullets item case if you want to preserve the glitch.

ch10-4_stairs-ammo.png

The thing that decides the glitch should happen is not the fact that your gun consumes MG bullets or that it has an auto-fire feature. Instead it's a variable (either 1-byte or 2-byte, I'm not sure which) that determines both the gun silhouette in the lower left of the HUD and what type of gun Vincent appears to be holding out on the field. If this variable indicates that Vincent should be holding a machine gun frame, then the Infinite Ammo glitch can happen, regardless of which bullet type the gun actually consumes.

Unless a method is discovered to fool the turret into copying its infinite ammo traits onto a handgun, there is zero chance of this glitch being incorporated into a speedrun. The damage output of the MG is far too low for it to be worthwhile. All this said I am very happy about the existence of this glitch. Fascinating to see yet one more example of how the individual chapters of Dirge of Cerberus are uniquely programmed, rather than each chapter calling on the same, identical functions.


The nature of this glitch feels like something you'd see posted about on GameFAQs shortly after the game's release date but I have not found any references to this bug that predate SCREAMO TV's video. Granted, it is extremely rare for a player to run out of MG bullets. It does require some alignment of the planets for a person to run out of MG bullets, mount a turret in Ch8-2 or Ch11 while also still being on the machine gun weapon slot, and then to dismount while also noticing that a 0 just changed to a 1.
 
Last edited:
The KelStr file(s) contain the game's menu text, including things like item text, speaker names for dialogue, config settings etc. I learned the bitmask for decrypting/encrypting KelStr way back in March 2018. 'Twas only recently that I pondered the possibility of applying the bitmask on KelStr files that the game never boots up and decrypts for you.

As it turns out, the Japanese KelStr file in the North American retail version (and to a lesser extent the localization prototype) has plenty of item text unique to the 2006 era of the online multiplayer! Huge amounts of text that had been considered lost up until now.

Here are some highlights from the quest items, Japanese text followed by (sometimes very flawed) auto-translations.

魔晄パウダー​
どうにも胡散臭いパウダー状の魔晄粉末。使用法は謎とされてきたが……。​
Mako Powder
It's a fine mako powder that smells like dust. The usage has been a mystery, but…​


飾り気のないピアス
綺麗に透きとおったアメジストのピアス。
Unpretentious Earrings
A pair of beautifully clear amethyst earrings.


魔晄が10倍楽しくなる方法​
魔晄の印象がガラリと変わる、初心者必読の完全魔晄マニュアル。魔晄料理の節約レシピ付き。​
How to make Mako 10 times more fun
A complete mako manual that is a must-read for beginners, which changes the impression of mako. Comes with a recipe for saving mako dishes.​


アダマンタイト
非常に硬度の高い石。優れた武器を作るためには、欠かせない素材。
Adamantite
A stone with extremely high hardness. An indispensable material for making superior weapons.


壊れかけのマシンガン​
おおむね傷んではいるが、このままではどっち付かずで使えない……。​
Broken Machine Gun
It's generally damaged, but I can't use it either way as it is…​


モーグリのかぶりもの
モーグリキャップ生地のかぶりもの。大事な鼻とかアレとかがついていない。これではかぶれない。
Moogle Headgear
Moogle cap fabric headgear. It doesn't have the important nose or pompom. You can't wear this.


モーグリの鼻とか​
モーグリキャップのフェイスパーツ。指で押すと、猫の肉きゅうを思わせるプニプニ感だ。​
Moogle Nose
The face parts of Moogle Cap. When you press it with your finger, it feels like a pudgy cat's meat ball.​
*(Pudgy cat's meat ball?!?!)


モーグリマスク
フェイス部分は完成しているが、大事なアレとかが欠けている。とうていかぶる気にはなれない。
Moogle Mask
The face part is completed, but important things are missing. I don't feel like wearing it.


モーグリのアレとか​
モーグリキャップの頭頂部にある謎のボンボン。これがモーグリをモーグリたらしめている。​
Moogle Thing
The mysterious pompom on the top of Moogle Cap's head. This is what makes a moogle a moogle.​


旧式魔晄蓄電池
魔晄を溜め、動的エネルギーに変換する電池。現在は実装中止となっている。
Old-fashioned Mako Storage Battery
A battery that stores mako and converts it into dynamic energy. Currently, the implementation has been discontinued.


Edenのメモ​
油の染みた紙きれに、同じような言葉がびっしりと綴られている。​
Eden Notes
The same words are spelled out on a piece of oil-soaked paper.​


汚れた調査メモ
虫に喰われながらも何かを書きとめようとしたのか、綴られた文字は汚く踊っている……。
Dirty Research Notes
Perhaps he tried to write something down while being eaten by insects, the spelled characters are dancing dirty…


魔晄の染みた調査メモ​
死に瀕しながらも書き殴られた調査メモ。魔晄が染みて、文字が読めなくなっている。​
Mako-stained Research Notes
Research notes scribbled down while dying. The words are illegible due to the stain of the mako.​


壊れた調査メモ
死に瀕しながらも書き殴られた調査メモ。筆圧が強すぎたのか、ボロボロでさっぱり読めない。
Broken Research Notes
Research notes scribbled down while dying. Perhaps the writing pressure was too strong, but it's so tattered that you can't read it at all.


油まみれの調査メモ​
油にまみれて内容はよく読み取れないが、どうやら同じような言葉を延々と綴っているようだ。​
Oil-soaked Research Notes
I can't read the content well because it was covered in oil, but it seems to spell out the same words endlessly.​


奇跡のメモ?
廃棄臭の漂うメモ。粉まみれでひどく読みにくい。廃棄死から甦った兵士の遺書だろうか?
A Miraculous Note?
A note that smells of waste. It was covered in powder and was terribly difficult to read. Is it the suicide note of a soldier who came back from the dead?


蒼き弾丸​
アスール専用に製造された極めてごつい弾丸。常人にはとても扱えない。​
Blue Bullet
An extremely bulky bullet manufactured exclusively for Azul. No ordinary person can handle it.​


Waldoの清書メモ
精密機械が記したような文字で原文が正確に再現されている。
とても手書きとは思えない。
Waldo's Clarification Note
The original text was accurately reproduced in characters that looked like they were written by a precision machine.
It is hard to believe that it is handwritten.


ぴちぴちボーナスチケット​
緑色の紙きれに、太いマジックでぴっちぴちのボーナスステージと書いてある。​
Pichi Pichi Bonus Ticket
A piece of green paper with the words "spiffy bonus stage" written on it in thick magic marker.​


身体データの断片
認識番号GAI012の身体能力に関するデータの断片。
Body Data Fragments
Fragment of data on the physical capabilities of recognition number GAI012.


知能データの断片​
認識番号GAI012の思考能力に関するデータの断片。​
Intelligence Data Fragments
Fragment of data on the thinking ability of recognition number GAI012.​


???データの断片
不可測なデータ片。彼が彼として存在するために必要だったもの。
??? Data Fragments
An impenetrable piece of data. What he needed in order to exist as he did.


いかさまパスコード​
Black-Jの組んだ裏ミッションに入るためのパスコード。魔晄臭をビンビン発して機械を酔わせる。​
Fraudulent Passcode
A passcode to enter the back mission organized by Black-J. It emits a mako odor and intoxicates the machine.​


ゴミデータ
意味不明なデータ片。細かく分断されているせいか、そのままでは解析不能のようだ。
Garbage Data
An unintelligible piece of data. It seems that it cannot be analyzed as it is, probably because it is divided into small pieces.

The data fragments and the passcode are for the Turk Vincent battle of June 2006. GAI012 is Vincent's ID.

By collecting Turk Vincent’s battle data and handing it over the Black-J in the Area 4 basement, players could acquire a one-time password to set up a battle table for the fight against Turk Vincent. Once the battle was over, they would either re-collect the data to get another password or they would piggyback on somebody else’s battle table.


Any ambitious patch-work revival of the online mode now has way more data to work with. One aspect that still remains frustratingly missing are the speaker names for the Deepground NPCs. While the documentation for these NPC names is pretty good, having an original KelStr with these speaker names intact would be way preferable. Unless Noesis gets updated with a more complete extraction algorithm for Dirge of Cerberus file (or if I get there first with unlocking the complete folder-and-file structure) I can't be 100% sure that I've found every KelStr file.
 

Torrie

astray ay-ay-ay
Mako Powder
It's a fine mako powder that smells like dust. The usage has been a mystery, but…
I believe this is the first time the actual smell of mako has ever been specified?? Dude. This is a mind-blowing discovery, even if the canonicity of it is somewhat dubious at the moment.

Edit: Unless it's the smell of the powder, not the mako...

Mako-stained Research Notes
Research notes scribbled down while dying. The words are illegible due to the stain of the mako.
And another fact about mako that we've learned from these files is that it has staining abilities and can make handwritten notes unreadable. I'm not sure what I'm going to do with this information, but it still might be useful for one piece of fanfic or another.
 

Makoeyes987

Listen closely, there is meaning in my words.
AKA
Smooth Criminal
Screaming about how absolutely demented they were in Deepground to give out a book called, "How to Make Mako 10 Times More Fun."

What the actual fuck.

Were they EATING it? Spreading it on bagels? Mixing it into smoothies? Mako isn't supposed to be "fun!"

"Dirty Research Notes" gives the important answer to why Bizzare Bugs/Bugaboos grew from normal sized to fucking giants between FFVII and DC. :awesome:

It's amazing how these items give an interesting look into the setting and hilarity of the Deepground multiplayer. Man, they do things different in Deepground, compared to SOLDIER. :monster:

EDIT: Deepground goes so hard, they don't get infused with mako.

THEY EAT MAKO. CAUSE IT'S FUN. THEY LEARN THAT ON DAY ONE.
 
Last edited:
Top Bottom