DCFFVII Research Thread

Clement Rage

Pro Adventurer
So Shad, a mostly unrelated question.

Recently I tried to play a PS2 on a modern flatscreen TV (the 25 year old TV I used previously finally broke). It works, but when I try to play games everything is too dark and I can't navigate properly. Adjusting brightness doesn't seem to do anything. Just wondering if this is something you have encountered on your travels, and if any handy fix comes to mind. I am aware that this is unreasonably vague, so no pressure.
 
Are you using PS2 composite cables or RGB scart to hook up your console to your new TV? Are you using the same cables now that you used on your old TV?

I have not encountered the issue personally but it is apparently common that PS2 games look dark on modern TVs.

From the reddit thread:
Bubavon said:
Crt is the way to go! Only other feasible option is to buy something like this

Note that hdmi adapter and hdmi upscaler are two different things. An adapter will still give a dark picture on modern TVs, an upscaler on the other hand will give you the best possible picture on modern tvs.

Many people use HDMI upscalers like OSSC, Framemeister or Retrotink. These are usually very expensive though.
 

Clement Rage

Pro Adventurer
HDMI with an adapter. Duly noted, thanks and apologies for being my guinea pig, I just thought you might have come across it with Dirge at some point.
 
Basics of Normal-type Stagger: Part 1

Attacks in Dirge of Cerberus can be divided into three types: Normal [ノーマル], Hard [ハード] and Blow [ブロウ].
Page 35 of the DCFFVII Official Complete Guide explains this convention. No in-game tutorial goes over this.

DC_Complete_035_crop.jpg

受身をとって追加ダメージを防ぐ

敵の攻撃によるダメージには、右表に示す3種類が
ある。なかでもブロウダメージを受けるとヴィンセント
は地面に転がってしばらく動けなくなり、そこに追撃を
受けたり、敵に囲まれるなど危険な状態になるのだ。
そこで有効なのが「受身」という操作だ。これは敵か
らダメージを受けて、吹き飛ばされたときにとれる行
動で、ヴィンセントが地面に落ちる瞬間にジャンプか
前転の操作を行うと実行できる。成功すると地面に転
がらずにジャンプや前転が発生し、すぐに体勢を整え
ることができるのだ。ボス戦など敵の攻撃が激しいと
きに特に有効なので、マスターしておこう。


ダメージの種類

ノーマル
ダメージ
受けても体勢を崩さない。ただし、連
続で攻撃を受けつづけると、ハードまた
はブロウダメージになることがある。

ハード
ダメージ
これを受けるとヴィンセントは体勢を崩
してしまい、約0.5秒ほどと短い時間だ
が、動きが止まってしまう。

ブロウ 
ダメージ
受けると吹き飛ばされてダウン状態に
なる。ダウン中は行動不能で、起きあ
がるまでに追加攻撃を受けることも。
Prevent additional damage with breakfalls

There are three types of damage caused by enemy attacks, as shown in the table on the right.
Above all, if Vincent receives blow damage, he will roll to the ground and be unable to move for a while,
where he will be in a dangerous situation, such as receiving follow-up attacks or being surrounded by enemies.
What is effective there is an operation called "breakfall stance". This is an action that can be taken when Vincent is blown
away after receiving damage from an enemy, and can be performed by jumping or rolling forward at the moment
Vincent falls to the ground. If you succeed, you can jump and roll forward without rolling on the ground,
and you can immediately adjust your posture. It's especially effective when the enemy's attacks are intense,
such as in boss battles, so let's master it.


Types of Damage

Normal damage
Even if you receive it, you will not lose your posture.
However, if you continue to receive attacks in a row,
it may cause Hard or Blow damage.

Hard damage
When this is received, Vincent loses his posture,
and the movement stops for a short time of about
0.5 seconds.

Blow damage
If you take it, you will be blown up and down.
You are disabled while down, and may take additional
attacks before you get back up.
DC_Complete_257_resized.jpg

The Bradygames guide also include a bestiary where enemy attacks are categorized as Normal, Hard or Blow. The guide alternates between the term "blow" and "blowback". The Bradygames guide does not have a section that describes the differences between the three damage types.


If Vincent receives Hard damage he will be stunned for half a second, ergo why I typically call it the "stun". There is no way to recover or "breakfall" from Hard damage as a means of ending the stun quicker.
vincent_stunned.gif

If Vincent receives Blow/Blowback damage he will be sent flying and you can recover by mashing Jump or Dash. The recovery is not shown in the animation below.
vincent-blowback.gif

Additional:
- If Vincent is in midair while receiving Hard damage he will not experience a slight stun but will instead fly back as though he received Blow damage. Breakfall/recovery will be available, as per Blowback mechanics.
- When Vincent is on a ladder he is safe from Hard- and Blow knockback, in the sense that he can't be knocked away but his HP is still depleted. Vincent will only fall from the ladder if his HP reaches 0.
- Obviously Vincent is safe from all knockback effects while in an invincibility state. This can happen by being in a transformation sequence, by being revived and/or by employing the unused invincibility items Hero Tonic and Hero Tonic Gold.
- No amount of defense, be that his DEF stat or the defense granted by Cerberus Relief, can make Vincent immune to Hard/Stun or Blow/Blowback stagger.


So what about Normal damage? Here is again what the official Japanese guide says on page 35:

Normal damage
Even if you receive it, you will not lose your posture.​
However, if you continue to receive attacks in a row,​
it may cause Hard or Blow damage.​

This is where the player's "Stagger Gauge" comes in. (More in Part 2)
 
Last edited:
Basics of Normal-type Stagger: Part 2

In the original Japanese release the Stagger Gauge (SG) can be found in address 20133B10. In all the later releases the gauge is in address 20133B30. This is a 2-byte variable that starts out at value 0 and builds up as Vincent takes damage that impact the Stagger Gauge. Usually this is in the form of Normal-type damage, like common gunfire, but there are also cases of Hard- and Blow damage incrementing this counter.

If the SG reaches value 30, default form Vincent will experience the Hard/Stun knockback.
If the SG reaches value 80, default form Vincent will experience Blowback and the counter will reset to 0.

These threshold values can be found in the bzd files, the "basic zone data" files that are unique to each area.

p000_ch10-4_knockback-thresholds.png

The limits of 30 and 80 for Hard and Blow are true regardless if you are Turk Vincent, standard Vincent or Chaos Vincent. Only when you transform into Galian Beast is there an actual increase in toughness.

p001_ch10-4_knockback-thresholds.png

The Stagger Gauge must reach 90 for the beast to be stunned and it must reach 150 for the beast to get blown back.


Remember, this is all in regards to knockback that happens if you take enough damage in a short period of time. If an attack type is inherently Hard- or Blow type, Vincent will experience the appropriate knockback regardless of his Stagger Gauge.

In order for the SG to continue ticking upwards you must receive gauge-affecting damage within intervals of less than 1 second (60 frames).

stagger-gauge_60-frame-check_edit.png

Vincent takes damage and the game retrieves the current frame value from the primary frame counter. This is the same frame counter that influence the duration of Galian Beast form, the recharge time of Mako Points etc.

This value is then subtracted with the frame when Vincent was last hit by an attack that incremented the Stagger Gauge.
Let's say the current frame is 500 and Vincent was previously injured at frame 441.
500 - 441 = 59
59 is less than 60 (0x3C in hex) and so the Stagger Gauge will be incremented in this attack.
If Vincent had taken the hit on frame 501, the Stagger Gauge would not be incremented and will instead reset to 0.

There is a quirk where in some contexts (I do not know how common) the SG is reset to 0, but then the new stagger-value is applied, meaning that the value of 0 is only present again for a few rows of assembly instructions. I don't know how widespread this behavior is but it's at least not universal.


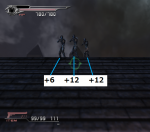
Enemy attacks will increase the SG different amounts. Here is an example from the first three soldiers you encounter.

ch1-1_first-encounters.png

Shots from the left soldier will increase the Stagger Gauge by 6. The middle soldier, despite being the exact same enemy type as the left soldier (e027) will increment the gauge by 12. The soldier on the right also increase the value by 12.

You *can* thus take Hard knockback from these three. 6 + 12 + 12 = 30, reaching Vincent's threshold for being stunned. The stars would have to align though because their aim is incredibly bad.

A way more common case of Hard-type knockback, by taking Normal-type damage, is from the office in Ch1-4.

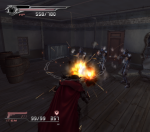
ch1-4_normal-type-hard-stagger.png

The three soldiers in the office always get the first move. Each soldier deals +12 to your Stagger Gauge. Roughly 1/3 of the time all three shots will hit you, 12 + 12 + 12 = 36, and Vincent is briefly stunned. All the common DG soldiers that appear in this room deal +12 to your SG. At the end a Deepground Commander shows up and they only deal +1 to the SG though they have a decent firing rate.
 
Last edited:
The Item Selection Glitch
Exclusive to the original Japanese release, Hard mode difficulty. The glitch so far can't be used to help the player in any way.

Basics
When you select a restorative item you have three options: Use, Discard or Set. You can consume the item, throw it away or set it as your active item in the item shortcuts (bottom left of the HUD). For any equippable you can select Discard, so long as the item is not equipped or otherwise set to be impossible to throw away. For Omega Reports and G Reports you can select to read any of the collected files.

On Hard mode (and Ex Hard, not available in the original JP release) the game is not paused when accessing the main menu (Triangle) so you can move around collecting items even while inside the Item sub-menu. Though you can move around using the left analog stick you can't jump/roll/shoot while in the menu.

The Twist
If you have selected an item and then proceed to pick up an item that become stacked on a higher step in the inventory, your cursor will move one step upwards. This requires the new item wasn't already in your inventory, as it needs to be inserted into an empty item slot for the cursor to move one step up. The cursor also will not change if you pick up an item that is added onto a lower section of the inventory.

inventory-cursor_post-original.png

In the post-original releases you will be forced out of any selection menu you were just in if you also pick up an item on the field. Be that the "Use/Discard/Set", "Discard" or the report lists.

But in the original release you'll stay in the same selection-menu while the cursor has now moved one step upward. The selection-menu, in this example Use/Discard/Set, will now apply to the Cardkey [カードキー] even though it is a greyed out item that shouldn't have these options.

selecting-cardkey_jp-original.png

Select "Use" and nothing happens. Select "Discard" and the cardkey is thrown away which in many cases will mean the player can't progress through the stage. Select "Set" and the item is added to the shortcut menu, though nothing happens when you try to use it. "Cardkey" stays in the shortcut menu even after using up the actual cardkey, though your new fake cardkey can't be used to lower additional barriers. Cycling through your shortcut items or picking up items will remove the fake cardkey from your shortcut items.
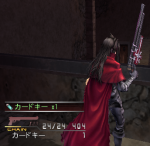
shortcut-item_fake-cardkey.png

Because the Item Selection Glitch (ISG) only works for when the cursor is moved one step upwards, you can't apply the Use/Discard/Set option to Omega- and G Reports, ammo, equipment and the Gold Moogle Doll. All the restorative items with the Use/Discard/Set option are at the top of the inventory list and the other aforementioned items are always below the restoratives. So you can't set Omega Reports to your shortcut items, for example.

If you have 0 bullets of a given ammo type and use ISG to remove one more bullet from your inventory the menu will briefly claim you have -1 bullets, but in actuality your bullet count never goes below 0. No means of infinite ammo here.
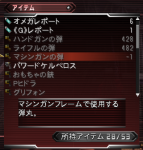
machine-gun-ammo_actually-zero.png

The glitch allows you to discard items even if Vincent has them equipped. The result is that you can "remove" even Guns and Frames from your weapon slots which is something the game normally does not allow. What you'll quickly notice though is that removing the Cerberus and Long Barrel doesn't actually change any gun traits expressed on the field. The equipment menu HUD might look weird but in essence nothing changes. Remove Sniper Scope after ISG and you still have deep zoom available. Remove Power Booster after ISG and you still have added power.

When you have removed an item from your weapon slot, using ISG, the next addition to your inventory will automatically fill that slot. In this way you can "equip" impossible items, like Mega-Potion [メガポーション] or even multiple Power Boosters [パワーブースター].
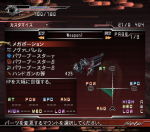
impossible-equips.png

Sadly, the Power Boosters do not stack in any way to improve your gun power beyond what's intended. Only your original instance of the Power Booster, before the glitches, will count.

In summary I highly doubt that the Item Selection Glitch will be useful for anything. There would have to be some subtle nuance of the glitch that I have missed. Maybe there is some equipment trait that can be stacked, or maybe some way to make the "Fake Equips" actually count as valid, but so far the research reveal no such exploits.
*EDIT: The only potential "use" out of ISG is that it effectively expands your inventory, albeit temporarily. By discarding an equipped item you leave extra room in your main inventory while still enjoying the benefits of the equipped item you threw away. But this only applies until you change the equipment slot, after which the discarded item is permanently gone. Confusion would also easily arise from the equipment menu displaying new "fake equips".


Shop Tangent
I had hoped that the shop would display its own version of ISG but that turned out negative. When accessing the shop Vincent is frozen in place, but an enemy may still nudge Vincent to pick up an adjacent item on the field while in the shop, which is how I was able to confirm that no shop counterpart to ISG exists.

The holy grail would have been to find a way to sell restorative items down to a negative amount. If you have -1 Potions and less than 70 gil, selling the Potion will actually remove 70 gil from your wallet and underflow your gil count to the natural max: 99'999'999. But alas, the shop could not be fooled to acquire items neither below- nor above the intended item caps.
 
Last edited:
I came upon the Item Selection Glitch while exploring two curiosities.

Ch10-3 Despawn Trigger: Backtracking to an invisible shop
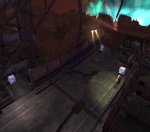
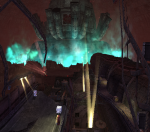
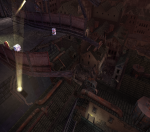
ch10-3_aerial-shot_a.png


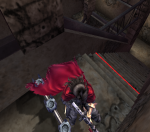
ch10-3_aerial-shot_b.png


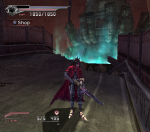
ch10-3_aerial-shot_c.png
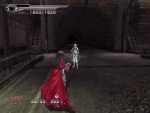
This is where Vincent says "You know what to do, Cerberus" and where you can find the second G Report. Because of the quick access to a shop, cargo crates, a drum can and several enemies this is one of my go-to spots for experimenting in Dirge of Cerberus. The place is populated with DG Sergeants and a few DG Elite.

After taking the stairs to one of the house interiors and using a cardkey there is a trigger that will despawn enemies and objects in the area you just went through. Specifically, when you cross the third step of the interior stairs you will have touched the invisible border.

ch10-3_line-of-despawn.png

You can however still backtrack to where you just came from. This can feel a bit uncanny, especially if you left several enemies and objects behind that then simply vanish.

Things that are unloaded
- Enemies.
- The 3000 gil item case (2000 gil in the original release).
- The drum can and the cargo crates. The cargo crate with the Ether (immediately adjacent to the shop) is not unloaded in the original JP version.
- The shop model is despawned but can still be interacted with as normal. In the original game the collision of the model is also removed but in the post-original releases the invisible shop is solid.

ch10-3_invisible-shop.png

Things that are not unloaded
- Recent enemy drops.
- The G Report.
- The aforementioned cargo crate in the original JP release.

No cheats or zoom climbs are required to observe this oversight in the game's load triggers. It was while observing this humorous de-rendering scheme that I noticed another minor bug.


Omega- and G Report lists: Postponed Update
Perform the following actions.
- Enter the item menu.
- Open the G Report list.
- While still in the menu, grab a G Report (the one in Ch10-3 is easily accessible).
- Open the G Report list again.
You will observe here that while the G Report count increased from 1 to 2, the actual available reports in the list did not increase. To fix this, either leave the item menu or open the Omega Reports list. This will update the G Report list to include both reports.

Basically, when you open any report list the game loads and remembers the current status of available reports. Simply grabbing a report on the field will not immediately update the menu in this regard. The phenomenon described above applies to both the Omega- and G Reports.

Fortunately this minor bug, if it can even be called that, does not actually risk deleting any acquired reports from your inventory. You picking up the Omega/G Report is still valid and the appropriate flag has been updated. It is simply an "error" with the menu not being updated every time you open the corresponding report list.


You can see then how me observing these matters in Ch10-3, comparing game versions, led to me discovering the Item Selection Glitch. The difference in how the original Japanese game acted became very apparent after having seen how the post-original version reacted to me picking up a G Report while still in the item menu.
 
Last edited:

ForceStealer

Double Growth
Interesting to think how this kind of thing likely exists in every game that wasn't a cult-enough classic to be as analyzed as the likes of FF7 or OoT or Shadow of the Colossus.

Super interesting, I can only imagine how hopeful you must have gotten before determining each of your ideas wouldn't work (infinite cardkeys, etc.) :lol:
 
Veteran DCFFVII runner DynamiteDanTNT is now the World Record holder of Dirge of Cerberus Any%. Congratulations to Dan!


Timer was stopped at 1:17:50 and has been retimed to 1:17:49. Time ends when the final damage is dealt on Omega Weiss. This is the first 1:17:xx speedrun record for Dirge.
- Dan does not drop a single zoom climb in this run. With the time investments that go into some zoom climbs this is a great victory. I think NT's 1:19:28 was the first WR (maybe even the first PB) with flawless hovers, making Dan's time the second WR with this zoom climb achievement.

- Just over two weeks ago I demonstrated to the runners that Shelke does not have any invincibility frames when the battle against her starts. Even when the screen is still dark you can one-shot Shelke and end the battle. This saves two seconds compared to letting Shelke draw first blood. The strat is riskier than waiting for Shelke to attack and retreat but it is not difficult. Dan's WR is the first personal best to include this quick-kill.

- Rosso's AI can be difficult if she chooses to run back and forth while you try to line up the Limit Flex shot. Despite Rosso going squirrel mode, DynamiteDan kept his cool and achieved a beautiful Limit Flex. By the power of patience and quick thinking.

- Every time Weiss Empowered performs the "chair move", retreating to his throne and firing off lasers, the runner loses 12 seconds. This is RNG-based and if the player is unlucky Weiss may perform the chair move twice or even thrice. There is also some timeloss in the battle whenever Weiss has i-frames during his defensive spinning-sword move. If you are lucky you can finish the battle with zero chair moves.
In Dan's run the chair move happens once. It's easy to look at this as "unlucky", but on the other hand if there had been one more chair move then the sub-1:18 might not have been achieved.

- After seeing this run I do believe that a 1:16:xx is possible if you have godlike RNG, flawless play and fast zoom climbs. We may need one or two more timesave tricks before we can reasonably see a sub-1:17. One timesave Dan did not perform in this run is the Ch8-2 barrier skip where you save 8 seconds by double-jumping over an invisible trigger.
 
Damage Types: Light Hard & Heavy Hard

The three official damage types involved with knockback/stagger are Normal [ノーマル], Hard [ハード] and Blow [ブロウ]. Closer examination has upped the count to four damage types.

- Normal
- Hard Lv.1 (Weak Hard, Light Hard etc)​
- Hard Lv.2 (Strong Hard, Heavy Hard etc)​
- Blow/Blowback
---
Normal
Attack does not have inherent knockback-traits. Only if the attack increases the player's or enemy's Stagger Gauge fast enough may any knockback effects be observed.

Hard Lv.1
When a grounded enemy takes Light Hard damage they are stunned for one second. No knockback is observed if the enemy takes Light Hard damage while in midair. All signs point to Vincent being completely immune to Hard Lv.1 knockback.

Hard Lv.2
When a grounded enemy takes Heavy Hard damage they are stunned for one second, same as with Light Hard damage. In some cases the Hard Lv.2 hit may reset the enemy in such a way that after they've recovered from the one-second stun, it may take them an additional 0.5 seconds before performing another action. Hard Lv.1 strikes do not reset the enemy AI in this way. When Vincent receives a Heavy Hard hit he is stunned for half a second.
If the enemy- or player is in midair while taking Hard Lv.2 damage they will experience Blow-type knockback.

Blow
Powerful knockback launching the enemy/player into the air regardless if they were grounded- or midair when taking the hit. Player can use breakfall, mashing jump or dash, to recover.
---

When comparing bullets/accessories, magic and melee attacks the game has different standards for which value will represent which attack type.

Bullets/Accessories
0 = Normal
2 = Hard Lv.1
4 = Hard Lv.2
8 = Blow

From the post-original version:
Bullet 7 -----------> 2
Blast Machine Gun --> 8
Gigant Hydra -------> 8
Power Booster ------> 4
Power Booster β ----> 4
Power Booster γ ----> 4

From the JP original:
Bullet 4 -----------> 2
Bullet 5 -----------> 2
Bullet 6 -----------> 2
Bullet 7 -----------> 2
Blast Machine Gun --> 8
Gigant Hydra -------> 8
Power Booster ------> 4
Power Booster β ----> 4
Power Booster γ ----> 8

Bullet 4, 5, 6 & 7 are unused bullet types. In the Beta Version disc all inventory bullets have the Light Hard trait. Handgun Bullets, Rifle Bullets, Machine Gun Bullets and Death Penalty Bullets would then have been guaranteed to stun any enemy not strictly immune to Light Hard damage.

Power Booster Gamma was weakened after the original game so instead of Blowback it only has the Hard Lv.2 trait.

The damage type values of all the equipment in your current weapon add together via OR operations. The consequence is that you can't combine two weaker damage types to create a stronger type. OR operations below to further visualize, with the left side representing equipped items.

2 | 2 = 2
2 | 4 = 6
4 | 4 = 4
4 | 6 = 6
4 | 8 = 12
8 | 8 = 8


No special effects have been observed from combining Power Booster and Blast Machine Gun.


Magic
0 = Normal
1 = Hard Lv.2
2 = Blow

Hard Lv.1 is notably absent. Magic also extends this variable to include additional effects though they are unrelated to knockback/stagger.
4 = Arc
8 = Grenade

Number 4 cause magic projectiles to travel in an arc as though influenced by gravity. This feature was present for the Fire Materia in the 2006 era of the online mode. Number 8 cause magic projectiles to stay in place when they hit a solid surface and after an amount of time they will dissolve/explode. The "Grenade Materia" this was intended for stayed unused in both the single player and the multiplayer.


Melee
I have observed two standards here so far.
0 = Hard Lv.1
1 = Hard Lv.2
2 = Blow
3 = Normal

...and...
0 = Normal
1 = Hard Lv.2
2 = Blow


The first standard, with a stagger trait even at value 0, are used for Vincent Valentine and Cait Sith.
Vincent's ground-melee combo in the post-original game consist of three strikes.
1st strike: Hard Lv.1
2nd strike: Hard Lv.2
3rd strike: Blow


This is why you can't juggle a midair enemy by using the first strike. Since that one is the weaker of the Hard-type attacks, it can not cause a midair enemy to experience Blowback. All of Cait Sith's melee attacks are Hard Lv.1 type.


Melee strikes performed by an enemy used the standard where Hard Lv.1 is absent and the value 0 equals no knockback. We can see how this standard matches the values used for magic attacks. The laser fired from the Black Widow's materia cannon does indeed use these numbers for stagger traits.
Apropos, the materia cannon's laser is influenced by the enemy's STR stat and not by their INT stat. Ultimately this doesn't matter since the BW's four stats (STR, DEF, DEX and INT) are all set to 0 but it's still humorous to me.
 
Last edited:
Damage Types: Short Blowback & Long Blowback

When Vincent uses a melee strike with damage type Blow the enemy is sent flying high and far: Long Blowback. Same effect when you use Thunder magic with Blow trait. Yet the Blast Machine Gun, specializing in knocking enemies over, will in most cases only blow enemies back a short distance: Short Blowback. What is going on?

When it came to Hard Lv.1 and Hard Lv.2 attacks, these were types clearly distinguished via their own bit flags. Such as for bullets...
Hard Lv.1: Value 2 [00000010 in binary]
Hard Lv.2: Value 4 [00000100 in binary]

However, the two variants of Blow stagger employ the same bit flags and are instead expressed via context.
Conditions for Long Blowback
- The target must be in a grounded state.​
- The attack must inflict 0 or less "damage" to the target's Stagger Gauge.​

If either- or both of these conditions are not met the end result will be a Short Blowback. Logically, Blowback achieved by reaching the Stagger Gauge threshold for that damage type will only ever be Short Blowback due to requiring an SG increment in the first place.

The rule about Long Blowback only happening if the attack's Stagger Gauge Power (SGP) is 0, or less, is so counterintuitive that I seriously wonder if its inclusion is an accident.


Let us explore some scenarios. For reference, here are the Stagger Gauge Power values for all the player's equippables.
Within square brackets, [], is what that item turned into in the post-original game.
0 Handgun Bullets
0 Rifle Bullets
0 Machine Gun Bullets
0 Death Penalty Bullets
0 Bullet 4
0 Bullet 5
0 Bullet 6
0 Bullet 7
1 Model Gun
1 Silver Model Gun
1 Gold Model Gun
12 Ultima Weapon
7 Quantum Cerberus
7 Zero Cerberus
1 Feather Hydra
0 S Griffon γ
0 Sonic Griffon
2 Blast Machine Gun
1 Bayonet Rifle
9 Shinra Handgun
10 One Eighty
10 Three Sixty
10 Five Fourty
10 Seven Twenty
15 Caballerial
7 Steelfish
10 Alley-Oop
15 Elgarial
15 Miller Flip
1 Broken Handgun
45 Scarlet Custom
25 Tomin
25 Balmen
25 Bror
25 Clynel
60 Caol
10 Tlemill
25 Ringbank
45 Ockdhu
50 Farran
1 Nelson
1 Stenberg
1 Ullman
1 Foresythe
20 Grogono
1 Terashima
1 Smith
1 Revis
1 Hopcroft
0 OF29
0 OF30
0 OF31
6 Vernis
6 Vernis Prime
6 Vernis X
10 Rouge
12 Rouge Prime
15 Rouge X
2 Parfum
2 Parfum Prime
2 Parfum X
0 OB9
0 OB10
0 Auto Scope
0 Auto Scope Revo
0 Sniper Scope
0 Materia Floater
0 S Auto Scope
0 OS5
0 OS6
0 Power Booster
0 Power Booster Revo
0 Auto Reloader
0 Rapidfire Unit
0 Rapidfire Unit Revo
0 Gravity Floater
0 Materia Booster
0 Materia Booster β
0 OO8
0 OO9
0 OO10
0 OO11
0 OO12
0 Guard Relief
0 Revo Guard Relief
0 Power Cross
0 Power Cross Revo
0 S Adjuster
0 S Adjuster Revo
0 M Adjuster
0 M Adjuster Revo
0 L Adjuster
0 L Adjuster Revo
0 Recoil Limiter
0 Silencer
0 Limit Breaker
0 Limit Breaker Revo
0 OA14
0 OA15
0 OA16
0 OA17
0 OA18
0 OA19
0 OA20
0 OA21
0 OA22
0 Fire Materia
0 Blizzard Materia
0 Thunder Materia
0 Cure Materia
0 Flash Materia
0 Bind Materia
0 Grenade Materia
9 Gatling Gun
9 OT1
9 OT2
9 OT3
9 Cerberus
9 Cerberus II
9 Cerberus III
10 P Cerberus
10 P Cerberus γ
11 Powered Cerberus
8 S Cerberus
7 S Cerberus γ
1 Hydra
1 Hydra II
1 Hydra III
20 P Hydra
60 P Hydra γ
-56 Gigant Hydra
1 S Hydra
1 S Hydra γ
0 Griffon
0 Griffon II
0 P Griffon
0 P Griffon β
0 P Griffon γ
0 Dueling Griffon
0 S Griffon
0 S Griffon β
5 Normal Barrel
5 Normal Barrel II
5 Normal Barrel III
5 Normal Barrel β
5 Normal Barrel γ
5 Master N Barrel
5 Guard N Barrel
8 SB7
9 Long Barrel
9 Long Barrel II
9 Long Barrel III
9 Long Barrel β
9 Long Barrel γ
9 Nova L Barrel
3 Faerie L Barrel
25 SB15
1 Short Barrel
1 Short Barrel II
1 Short Barrel III
1 Short Barrel β
2 Short Barrel γ
2 Gale S Barrel
0 Lucky S Barrel
1 SB23
0 Sniper Scope
0 Sniper Scope
0 SS2
0 Auto Scope
0 SS4
0 SS5
0 Materia Floater
0 S Auto Scope
0 Materia Floater γ
0 SS9
0 Rapidfire [Manaheart]
0 Rapidfire β [Manamind]
0 Rapidfire γ [Manasoul]
2 Power Booster
2 Power Booster β
2 Power Booster γ
0 Gravity Floater
0 Gravity Floater β
0 Gravity Floater γ
0 Auto Reloader
0 SO10
0 SO11
0 Materia Booster
0 Materia Booster γ
0 SO14
0 SO15
0 SO16
0 SO17
0 SO18
0 Motion Detector
0 Item Radar
0 Composite Radar
0 Quickturn
0 Cerberus Relief
0 Cerberus Relief β
0 Cerberus Relief γ
0 SA7 [M Cerberus]
0 SA8 [M Cerberus γ]
0 SA9 [M Hydra]
0 SA10 [M Hydra γ]
0 SA11 [Velvet Hydra]
0 SA12 [M Griffon]
0 SA13 [M Griffon β]
0 SA14 [M Griffon γ]
0 SA15 [Starry Griffon]
0 SA16
0 SA17
0 SA18
0 S Adjuster
0 S Adjuster γ
0 SA21
0 M Adjuster
0 M Adjuster γ
0 SA24
0 L Adjuster
0 L Adjuster γ
0 SA27
0 SA28
0 SA29
0 SA30
0 SA31
0 SA32
0 SA33
0 Power Cross
0 Power Cross β
0 Power Cross γ
0 SA37
0 SA38
0 Recoil Limiter
0 SA40 [EX File ①]
0 SA41 [EX File ②]
0 SA42 [EX File ③]
0 Silencer
0 SA44
0 SA45
0 SA46
0 Fire Materia
0 Blizzard Materia
0 Thunder Materia
0 Fire Materia
0 Blizzard Materia
0 Thunder Materia
0 Cure Materia
0 Blind Materia
0 Bind Materia
0 Grenade Materia
9 Death Penalty
9 Gatling Gun
0 Handgun Bullets
0 Rifle Bullets
0 Machine Gun Bullets
0 Death Penalty Bullets
0 Bullet 4
0 Bullet 5
0 Bullet 6
0 Bullet 7
1 Model Gun
1 Silver Model Gun
1 Gold Model Gun
2 Ultima Weapon
2 Quantum Cerberus
1 Zero Cerberus
1 Feather Hydra
0 S Griffon γ
0 Sonic Griffon
0 Blast Machine Gun
1 Bayonet Rifle
5 Shinra Handgun
8 One Eighty
10 Three Sixty
10 Five Fourty
8 Seven Twenty
18 Caballerial
7 Steelfish
7 Alley-Oop
15 Elgarial
15 Miller Flip
1 Broken Handgun
40 Scarlet Custom
24 Tomin
25 Balmen
25 Bror
24 Clynel
40 Caol
6 Tlemill
18 Ringbank
45 Ockdhu
50 Farran
6 Nelson
1 Stenberg
1 Ullman
5 Foresythe
8 Grogono
1 Terashima
5 Smith
0 Revis
1 Hopcroft
4 OF29
3 OF30
0 OF31
6 Vernis
6 Vernis Prime
6 Vernis X
12 Rouge
12 Rouge Prime
12 Rouge X
2 Parfum
2 Parfum Prime
2 Parfum X
0 OB9
0 OB10
0 Auto Scope
0 Auto Scope Revo
0 Sniper Scope
0 Materia Floater
0 S Auto Scope
0 OS5
0 OS6
2 Power Booster
2 Power Booster Revo
0 Auto Reloader
0 Rapidfire Unit
0 Rapidfire Unit Revo
0 Gravity Floater
0 Materia Booster
0 Materia Booster β
0 OO8
0 OO9
0 OO10
0 OO11
0 OO12
0 Guard Relief
0 Revo Guard Relief
0 Power Cross
0 Power Cross Revo
0 S Adjuster
0 S Adjuster Revo
0 M Adjuster
0 M Adjuster Revo
0 L Adjuster
0 L Adjuster Revo
0 Recoil Limiter
0 Silencer
0 Limit Breaker
0 Limit Breaker Revo
0 OA14
0 OA15
0 OA16
0 OA17
0 OA18
0 OA19
0 OA20
0 OA21
0 OA22
0 Fire Materia
0 Blizzard Materia
0 Thunder Materia
0 Cure Materia
0 Flash Materia
0 Bind Materia
0 Grenade Materia
9 Gatling Gun
9 OT1
9 OT2
9 OT3
2 Cerberus
2 Cerberus II
2 Cerberus III
3 P Cerberus
3 P Cerberus γ
4 Powered Cerberus
1 S Cerberus
1 S Cerberus γ
1 Hydra
1 Hydra II
1 Hydra III
20 P Hydra
40 P Hydra γ
100 Gigant Hydra
1 S Hydra
1 S Hydra γ
0 Griffon
0 Griffon II
0 P Griffon
0 P Griffon β
0 P Griffon γ
0 Dueling Griffon
0 S Griffon
0 S Griffon β
2 Normal Barrel
2 Normal Barrel II
2 Normal Barrel III
2 Normal Barrel β
2 Normal Barrel γ
2 Master N Barrel
2 Guard N Barrel
8 SB7
3 Long Barrel
3 Long Barrel II
3 Long Barrel III
3 Long Barrel β
3 Long Barrel γ
3 Nova L Barrel
1 Faerie L Barrel
25 SB15
1 Short Barrel
1 Short Barrel II
1 Short Barrel III
1 Short Barrel β
2 Short Barrel γ
2 Gale S Barrel
0 Lucky S Barrel
1 SB23
0 Sniper Scope
0 Sniper Scope
0 SS2
0 Auto Scope
0 SS4
0 SS5
0 Materia Floater
0 S Auto Scope
0 Materia Floater γ
0 SS9
0 Manaheart
0 Manamind
0 Manasoul
1 Power Booster
1 Power Booster β
2 Power Booster γ
0 Gravity Floater
0 Gravity Floater β
0 Gravity Floater γ
0 Auto Reloader
0 SO10
0 SO11
0 Materia Booster
0 Materia Booster γ
0 SO14
0 SO15
0 SO16
0 SO17
0 SO18
0 Motion Detector
0 Item Radar
0 Composite Radar
0 Quickturn
0 Cerberus Relief
0 Cerberus Relief β
0 Cerberus Relief γ
2 M Cerberus
2 M Cerberus γ
1 M Hydra
1 M Hydra γ
1 Velvet Hydra
0 M Griffon
0 M Griffon β
0 M Griffon γ
0 Starry Griffon
0 SA16
0 SA17
0 SA18
0 S Adjuster
0 S Adjuster γ
0 SA21
0 M Adjuster
0 M Adjuster γ
0 SA24
0 L Adjuster
0 L Adjuster γ
0 SA27
0 SA28
0 SA29
0 SA30
0 SA31
0 SA32
0 SA33
0 Power Cross
0 Power Cross β
0 Power Cross γ
0 SA37
0 SA38
0 Recoil Limiter
0 Silencer
0 SA44
0 SA45
0 SA46
0 Fire Materia
0 Blizzard Materia
0 Thunder Materia
0 Fire Materia
0 Blizzard Materia
0 Thunder Materia
0 Cure Materia
0 Blind Materia
0 Bind Materia
0 Grenade Materia
9 Death Penalty
9 Gatling Gun

The Blast Machine Gun (BMG) has the damage type Blow, value 8, in every version. In the initial release this gun had an SGP of 2 by default. Frustratingly, this makes the BMG incapable of Long Blowback in that version.

Boot up the later releases and the BMG now has an SGP of 0 by default. To ensure Long Blowback, your only choice is then to equip the Lucky S Barrel which also has an SGP of 0. All other available barrels have a Stagger Gauge Power higher than zero, so equipping those would make the Blast Machine Gun only capable of Short Blowback.

Be careful though even after equipping Blast Machine Gun + Lucky S Barrel. If you equip a Power Booster you'll once again have SGP above 0, removing the potential for Long Blowback once again.

enemy_short-blowback.gif
enemy_long-blowback.gif

Short Blowback grants the enemy half a second of airtime before touching the ground. With Long Blowback that airtime becomes almost a full second, thus buying you on average an extra half second before the enemy recovers.

The height and flight of the target can be influenced by the surrounding geometry, such as if the target is being pushed against a corner they are likely to fly even higher. The sheer impact difference between the two forms of Blow stagger always remain clear though. Interrupting some animations may also change the effect, such as having the enemy only flying straight up-and-down.


The Gigant Hydra (GH) is another interesting example.
GH in JP Original: Blow type, SGP -56.
GH in Post-Original: Blow type, SGP 100.


Stagger Gauge Power is a signed 1-byte variable, meaning it can represent values from -128 up to 127. If the SGP of the original Gigant Hydra was written as an unsigned 1-byte variable the value would be 200, as the value range would be 0 to 255.

What is the point of assigning a Stagger Gauge Power to a weapon that already has guaranteed Blow damage type? I speculate the developer wanted to be on the safe side here. If for some reason the variable for Blow type glitched out, at least the SGP would reach the enemy's threshold for massive knockback and so the same effect would be achieved.

It is possible the developer forgot SGP was a signed 1-byte variable. They may have intended for the Gigant Hydra to have an SGP of 200 but only later realized their mistake and thus "fixed it" by changing the -56 to 100 instead. The consequence, whether intentional or not, is that the Gigant Hydra lost the ability to cause Long Blowback. Because the original GH has an SGP below 1 it becomes guaranteed to cause Long Blowback. No choice of barrels or Power Boosters in conjunction can bring the SGP to above 0.

This also means that the original GH is the only way for the player to cause negative Stagger Gauge damage. The enemy's Stagger Gauge is a signed 2-byte variable, so it can indeed be lowered to values below 0. The Gigant Hydra can never shoot fast enough for the player to bring the enemy's SG down to ever more extreme negative values. The only real impact here is that if you removed the Blow type trait from the original Gigant Hydra the player could never cause any Hard- or Blow knockbacks on an enemy, defeating the purpose of assigning a "high" SGP to the gun in the first place.
 
The FF Relay Race is ahead of schedule and Dirge of Cerberus is now projected to begin at 22:00 EST today. See "Schedule" tab in this document.
---
Continuing on from the previous post about the two forms of Blow knockback....

Melee attacks and magic never increase a target's Stagger Gauge, regardless of Vincent's equipment. It is because of this that Vincent's Blow-type melee strikes will cause Long Blowback instead of Short Blowback on a grounded enemy. Same logic applies to magic.

I have attempted to find addresses that would give melee attacks a Stagger Gauge Power but have come up empty. It's possible no such parameter was assigned for melee attacks. I have not yet made in-depth investigations to see if magic attacks can be granted an SGP trait.

Here are the damage type traits of magic. When two traits are written the left one applies to the JP original and the right one applies to the post-original versions.
Fire Lv.1: Hard Lv.2
Fire Lv.2: Hard Lv.2
Fire Lv.3: Blow
Thunder Lv.1: Hard Lv.2 - Blow
Thunder Lv.2: Hard Lv.2 - Blow
Thunder Lv.3: Blow
Blizzard Lv.1: Blow - Hard Lv.2
Blizzard Lv.2: Blow - Hard Lv.2
Blizzard Lv.3: Blow

The logic of Short Blowback vs Long Blowback applies to damage taken by the player character as well.

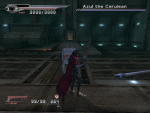
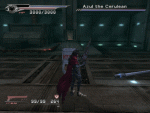
The cannon shot fired by Azul the Cerulean in Ch4-4 (Headquarters Under Siege) is by default a Blow attack. It has a Stagger Gauge Power of 1, meaning that even when Vincent is in a grounded state he will only take Short Blowback.
vincent_short-blowback.gif

If we use cheats to lower the SGP to zero then Vincent will be sent flying way further and higher.
vincent_long-blowback.gif

Did the battle designer intentionally leave the SGP at value 1 so that only Short Blowback would occur? Or is it simply a leftover from a template for bullet-type attacks? My personal feelings lean towards the latter conclusion but obviously I have no way of knowing for sure.


EDIT: Nuance discovered. If you deal a killing blow on an enemy by using the Gigant Hydra, even when the SGP is higher than 0, the enemy will be launched away according to Long Blowback. If the enemy survives the shot, Short Blowback applies. I could not find the same thing happening to Vincent if he is KO'd by Azul's cannon but clearly there can be special rules for how death animations are handled.
 
Last edited:
Cait Sith has knockback animations for taking Blow damage but NEVER displays the brief stagger that usually comes from Hard damage. Cait Sith is immune to Hard knockback and the player will not even experience any pauses/blocks to the button inputs when Hard would normally happen. I can't confirm if an unused Hard/stun animation exists in the data.

If Cait is in midair when taking a Hard Lv.2 strike he will experience Blowback, same as Vincent would. This is why it's best to stay grounded when you run past soldiers in the stealth section of Ch5-2, as their Hard Lv.2 melee attacks will not be able to stagger Cait.

ch5-2_taking-melee-hit.png

The bullets fired by the soldiers have no stagger traits, including no Stagger Gauge Power.

If you were to look at Cait's "Stagger Gauge Threshold" data, you would find these 2-byte values. Memory Viewer set to display decimal values.
n004_stagger-thresholds_marked.png
n004 = Cait Sith​

The threshold for Hard Lv.1 is unused. It is common for this variable to be set to value 1, including for Vincent, even when the actor is immune. If Cait's Stagger Gauge (SG) were to reach value 30 or higher while he is in midair, he would experience Blowback same as described before.

Enemies in Ch5-2, the stealth section, do not influence the player's SG. Opponents that Cait Sith face in the Extra Missions can build his SG but it is extremely unlikely that enemy attacks will make him reach the thresholds for Hard Lv.2 or Blow in any meaningful way. Azul's gatling gun in Extra Mission #26, "Cait Versus the Cerulean", does rapid-fire and deals +4 to the player's SG with each bullet. But the attack is already Blow type by default so the SGP becomes pointless.

Ergo the only thing that matters in the Cait Sith missions, in terms of accounting for knockback that may occur, are the inherent damage types of the enemy rather than their Stagger Gauge Power.


Targets in Ch5-2 are immune to all forms of knockback no matter what damage type you assign to Cait Sith's melee attacks. On top of that you can't deal any Stagger Gauge damage. Despite this latter fact the developers decided to give the Bull Heads high defense against SG effects.

ch5-2_e046-SG-thresholds_marked.png
e046 = Bull Head​

These are the Bull Heads with 10000 HP each, DEF stat 255 and with functions that always set the inflicted damage to 0. I love how they even went overboard with the SG thresholds, setting 999 for all three variables.


Many enemies have their Stagger Gauge thresholds set to the same values as Cait Sith:
Hard Lv.1 - 1
Hard Lv.2 - 30
Blow - 60
As a refresher, the logic is that when an attack brings the SG to value 30 or higher then Hard Lv.2 knockback occurs. When the value reaches 60 or higher, Blowback occurs and the counter is reset to 0.

Hard Lv.1 is different because it only requires that the attack deals +1 or more to the Stagger Gauge. It doesn't matter what value the SG already is, apart from when Hard Lv.2 or Blow is set to occur which obviously has higher priority. Because of this mechanic it is very easy to briefly stun common enemies when you have an SGP of higher than 0. Common enemies are not immune to Hard Lv.1.

I checked specifically to make sure Hard Lv.2 does not function according to multiples of 30 in this threshold scenario. Imagine if you set Blow to occur at value 120, then gradually build the enemy's SG to 30, 60 and 90. Hard Lv.2 knockback will only occur at the value 30 mark and NOT when you reach 60 or 90 which are higher multiples of 30. Thus it is clear that Hard Lv.1 and Hard Lv.2 operate differently.
 
Last edited:
Auto-Lock Quirk: Vincent turns, camera doesn't


What is happening in this video?
Sight Support is set to Automatic. This is equivalent to S Auto Scope in the original JP version. While in 1st-person mode I auto-lock onto a target. I then move past the target and make sure to NOT move the right analog stick. Moving Vincent around with the left analog stick is fine. If you move the right analog stick, which controls the camera, the game will realize you've moved too far away and you'll lose auto-lock on the target. Keep in mind you'll still lose lock-on if you create too much distance between Vincent and the object.

The red reticle, signifying a successful lock-on, will get confused and fly around the screen as you move away from the target. Sniper Scope does not allow auto-lock so it's important to not have that equipped.

The camera is facing away from the target but Vincent, even when he is invisible, will still be facing the target. Bullets and magic will fire directly at the target, giving the "illusion" of firing backwards. You can move between 1st-person and 3rd-person view without interrupting the effect. In 3rd-person Vincent will now be looking at the player while his gun is raised which is not a normal perspective to have.

This unintentional degree of auto-targetting can be achieved with enemies as well though some of their actions may disable the lock-on. The trick works on all versions of the game.

Outside of setting up for neat snapshots of Vincent holding his gun against the camera there is no real application in sight here. Defeating enemies by "shooting backwards" is fun but it's generally a slow method, even in the original JP game, so do not expect to see this in speedruns.


EDIT: While testing lock-on I learned that a Tempsave does not preserve your lock-on status. If you are locked onto anything, make a Tempsave, then load that Tempsave, the auto-targetting will have been lost. You'll still have the reticle raised and so it's easy to re-target something in front of you. Tempsaves are ridiculously good at creating a "freeze frame" of your current game status, so finding even tiny exceptions to this is something I appreciate.
 
Last edited:
Rosso's phase transition mechanics
and why Limit Flex works

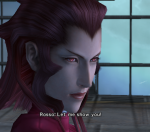
rosso-let-me-show-you.png

When you battle Rosso in Ch8-2, Fight for the Central Complex, she has two forms/phases: "Rosso the Crimson" followed by "Bloodburst Rosso". Both share the same HP bar and Rosso's max HP is 17000. Technically her max HP is 27000 and she counts as defeated when her HP is down to 10000 or lower but we'll just leave that as a sidenote. All the following math happens with 17000 as the reference for max HP.
Rosso's second form initiates when she has 75% or less of her max HP. To my surprise, this ruler is inside the area's bzd (basic zone data) file and not in the boss overlay file. The transition happens via an intermediate cutscene.

rosso-phase-threshold.png
(We will see soon where the value of 100 is used.)

After Rosso has taken damage the game divides her current HP with her max HP. Let's say her current HP is at 12921.
12921 / 17000 ≈ 0.76

This is multiplied with the value 100, seen in the memory viewer snapshot above.
0.76 * 100 = 76.0
This float value of 76.0 is converted into a whole integer, simply 76.

The game retrieves the threshold value of 75.0 from the bzd file and converts it to a whole integer, simply 75. What follows is then a comparison between 75 and 76.

75-compared-with-current.png

75 is less than 76 (jb = jump if below) and so phase 1, "Rosso the Crimson", continues.

I know for a fact that the transition to phase 2 happens when Rosso's HP is at 12920 or lower. But if you type the exact case of 12920 into the calculator on your phone or computer...
12920 / 17000 = 0.76
0.76 * 100 = 76
76 is too high for the phase transition!

The PS2 handles floating point calculations in its own unique way. That is why the resulting division is actually...
12920 / 17000 = 0.759999990463 (0x3F428F5C)
0.759999990463 * 100 = 75.9999923706 (0x4297FFFF)

When this float value is converted to a whole integer the game naturally rounds down. 75.9999923706 becomes 75.
Thus when the comparison happens, the threshold of 75 is compared with the current HP percentage of 75, the Bloodburst Rosso phase begins.
The application of damage from a single bullet, and the check to see if Rosso's HP is 75% or less of her max, all happen within the same frame. When the condition is fulfilled for the boss's 2nd form to start, the game will then initiate the screen to fade to black. The cutscene transition has begun.

Here are some "game locks" that happen when the screen fade has begun.
- Pausing is not allowed. Only when the screen fade is complete may you pause again.
- Transformations into- and out of beast form are not allowed. The Limit Breaker item can't be used.
- Real damage can NOT be applied on enemies, though the game may still calculate and display damage digits.

Vincent's handgun/Cerberus fires three bullets per shot. Each bullet is a projectile calculated separately. In other words they are not hitscan attacks. The game only handles one bullet per frame, so when all three bullets hit the damage is dealt over the course of three frames.

For simplicity, let us imagine our Cerberus shot deals 8000 damage per bullet, so 8000*3 at best. Here is what transpires when the Rosso battle begins and you press R1 to shoot. Frame counts here follow the 60 frames/second paradigm.

Frame 0: The R1 input has been registered. The game depletes three bullets from your magazine and the bullets are prepared to launch.​
Frame 5: At the starting distance between Vincent and Rosso it will have taken five frames, or 83 milliseconds, for the bullets to reach Rosso. Handgun bullets travel at 400 m/s. If you stand really far back you may gain another frame between shot fired and shot landed, upping the interval to 100 milliseconds (0.1 seconds).​
The first bullet has now inflicted 8000 damage and the game confirms that Rosso's HP is low enough for her second form to be activated. On this same frame the damage digits are displayed above Rosso's head. The HP bar of the boss retreats to above the visible part of the screen.​
Frame 6: The cutscene transition has initiated and with that the fade to black. Real damage is now locked from occurring. The second bullet still lands on Rosso however and the "fake" damage digits are displayed accordingly, shifting from 8000 to 16000 (8000*2).​
Frame 7: The fade to black is now more obvious. The third bullet from Vincent's shot lands and the damage digits roll up to 24000. The only real damage dealt was the first bullet, two frames ago.​
The fade to a cutscene clearly locks away many aspects of the game and it is Rosso's sole protector from becoming defeated with a single handgun shot.

As stated earlier, you may not transform (use a Limit Breaker) or de-transform while the fade to black is happening. Conversely, the cutscene transition may also NOT happen if a Limit Break transformation is underway! This is the key to the Limit Flex technique.

When pressing R1 to shoot Rosso you have 83 milliseconds (or 100 milliseconds if you retreated far away) to transform into Galian Beast. In the original JP version you hold down L1+R1 to transform, so in one swift motion you can hold down R1 for the shot, followed by holding down L1 and thus transform. In the post-original versions you use the Limit Breaker item to transform. The events will unfold thusly:

Frame 0: The R1 input has been registered. The game depletes three bullets from your magazine and the bullets are prepared to launch.​
Frame 5: At some point during frames 0-5 the player has used a Limit Breaker. The first high-powered bullet lands on Rosso and deals enough damage to initiate her second phase. Because you used a Limit Breaker it is impossible for the cutscene fade to happen! Several seconds will pass before the fade to black is allowed to happen. This means that REAL DAMAGE continues to be allowed to happen.​
Frame 6: The second bullet lands on Rosso and deals actual damage.​
Frame 7: The third bullet lands on Rosso and deals damage if the second bullet has not already defeated Rosso.​

absurd.png


Here is a funny clip of DynamiteDanTNT performing the Limit Flex back in June.

The same trick can be pulled off with Tempsaves. Pause the game at some point during Frames 0-5 (yes, pausing the game when the first bullet has landed will work too) and create a Tempsave. Load the Tempsave and an effect akin to Limit Flex will have happened. Because it takes the game several frames to set things back up again, there is enough time now for all bullets to deal damage on Rosso before damage-lock is activated. EDIT: I should note that it's inconclusive whether damage-lock is even activated at all after the Tempsave loads!

A consequence of the Tempsave method is that you can't skip the cutscene that transitions to Bloodburst Rosso, but Rosso will be defeated when gameplay resumes.
With the Tempsave method of defeating Rosso in a single shot the HP bar of the boss will stay hidden even after gameplay resumes. If the HP bar were visible it would be completely depleted.

The Limit Flex method, however, has a curious visual glitch. Initially the HP bar is depleted and set to 0 as you'd expect when the player has dealt 17000 damage or more. But after the intermediate cutscene, the game recalculates what the HP bar should show...and it decides to use negative values!

If each bullet dealt 8000 damage and all three bullets landed, then we get...
17000 - 8000*3 = -7000

Visually this is expressed as the HP bar "filling back up" to 7000. That becomes its way of expressing the value of -7000. So the more total damage you dealt then the more Rosso's HP will falsely appear to have recovered.

In this snapshot below each bullet dealt 9999 damage. Since two bullets was enough to defeat Rosso, the third was discarded.
17000 - 9999*2 = -2998

rosso_negative-HP.png
HP bar "filled" up to 2998.
 
Last edited:
Tempsave Glitch: Preserved Blowback Momentum


When Vincent has a raised reticle and is about to take blowback damage you can enter a curious state by creating a tempsave at that very moment. Load that save and instead of getting knocked back onto the ground, Vincent flies back as though the player did a controlled jump. On the ground, moving the left analog stick will only rotate Vincent. Getting airborne forces Vincent in the direction that the previous explosion sent him.

Inevitably you'll end up against a wall but numerous actions can cancel the glitch: Melee, dashing, transforming and being staggered.

The airborne velocity here is 3 meters/second, with inevitable deceleration happening as you land. If you repeatedly jump then your average velocity lands at around 2.7 m/s. Compare this to Vincent's maximum running speed of 6 m/s.

Any attack that cause blowback stagger can be used to trigger the glitch. Explosions, missiles, sword slashes, the Black Widow's laser etc. The main restriction is the timing required for this completely useless bug. If Vincent has already taken damage when you pause the game then it's too late to create Preserved Blowback Momentum. Often you need to pause the game 1 frame before you take damage, though sometimes the game is lenient and allows you 2-4 frames of leeway.

PBM can also be achieved with Chaos Vincent and has the same effects. Having a raised reticle is required for the glitch which is why PBM can't be achieved with Galian Beast and Cait Sith. Tutorial Mode does not offer the tempsave function, so PBM can't be unlocked with Turk Vincent.

It does not matter what your Sight Support is (Manual, Semi-Automatic, Automatic) or what your perspective is (third person, first-person) or if you are using the sniper scope. The glitch works all the same.

PBM can't be triggered in the original Japanese version. Any of the three post-original versions (NA, PAL & INT) will do if you want to try it out for yourself.

I actually discovered this bug on September 1st this year and mentioned it at the DCFF7 speedrunning Discord server. In the channel "game-knowledge" I can share stuff that isn't relevant to the speedrun. Only now did I decide to make a video and perform additional research. It was unknown to me before today that the raised reticle was a required component for PBM. The glitched disc icon nine seconds into the video is an emulation error. PBM works the same on console.
 
Tempsave Glitch: Reversed Reticle-vs-Posture Status

What happens, in the original JP release, if you load a tempsave that was created just before Vincent takes blowback damage with the reticle raised?


Vincent takes damage and falls back as expected but with one difference: The reticle stays active. When Vincent recovers, he remains in an idle standing animation. Moving around with the left analog stick in this state will be the same as though you have your gun raised. If you shoot while moving, Vincent's gun posture won't change! The end of the barrel flashes and a shot is fired straight ahead but your gun posture doesn't change.

If however you are standing still while shooting, Vincent will finally animate to stretch out his arm and gun. Then when you lower the reticle...Vincent is frozen in this animation state, allowing you to run around and see this posture from a different POV than usual.

Many actions undo this glitched out reticle-vs-posture state. Sometimes when you load the tempsave, the reticle will initially be active but then get lowered seemingly at random. I experienced this issue often enough that I would definitely rate this glitch as more inconsistent in execution than the PBM of the post-original versions.


Tempsave-Restart Glitch: Gun raised by default

At the end of the video, embedded at the start of this post, Vincent immediately raises his gun when the stage is restarted. This is not normal behavior for Ch11-1 and indeed not the usual behavior for most checkpoints.

The glitch works on all game versions and actually has nothing to do with the blowback experiments of these last two posts. All that's required is to have an active reticle, make a tempsave, load that tempsave, select Restart and suddenly starting out with a raised gun has become the default behavior!

Several checkpoints allow the glitch while others seem impervious. A random sample shows the glitch working in Ch5-4, Ch8-1-2, Ch10-3, Ch10-4 and Ch11-1. Meanwhile Ch5-1, Ch8-1-1 and Ch9-2 refuse to change the default behaviour for when Restart is employed.

The fact that a tempsave can influence the Restart function in this way blows my mind.

Fun fact: A tempsave can't retain your first-person zoom status from when the save was made, regardless if you are using the sniper scope or not. When you load the tempsave you'll be forced to third-person view.
 
Last edited:

Your momentum, and the direction of said momentum, when you climb onto a ladder is actually preserved. If you let go of the ladder you can see this vector play out. If you simply climb to the top or bottom of the ladder, the previously preserved momentum is undone.

Nothing more to it. Just wanted to share this tiny quirk with Dirge's movement that I didn't realize until three days ago.
 
Last edited:
Top Bottom