• There are currently leaks out on the internet for FFVII Rebirth; we have received legal notice about these being posted on the forums. Do not post any images, videos, or other media, or links to them from FFVII Rebirth or the artbook. Any leaked media or links to them will be deleted.Repeat offenders will be suspended.
    Please help us out by reporting any leaks, and do not post spoilers outside of the spoiler section.

DCFFVII Research Thread

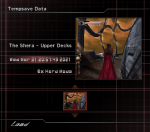
I love discovering these tiny version differences that are of absolutely no interest to anyone other than myself. If you create a Tempsave in Ch7-2 (Shera chapter, second half) when you are playing the NA versions (prototype and retail) then the Tempsave will show up like this:

Ch7-2_tempsave_NA.png
The tempsave shows up on a lonely row, sandwiched between the Chapter 7 and Chapter 8 checkpoints.

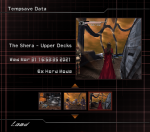
But if you are playing ANY OTHER VERSION of Dirge, the Tempsave will show up correctly and line itself up with the normal Chapter 7 checkpoints.
Ch7-2_tempsave_not-NA.png
As a refresher, Ch7-1 takes place in zone137, Ch7-2 takes place in zone189 and the lab/"Sick Bay" used by Shelke across both halves of Ch7 is zone149.

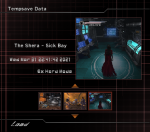
The error in the North American versions where the Tempsave gets inserted into its own row happens specifically for zone189. If you create a Tempsave while in the lab, zone149, the temporary save will line up accurately right next to the default Ch7-2 checkpoint.

Ch7-2_tempsave_sick-bay.png

I discovered this behavior while performing Tempsave Teleportation from every possible checkpoint in the NA prototype, as part of my zone207 (Proving Grounds) research. I confirmed in the NA prototype that no other area in the game exhibits this behavior of Tempsaves sandwiching themselves in the void between chapters. Other chapters in other versions of the game might contain errors like these but I have not checked this yet by tempsaving from every possible zone in every version of Dirge.


Depending on where in the game you create a Tempsave Teleport, different areas in zone207 will load or you may end up with an infinite 'Now Loading' screen and have no area load up at all. Without additional cheats, I have only managed to unlock 7 out of 8 areas in the Proving Grounds. The game never loaded more than one unique area at a time.

zone207 area : Checkpoint from which a Tempsave Teleport in NA prototype loaded said area
Huge Facility : A great majority of checkpoints.
Roof : Ch6-3 and Ch8-1-3.
Ruins : None.
Plateau : Ch1-4.
Desert : Ch3-4, Ch8-2-3, Ch9-3 and Ch10-4.
Major Fault : Ch5-4 and Ch11-4.
Valley : Ch2-3, Ch4-4, Ch8-1-2, Ch8-2-2, Ch11-2, Ch11-4 and Ch12-1-3 (only if teleport was made from the spiral area).
Battlefield Ruins : Ch11-5 and Ch11-6.

So far the NA prototype is the only one that actually loads the spires and the FF monster/creature textures on said spires. Though since the NA prototype, NA retail and PAL versions have the same files for this area, I am assuming that the spires would load in the other versions too if only the right hacking got applied. 99% of all this zone207 data was deleted for the JP International edition.

The prototype is also way more lenient when it comes to loading zone207 in the first place. NA retail and PAL tend to get stuck on an infinite loading screen way more often than the prototype. It was in fact only because of the prototype that I discovered zone207 at all, because the other versions had been so stubborn about not loading the Proving Grounds that I assumed the patch-work battle map just couldn't be visited. Turns out you can actually Tempsave Teleport to zone207 even in the two retail editions, you just need to teleport from the correct checkpoints.

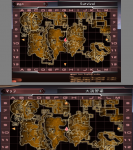
zone207 NA prototype "corrupted" menu map:
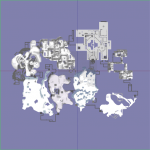
D4281E7D.png


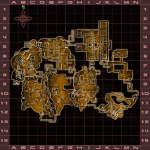
zone207 complete map, PAL version:
FC28CD87.png

NA retail menu map is the same except that it still has the letters W, S and E next to the compass.

 
A few posts ago I wrote that we wouldn't be seeing any more unique location names in these hidden zones because they would all just re-use the name "Kalm" everywhere. With the finding of zone207 I turned out to be, once again, joyously wrong.

The pre-release name of サバイバル has been directly translated to "Survival" and can be viewed on both NA and PAL when you visit the Proving Grounds. Only the PAL version still has Japanese text in there and it shows the release-version name 大演習場 [Proving Grounds] in use. Because the PAL game has its own unique resolution, not meant to display JP text, the kanji becomes a bit smushed.

zone207_location-name.png

*Edited to add: The location name remains the English "Survival" even if you boot the PAL game in French, Spanish, German or Italian settings.*

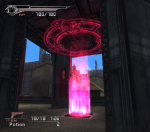
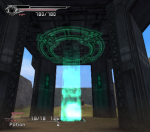
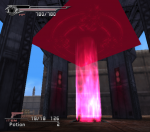
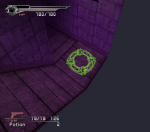
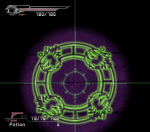
Above each glowing pillar of light, beneath each tall spire, is a slowly rotating circle showing the creature associated with the area.

From Roof sector:
roof_moogles-station-circle.png


From Battlefield Ruins sector:
battlefield-ruins_chocobos.png

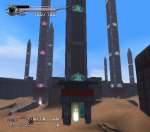
While I've only unlocked the rotating circle paintings in the NA prototype, I've seen the glowing pillars in the NA retail version as well. The pillars of light have this behavior that they will only start glowing when you get close, standing in the general vicinity of that station. I assume this was their intended behavior even though my Tempsave Teleportation will often cause the pillar bases to glow at all times.

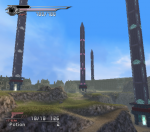
Major Fault
major-fault_spires.png


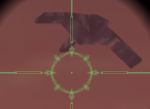
I am yet to see if the rotating circles were also to have this vicinity-based behavior. In general it's tricky to determine at this point what would have been the final behavior- and look of the Proving Grounds. For example when I load the Huge Facility in NA retail, one station will glow blue while in the NA prototype it always glows green. Perhaps they changed it or perhaps it's just a matter of what state the map was loaded in. For some reason I can never get the rotating Cait Sith circles to load in correctly and so instead they become this rotating square mess where you can only barely make out Cait Sith's form.

huge-facility_cait-sith-square.png

Sometimes even with the "correctly" loaded rotating shapes you will be able to make out the square edges because the edges will be bleeding color. I can easily see the online mode leaving in tiny imperfections like that, but not something as severe as the mono-color square seen above.
 
Last edited:
I wonder if the vicinity-detecting pillars of light were ever associated with any actual game mechanic or if they were purely an aesthetic touch. I can imagine something like "Team Moogle" trying to convert the Huge Facility spires into moogle spires, thus defeating "Team Cait Sith". But we quite simply do not have the documentation to know what the "quirk/twist/feature" of the Proving Grounds was, other than its ridiculous largeness.

It's a good thing they never placed a memory capsule in here. Guides usually refer to map coordinates to point out where a capsule is. "Go to E-5, you can't miss it." But because of how zoomed out the map is coordinates cover way too large sections of the map to be satisfyingly distinct. Definitely nitpicky of me but it is weird how they never adjusted the scale of the coordinates on each map.

fc28cd87-png.9551


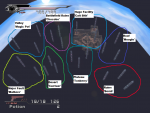
Taking my original bird's-eye view picture of the Proving Grounds, I crudely marked out the areas and their associated creature.

zone207_from-above_NA-prototype_areas.png

The way the eight maps are connected into one patched-together whole strikes me as a design choice that was pre-emptively in place all along. Of all the online battle maps, these eight are the only ones with the particular "shinra stations" (which here are granted super-tall spires) and the usually empty storage rooms that now become entrances to the corridors that connect the neighboring maps.

Plateau_new-path.png

Going back to the creature paintings, some designs draw more obviously from specific Final Fantasy titles. Tonberry and Magic Pot look like almost straight-up rips from their FF6 counterparts.


dcff7-comp_tonberry_magic-pot.png


The sideways-view of Cait Sith mid-walk could be loosely inspired by the FF6 Esper "Cait Sith" but still looks like its own design.

dcff7_cait-sith_comp.png

From this point the exact inspirations are more difficult to speculate on. The Chocobos, with their large heads and beaks, look to me like the FF9 versions. The Moogles too make me think of FF9 concept art but also FF Tactics.

Size doubled.

creature-textures_size2x.png

One of the main criticisms against Dirge of Cerberus is that it often doesn't quite feel like a Final Fantasy game. The UI and the menus do not evoke Final Fantasy and you don't get drowned in Final Fantasy creatures and aesthetics the way you do in a game like Crisis Core. The presence of these monster paintings in the Proving Grounds would have been a step in the right direction but not quite enough to give you those proper Final Fantasy vibes.

That is at least one thing that The First Soldier has going for it: This time you'll actually be battling Bombs, riding Chocobos, using Summons etc. You won't be pining for those few drops of Final Fantasy goodness the way one often does with Dirge of Cerberus.
 
Last edited:
Further data mining revealed that zone207 exists in the original Japanese release (SLPM-66271) and that the plan was there all along for the eight maps (“Valley”, “Battlefield Ruins”, “Huge Facility”, “Roof”, “Major Fault”, “Desert”, “Plateau” and “Ruins”) to connect into one.

Observe the MP gauge in the upper corner and how it is divided in two segments, the way that it was done in JORG single player and in beta.
zone207_JORG.png

After performing Tempsave Teleportations from every possible checkpoint in JORG (thus confirming in the process that the error of tempsaves spawning inbetween chapter rows in the chapter selection menu doesn't happen in the original retail release) I found that the area actually loaded successfully by doing Tempsave Teleportation from Ch10-4. All the spires are there, monster textures and all. The usual collision-breaking cheat I use, which removes walls but keeps you on solid ground, doesn't work here and I've been unable to freely explore. It's visible enough that only the Desert map loads.

Searching through the data files for not just zone207 but each individual map (in their own zones) show that many of them are very close to completion even in JORG.

zone207 - Survival / Proving Grounds
zone230 - Huge Facility
zone231 - Battlefield Ruins
zone232 - Valley
zone233 - Major Fault
zone234 - Desert
zone235 - Plateau
zone236 - Ruins
zone237 - Roof

It's not yet certain that zones 230-237, on their own, can be accessed via Tempsave Teleportation in the original JP version.

Most of the texture files for any given area has the zone number in them, so zone207 will have textures like "z207_a_7can1", "z207m_mark01" or "z207n_water1". What now turned to my attention is that almost every texture file for zones 230 - 237 have textures with the name "z207" in them. They don't have unique texture names with their own zone number, it all references back to zone207. Making the point even further just how early on it was planned that these eight maps would one day connect with each other.

I am quite astonished at just how much was completed even at this early stage, though most of the content on disc is in terms of collision data and textures. Zones 230 - 237 lack crucial "basic zone data" ("bzd" files) that tells which actors to load and all the maps talked about here lack the "TTTT" files that include additional important strings for initializing a map. Less crucially, but still relevant, none of these areas have menu maps or menu text files in JORG. It's a miracle I was able to load zone207 at all in this early version.

It wasn't my intention to linger this long on the Proving Grounds but it was just such a huge surprise to see the area so close to completion even in SLPM-66271. The zone files on the disc have now been properly documented and I have a better picture of what is- and isn't on there. There is way more multiplayer content here than I initially thought, but it's still a relatively small amount compared to what's on the NA and PAL discs.

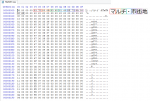
One neat discovery is that zone202, already dealt with in the previous page, has a different name in the game files. The Deepground lobby is called マルチ・市街地 [Multi - City]. This exact name was later moved to zone225 and zone202 became マルチ・ロビー [Multi - Lobby]. Keep in mind these files I'm referring to do not dictate what location name is displayed in the menu map. These are just zone names, in Japanese, that happen to be in the game files.

zone202_name__slpm66271.png

Most of these zone names would find their way into the "zonelist.txt" file that summarizes all the zones in the game, but SLPM-66271 lacks such a convenient file. Though sometimes there are discrepancies between the zonelist.txt and the individual "zone name files", so it's relevant that I compare the zone names across all the various sources.


To finish off zone207, here is the ring of Bombs that were once so mysterious in the screenshot from daijinn's blog but that we now know belongs to The Proving Grounds.

bombs-leading-to-Ruins.png


bombs-leading-to-Ruins_zoom.png
 
I keep making more discoveries before I am able to finish reporting on the old observations. What a great problem to have. :monster:

zone008 - BG Test [BGテスト]
Exclusive to NA and PAL

How I have longed for a test room that really FEELS like a test room, complete with mono-color tiles with numbers and letters on them. A place that really feels like a playground where the mechanics of the game are obviously tested. The discovery of zone008 satisfies an unspoken need. The only thing missing now is a debug room with lots of menu options.

*WARNING: Sudden loud noises*

The "BG" in "BG Test" probably stands for "Basic Gameplay" or something along those lines.


The skybox texture here is called "z133o_sky01". Zone133 is the mountain path (and bridge) on your way to WRO HQ or in other words Ch6-2. However, the final game uses a way brighter skybox and with the sun set higher.

The texture found in zone008 matches up better with pre-release screenshots depicting Ch6-2.

pre-release_texture-comparison.jpg

Take into account of course that the sun is a separate, glowing texture that changes the overall color somewhat.

Even though the texture was dramatically changed it has the same internal name as the texture in BG Test.
ch6-2_final-sky-box.png


No birds are ever visible during real-time gameplay and certainly none that look as awful and primitive as those in the test map. The birds seem to be coated with the z133o_sky01 texture.

zone008_bird.png

If these birds were perpetually off in the far distance and the player had no way to zoom in on them they might have worked as a background element. But this is a shooter and you can generally zoom in on content, with Chapter 7 (The Shera) being an obvious exception. Had birds been implemented they would have had to increase the polygon count and provide them with unique model texture sheets.


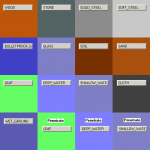
Texture "z008material". This is the only texture within the map that is identified as uniquely belonging to "zone008".
z008material.png

The three "Penetrate" textures denote that bullets will fly straight through and actually land on the other side. The other textures/environment-types completely stops your bullets in their trajectory.

While making the video I didn't think to also jump on the surfaces to show that there are unique sound effects for jumping/landing as well. The video gets the point across at least. Were I to audibly demonstrate each sound variation then the video would have been an hour long.

The sound document "jsnddb.txt" describes these sounds. Small selection from the document:

bsj_102 軽い着弾(水) Light landing (water)
bsj_103 普通着弾(水) Normal landing (water)
bsj_104 重い着弾(水) Heavy landing (water)
bsj_105 軽い着弾(砂) Light landing (sand)
bsj_106 普通着弾(砂) Normal landing (sand)
bsj_107 重い着弾(砂) Heavy landing (sand)

fsj_171 ヴィンセント(ビースト)歩き(鉄) Vincent ( Beast ) walk (iron)
fsj_172 ヴィンセント(ビースト)走り(鉄) Vincent ( Beast ) ran (iron)
fsj_173 ヴィンセント(ビースト)ジャンプ(鉄) Vincent ( Beast ) jump (iron)
fsj_174 ヴィンセント(ビースト)着地(鉄) Vincent ( Beast ) landing (iron)
fsj_175 ヴィンセント(ビースト)歩き(土) Vincent ( Beast ) walk (soil)
fsj_176 ヴィンセント(ビースト)走り(土) Vincent ( Beast ) ran (soil)
fsj_177 ヴィンセント(ビースト)ジャンプ(土) Vincent ( Beast ) jump (soil)
fsj_178 ヴィンセント(ビースト)着地(土) Vincent ( Beast ) landing (soil)
fsj_179 ヴィンセント(ビースト)歩き(砂) Vincent ( Beast ) walk (sand)
fsj_180 ヴィンセント(ビースト)走り(砂) Vincent ( Beast ) ran (sand)
fsj_181 ヴィンセント(ビースト)ジャンプ(砂) Vincent ( Beast ) jump (sand)
fsj_182 ヴィンセント(ビースト)着地(砂) Vincent ( Beast ) landing (sand)

There are hundreds of sound effects like these not just for Vincent and his forms, but also for the sound each enemy type make when they interact with surfaces.

fsj_315 サハギン歩き(石) Sahagin walk (stone)
fsj_316 サハギン走り(石) Sahagin run (stone)
fsj_317 サハギンジャンプ(石) Sahagin jump (stone)
fsj_318 サハギン着地(石) Sahagin landing (stone)
fsj_319 サハギン歩き(鉄) Sahagin walk (iron)
fsj_320 サハギン走り(鉄) Sahagin run (iron)
fsj_321 サハギンジャンプ(鉄) Sahagin jump (iron)
fsj_322 サハギン着地(鉄) Sahagin landing (iron)

fsj_393 デュアルホーン歩き(土) Dual Horn walking (soil)
fsj_394 デュアルホーン走り(土) Dual Horn ran (soil)
fsj_395 デュアルホーンジャンプ(土) Dual Horn jump (soil)
fsj_396 デュアルホーン着地(土) Dual Horn landing (soil)
fsj_397 デュアルホーン歩き(草) Dual Horn walking (grass)
fsj_398 デュアルホーン走り(草) Dual Horn ran (grass)
fsj_399 デュアルホーンジャンプ(草) Dual Horn jump (grass)
fsj_400 デュアルホーン着地(草) Dual Horn landing (grass)
 
Last edited:

Strangelove

AI Researcher
AKA
hitoshura
bsj_102 軽い着弾(水) Light landing (water)
bsj_103 普通着弾(水) Normal landing (water)
bsj_104 重い着弾(水) Heavy landing (water)
bsj_105 軽い着弾(砂) Light landing (sand)
bsj_106 普通着弾(砂) Normal landing (sand)
bsj_107 重い着弾(砂) Heavy landing (sand)
just as a note, these are specifically the landing/impact of bullets, as opposed to the rest of the landings later on (which is landing on the ground)
 
Thanks @Strangelove! There definitely are a lot of improvements to be made in the translations of the jsnddb document.


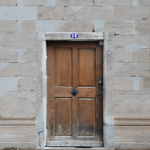
Texture "z126_door". Though very fuzzy and thus not entirely obvious at end of video 1, the door indeed has "14" written above it.
z126_door.png
Good job on the map creators: They made it so that the door handle was on matching sides even when they mirrored the door texture for BG Test.

There are seven textures in zone008 that are identified as "zone126" textures. This includes the primary ground texture of BG Test.

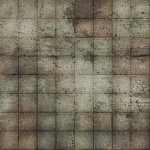
"z126_04"
z126_04.png

If the above texture looks familiar then that's because it is a flattened version of the same texture used in Tutorial Mode where you play as Turk Vincent. The coloring is also slightly different.
6A53F8B3.png


Zone126 is the map mysteriously called テトリス [Tetris]. Tetris has enough data that it can probably be explored, but so far I haven't been able to unlock it. The actual Tetris map also only has ONE texture file: "z126_01" which is also used by zone008/BG Test.

z126_01.png

So if I am ever able to unlock zone126 as a traversable map I expect that it will be covered in only the above texture, albeit with different colors applied here and there.

The zone name "Tetris" does confound me though. The simplest explanation is that the area has objects and/or environment geometry that looks like stacked Tetris objects. But maybe there's a more obscure explanation, like the map perhaps originally being titled "Test List" [テストリスト] and the two katakana ス and ト got removed and it was changed to "Tetris"? :wacky: Don't pay too much mind to this conspiracy theory of mine.

If I load BG Test in the NA prototype the area will partially load enemy data. The enemies are invisible and I won't be making a video showing any enemies until I'm sure that I can properly unlock most- or all of the enemy data.

Adjacent to the z126 door "house" there will be infinitely spawning DG soldiers of the standard, male type (e027). Each one has 220 HP and as you defeat the soldiers the game will make room for more unique iterations of this soldier type, each with their own HP counter. The game starts with only two unique e027 models in memory and as I kept defeating them, seven more eventually occupied previously unused memory space.

Whether intentional or not, the DG soldiers just stand around waiting to be killed. For each defeat they drop "Handgun Bullets x20". This is interesting because the final single player game only drops Handgun Bullets in multiples of 3, due to how the Cerberus gun works. In conjunction with the presence of item OI7 (Online Item 7), which is just the online mode version of Limit Breaker, you'd think that BG Test was primarily intended for testing the online player character. However the map has no references to o099 (the model string for the online player character) so clearly BG Test is at a stage here where testing o099 is no longer relevant.

zone008_handgun-bullets-pie.png

Creating an "ammo pie" using the infinitely spawning soldiers and their drops. Players of the online mode used to create pies like these by dropping their own ammo repeatedly in the same spot. This "Drop" option is not available in single player.


The other enemy data that I'm able to load are three invisible "Blue Walls" (e078) that fly around in wide trajectories based entirely on where Vincent is standing. The blue walls are used by Omega Weiss and they can also be triggered in the Extra Mission where you fight Weiss, Nero, Rosso and Azul all at the same time. Though unlike the final-game iterations, each blue wall in zone008 has a whopping 9999 HP.
 
BG Test, Video 2

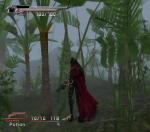
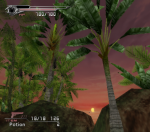
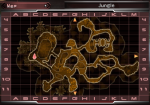
While zone008 does not have its own menu map, it is easy enough to spot that the jungle portion is like a smaller version of the westmost area in the final Jungle map (zone201).

zone201_jungle_menu-map.png

Your standard Dirge player will only ever see Jungle in Extra Mission #8, "Lord of the Jungle". As an aside, this mission is "zone117" but it inherits graphical data from zone201. This is the case with all the extra missions: They are their own "zone" but they inherit all their collision data and graphical textures from a "master zone", typically the multiplayer-zone maps.

The final jungle map is covered in perpetual mist so deep that you can never see very far ahead, much less see the sky at all. Some parts of the jungle are more open while others are overflowing with plant life that will obscure the view for the player.

jungle-final.png

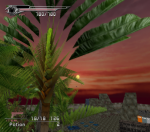
This makes the jungle area in BG Test so much more of a refreshing sight. There is no fog, the sky provides a bright contrast and the sun is on the horizon. The video upload can't make justice of just how much more radiant this test jungle is. Naturally these snapshots look extra bright because they come from emulator, where the graphics aren't stretched the way they'd be on console, but even taking that into account the BG Test jungle is way bright.

jungle_zone008_b.png

Your jungle path in BG Test is almost not obscured at all due to the lack of bushes and small plants on the traversable ground.

At least one of the tree/palm shapes present in zone008 are not visible anywhere in the jungle of zone201. See this full-bloom tree, which looks like it was inspired by a Traveller's Palm.

jungle_zone008_a.png

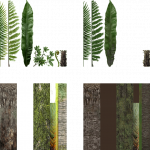
The extra brightness and contrast is not just due to the lack of fog, the presence of a skybox and the more exciting tree shapes. The textures themselves are brighter in zone008 than they are in zone201.

Left: zone008, BG Test. Right: zone201, Jungle.
zone008_vs_zone201_jungle-textures.png

While the general toning down of color makes sense for the fog-bathing final map and its general function of limiting your sight, a fogless, bright version of Jungle would have been nice to have for the final game.
 
Last edited:
Intermission

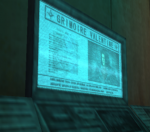
The beginning of Ch11 has a flashback where Vincent finds an open file about his father.

ch11_grimoire-file.png

Dumping the texture for this screen reveals a clean version.

B6507009.png

And look, it's the return of the tile texture from Tutorial Mode.

grimoire_tutorial-tiles.png


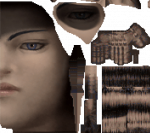
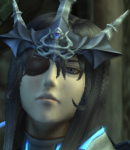
Moving on from grey to silver, I have long assumed that Argento's eye color would be silver. It is in fact blue with a golden ring around the pupil. Very similar to Weiss, though the golden ring in Argento's eye seem to lean more towards golden brown than golden yellow. Weiss has more hi-resolution versions of his eye textures than what exists for Argento so we can't make a perfect comparison.

079EE744.png

argento_eye.png

Looking here like if we were to remove the eyepatch texture then we would see a complete, albeit shaded, eye underneath.
 
Last edited:
OmegaReports has uploaded crisp 1080p versions of the online mode cutscenes. While there are some emulation artefacts in there it is still the highest quality upload on YouTube as far as I'm aware. I am thanked in the video descriptions because I provided the memory card save.

Onto something completely different, the issue remains that my modded PS2 Slim (SCPH-75004) can't read discs. This makes it more cumbersome for me to play NTSC-US and PAL versions of games. Here is my progress thus far though.

One of the most common errors that happen with a PS2 is the laser gets worn out and the console can no longer read discs. The breakdown can be gradual, as it was for me. I was able to play Dirge of Cerberus for sometimes several hours before the game's music suddenly stopped and game data stopped being loaded. The problem got worse until each boot-up led to the game crashing 1-2 minutes in.

There are different lasers depending on your PS2 model. This is what a blog post on Ethereal Game has to say:
PS2 laser compatibility list:

Fat SCPH-3000x uses KHS-400B however use 400C

Utilize a 400C to change an A or B version due to improved reliability and accessibility.

  • Fat SCPH-5000x utilize a KHS-400C
  • Slim SCPH-7000x utilize a SPU3170
  • Slim SCPH-7500x utilize a PVR-802W
  • Slim SCPH-7700x use a PVR-802W
  • Slim SCPH-9000x utilizes TDP-182W
Googling for TDP-182W only give results showing the laser + the mechanical construction on which the laser rests. The laser itself on these "TDP-182W" look like the PVR-802W. Not sure if SCPH-9000x models always require that you get this full "laser + motor-driven structure".

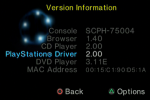
Online blogs and tutorials on YouTube show the PVR-802W being used for laser replacement inside PS2 Slim models. My modded PS2 Slim has a unique coating which doesn't show the version number on the console itself but you can check the version info by pressing Triangle on the boot-up screen.

my-modded-PS2_SCPH-75004.png

Accordingly I bought a PVR-802W laser, same as the tutorials. This was wrong.

laser-too-short_crop.jpg

The PVR-802W was too short and the right arm was meant to rest on a platform where it would slide up and down: It was not designed to attach to a metal bar on the right, as was present in my console.

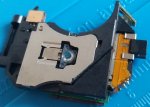
What I should have bought was a SPU3170. That one is wide enough and will actually attach to both metal rods, not just the one on the left. I bought mine from a German retailer and the laser arrived within only 2-3 days. Super fast delivery.

The risk of having a modded console that you don't know the full history of is that you do not know how it was assembled. Quite possibly the CPU and bios of my console is indeed that of an SCPH-75004 but it may have been constructed with parts from an SCPH-7000x, ergo why a different laser than expected was required. Either that or the tutorials online are erroneous and have not taken into account all the PS2 model differences.

Before replacing the laser on your PS2 Slim I recommend opening it up and checking what type of laser is already in there, seeing if it is attached to one metal bar or two, etc.


The next challenge when your laser has arrived is to desolder the anti-static point (apparently called a "solder blog") or else the component will not function in your PS2 console. You will need a soldering iron and something to remove the molten solder blog with, either using a solder sucker/plunger or some desolder wick. I can only recommend using desolder wick. If you don't already have a soldering station this is where things can get quite expensive, as it did for me.

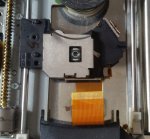
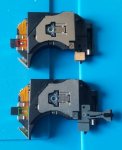
In the photo below you see two SPU3170 lasers: The upper one is the new laser with the anti-static point still intact and the lower one is the old, worn-out laser where the anti-static point was already desoldered long ago.
laser-old-vs-new.jpg

Not having any real experience with soldering nor with desoldering, I purchased test boards and solder wick (copper wires with flux) to test applying solder and then soaking it up with the wick.

desolder-tests.jpg

Observe the copper wires with silvery tin that has been absorbed into them. The laser in the picture above is the PVR-802W. Because I ended up not needing this laser, I used it for desoldering practice. Desoldering on a flat surface like a test PCB is already finicky enough. Desoldering a PS2 laser is more difficult because it isn't perfectly flat and it is more prone to moving around. A solder sucker is meant to vacuum up molten tin but I could not use one correctly on the PCB so there was zero hope of using a plunger on the laser to suck up the molten solder blog. Absorbing the metal using desolder wick was my only real option.

Pretty sure I accidentally destroyed the PVR-802W when I used it for practice. If you are a complete n00b with soldering, like me, do not apply a soldering iron on the laser's anti-static point the first thing you do. Practice first on a PCB and perhaps on some of the metal on your old laser.

Continued in the next post...
 
I knew then what to do, roughly speaking. Apply the desolder wick/wire on the solder blog, apply heat on top with a soldering iron and let the copper wire absorb the metal. The copper wire is very conductive to heat, so do not touch the wire while heat is being applied. Let your fingers stay only on the circular box/container holding the wire.

desolder-wire.jpg

From my desoldering practice I knew that a big risk was the molten metal gluing together the copper wire with the laser. Re-melting the metal and un-sticking the wire is possible but finicky. Indeed that's a good word for this entire process: Finicky. Even knowing what to watch out for...I still ended up accidentally gluing the wire onto the laser.

Online soldering tutorials are usually zoomed in on the tiny components. This is good for showing and teaching. The problem is that since I do not have any magnifying glass or easy way to control my lighting, the amount of visual feedback I get from the soldering process is limited. Because soldering involves very fast processes of melting and solidifying, having a proper visual on what you are doing and seeing what is happening is important. Not having this kind of feedback is a prime reason why the wire ended up glued onto the laser for me: Everything happened too fast and it was too small for me to see clearly.

You definitely can get the job done without extra lamps and magnifying glasses, same as I eventually did, but soldering really is the kind of craft where your job becomes infinitely better and easier the more money you throw on good equipment.

Managed to unstuck the wire from the laser but I still had more metal to absorb from the anti-static point. At every stage I was scared of damaging the laser, having no idea how heat resistant each individual part of the laser is. Carefully applying the desolder wick over and over, I eventually got this result.

New laser vs old laser

first-desolder.jpg

There were definitely lots of metal left on the new laser but I was too scared to apply any more heat from the soldering iron. Was convinced that I would damage the laser if I went any further. It *looked* similar enough the old laser and its desoldered component, after all.

Exhausted, I installed the new laser into my PS2 Slim. Booted up the console...and I was met with worrying sounds like the console's internals smashing into each other. The console booted up, yes, but it did not read discs and the disconcerting sound turned out to be the laser repeatedly smashing into the disc spinner.

Not having any other way forward, I detached the laser and desoldered those last bits of metal I had previously not dared to get. The result was a much cleaner desolder job with the two parallel paths on the orange/golden strip DEFINITELY running free through the former anti-static point.

second-desolder.jpg

Installed the laser again...and now the PS2 made friendly, familiar sounds. I take this as a sign that it really matters to remove as much of the "solder blog" as you can from the laser or else it will impede the electrical signals, even if you think it looks "good enough" to leave some metal mountains left standing.

But the console still won't read discs. Fudge.

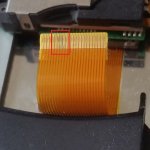
My only guess from this point is that the "laser flex ribbon cable" connecting with the laser needs replacing as well. The photos don't do it justice but the ribbon looks really banged up in one section.

laser-ribbon-damaged.jpg


laser-ribbon.jpg

The ribbon cable was probably damaged when I detached it from the original laser. At the time I did not know that the ribbon was connected with teeny tiny arms on the laser, so I only got the ribbon loose after applying A LOT of force. If I was a seasoned nerd used to PCBs and these soft ribbon cables I would probably have known about these tiny arms and how to properly remove ribbons. But as it stands ribbon cables still confuse me. One is so used to electrical components making a clicking sound when they are attached but the ribbon cable, seemingly, does not cause a clicking sound when it is applied properly.

The quality of the ribbon-holding arms on the lasers also seem to differ. On the old SPU3170, the ribbon cable was attached quite strongly. On the new SPU3170, the ribbon is always one breath away from detaching no matter how well I try to put the locking-arms in place on the laser. Either I just don't know how to operate these levers or it really is a matter of production quality.


And that's where I'm at now. I've ordered two ribbon cables (one extra in case I accidentally destroy one) that should arrive shortly and hopefully they are the right type for this job. If I'm able to correctly replace the ribbon cable and the PS2 Slim still won't read discs...I have no idea where to go from there.


PS2 laser replacement is one of those repairs that is demonstrated and spoken of in online tutorials as though it's the easiest thing in the world. For seasoned hardware tinkerers it probably is. But for me this is a massive and exhausting challenge. I'm not used to picking apart electronics, not used to soldering and I had to spend A LOT of money just to reach the point where I could desolder the anti-static point on the new laser. So far, adding together the cost of the complete solder station and the PS2 lasers, I have now spent 2000 SEK (239 USD, 197 EUR) on this project.

The main saving grace is that getting a proper soldering iron (with adjustable temperature and on/off switch), a solder mat, desolder wire, flux etc is a long-term investment that can pay dividends in the future. The tools will be useful for other projects, not just PS2 laser replacement.

If you find yourself *only* wanting to replace the PS2 laser however, with no ambition of tinkering with hardware in the future, I recommend finding a resourceful person who can do the laser replacement on your behalf instead.
 
Last edited:
Speedrun of Extra Mission #01, Zephyr Heathlands
In-game time of 00:57
Real time may be measured as anything from a high-57 to a low-57 depending on the timing standards that the speedrunning community settle on.


Guard N Barrel and Cerberus Relief Gamma equipped on Weapon Slot 1 for maximum defense.
Played on a Japanese PS2, model SCPH-50000.
Game version: DCFFVII International, SLPM-66629.

EDIT: The run will not be accepted on the speedrun leaderboard until at least two people have submitted runs. Will be trying to build hype on the Dirge Discord channel to get this thing rolling.
 
Last edited:
Speedrun of Extra Mission #46, An Invitation to Illusion
In-game time of 01:06


PS2: SCPH-50000 | Game: SLPM-66629


I use Fire Lv3 (Fire Materia + Materia Floater Gamma) to destroy the drum can from a safe distance. Thanks to Manasoul's MP regeneration I have just enough MP for a fire spell by the time I reach the room with the drum can. Even with maxed out defense (Guard N Barrel + Cerberus Relief Gamma) you would not survive the blast from the drum can but being hit is not an option either way because getting thrown back would slow you down.

Initially I also used Fire Lv3 on the floating cargo crate but I felt slowed down by the method. Making a jump for the cargo crate and shooting it head on both was more consistent and felt more fluid.

Mission #46 is a great example of the game's flaws and complexities. The dozens of electromagnetic barriers eat away at the PS2's rendering capabilities and you will find frames being eaten away at key places while running around. Those few lost frames can be enough to disorient you and make you run into a wall or miscalculate just how long your dash was. There are also plenty of invisible hard walls and plenty invisible "soft walls", the latter which will slow you down or outright stop you unless you tweak your angle and approach.

For example the pillar at 0:52, on Vincent's left, will stop Vincent if he is in mid-air and it will greatly slow down his dash if you dash too early. But by dashing close to the pillar, Vincent can get through this narrow section quickly. The open door at 01:04 will also stop Vincent completely in his tracks if you are just a little bit off to the right even though visually you SHOULD have free passage! There are over a dozen of tiny collision traps like these which will hurt your speedrun unless you memorize where these invisible obstacles are.

An Invitation to Illusion is a high-intensity mission, especially when compared to the straightforward Zephyr Heathlands, and during my first play session this morning I found myself dizzy and "losing mental frames" because there was just so much precise platforming, many quick turns and fast decisions. While I was very close to an in-game time of 01:05, getting a near-perfect run with only one or two fewer errors to actually get there will be very difficult. I was stuck on a 01:08 for almost an hour because it was just that difficult to get a more clean run.
 
Last edited:
Speedrun of Extra Mission #03, Wastelings
In-game time of 00:45

PS2: SCPH-50000 | Game: SLPM-66629

A short but satisfying mission because it makes use of two of my favorite things: Killchains and the manual scope. While speedrunning usually provides no reason for you to veer from Automatic or Semi-Automatic aim, you need Manual aim here if you are to have any hope of consistently hitting the Dual Horn's weak spot.

Weapon Slot 1: Fire Materia + Materia Floater Gamma equipped to get Fire Lv3. Manasoul equipped for gradual MP regeneration.
Weapon Slot 2: Ultima Weapon + Nova L Barrel + Power Booster Gamma

The randomness of the Guard Hounds and Crimson Hounds can easily mess up a run, either by attacking Vincent too quickly or by not clumping together in a convenient fashion for your Fire Lv3 shots when you build up that killchain. Since single-projectile attacks are capped at 9999 damage (sometimes less), making the three-projectile attacks from Ultima Weapon the key to defeating the Dual Horn quickly.


Gocu has now dethroned me on Extra Mission #01 and achieved a 00:56! The volume accidentally got near-muted, but the achievement is very real. Once again Gocu goes for clean dash-jumps and does not suffer for it. While the dash-jump-cancel ("City Dashing") technique is objectively faster when done right, the precise timing of it is not clear and the way it stresses the player may easily lead to them jumping early rather than allowing the high-speed dash to play out. The fact that good ol' dash-jumping has not been rendered obsolete is also a sign of how far away Dirge is from being a fully optimized speed game.
 
After a lot of hard work I managed to trim my EM03 record down to a 00:40 IGT.


Dash-jump-cancelling is exhausting and after about an hour of play I can no longer keep a rhythm. For that reason I make do with normal dash-jumps a lot of the time. The true time saves here come from keeping a mostly straight line, getting good hound RNG and by landing that final super-critical hit. I decided to equip S Adjuster Gamma to my second weapon slot. This way, when attacking at close quarters, all three bullets from an Ultima Weapon shot will converge on the same point. This way the odds are greater that all three bullets land on the Dual Horn's weak spot, rather than just one or two of the bullets in a single shot.

If I was able to perform perfect city-dashing all the way, get awesome hound RNG, fire fewer Fire Lv3 shots and land only perfect shots on the Dual Horn I am pretty confident that the in-game time could be trimmed down to a 00:38 (or even a godly 00:37).

When I'm shooting back with Fire Lv3 against the hounds I have to make sure that I don't turn the camera too far away in the Dual Horn's direction. If I do, the Fire Lv3 shots will despawn and not hit any targets! Reminds me of Ch10-4 and the way that my Fire spell would despawn and miss a drum can if I changed out of sniper-mode too quickly.
 
Not gonna lie, my first reaction upon discovering Dirge of Cerberus speedrunning was "Wow, they are really doing it. The mad lads are putting up with HA HUH HA HUH HA HUH for hours on end. That's crazy."

I think it's easier to watch Dirge speedrunning videos when you have additional elements on screen like a running clock, the runner themself, the runner's commentary and slightly muted gameplay audio. At some point I want to start streaming my attempts and include things like a proper overlay and a real-time clock but for now I'm making due with the recording method I'm used to.

The advantage of being the runner is that you become more occupied with the timing rather than the annoyance of the repetition. The HA and HUH become markers to indicate if you ended the dash too early or too late. On one hand a mod of Dirge that removed the HA HUH would make the game more appealing to viewers but it would also make the proper timing of dash-jumps more difficult for the runner.

One idea the community presented is marathoning all 46 missions and having that as a speedrun category. Such a run would arguably be more hardcore than a story mode run because of both its sheer length and the deep memorization required. Getting below even just 4 hours of total time in an EM marathon would be a massive task. In comparison the story campaign is approaching sub-1h30m and new runners will typically have completion times just above 2 hours and then gradually improve.

I do not know for sure if I will ever devote myself to speedrunning story mode. All I care about running at this stage are individual Extra Missions. Feels good to know that I have All S Ranks behind me and now I can justify running the missions. :wacky:

"HA HUH! HA HUH! HA HUH!"
-Vincent Valentine
I now look forward to FF7R mods or parody videos where most of Vincent's voice lines are replaced with HA HUH and other classics from Dirge.
 
Last edited:

Clement Rage

Pro Adventurer
I wasn't being sarcastic, I was reliving fond memories.

Every time I'm complimentary to Dirge someone immediately responds with snark.


Can you get out of 'perfection' mode enough to do speedruns?
 
Last edited:
Top Bottom