• There are currently leaks out on the internet for FFVII Rebirth; we have received legal notice about these being posted on the forums. Do not post any images, videos, or other media, or links to them from FFVII Rebirth or the artbook. Any leaked media or links to them will be deleted.Repeat offenders will be suspended.
    Please help us out by reporting any leaks, and do not post spoilers outside of the spoiler section.

DCFFVII Research Thread

Been just over a year since I last tried to fix my PS2 Slim. At the time I speculated that I had damaged a ribbon cable in the process of replacing the laser. Ordered two ribbon cables online but could not muster the courage/will to once again pick apart the console.

While playing Extra Mission #22, Shinra Manor Prime, on my Japanese PS2 (SCPH-50000) the disc-read errors became so frequent that I finally felt the motivation to revisit my PS2 Slim (SCPH-75004). If I can get the PS2 Slim in working order and play EM22 on that console, I might get closer to learning if my JP PS2 is breaking down or if EM22 is simply a volatile mission on the hardware.

Replacing the ribbon required picking apart one extra layer of the console but I got the job done. The result is the same as when I first replaced the laser: The laser smashing against the disc spinner while some unseen component of the motor makes BRRRRR sounds.

- Video showing the error (*WARNING: Up-close shot of my hand*)

When this happened last time I assumed it was because I had not desoldered enough of the metal from the laser. Indeed when I re-installed the laser that time I no longer got the worrying BRRRRR sounds, though discs would still not be read. Now since the BRRRRR error has returned I'm at a loss. Is the console just fickle with how much you tighten the screws, leaving everything up to guesswork in the re-assembly process?

I could try to once more pick apart the console but it feels pointless unless I can somehow learn the logic of what is going on. I have no idea what is going on. Impatience and fear are my biggest obstacles. Currently the situation feels somewhat insurmountable unless an expert magically appear to save me.
 
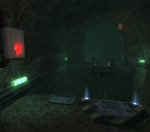
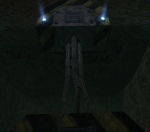
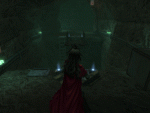
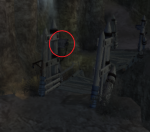
In the underground tunnels of Shinra Manor there is a pit. In the main game you press the red button on the left to make the platform move back and forth. This way you can easier use the platform to make it across, with the caveat that the platform doesn't move all the way to the other end because the connecting metal structure is damaged.

gsdx_20220517131052.png


gsdx_20220517131252.png

Due to the "Short Basement" skip, the pit is entirely avoided in speedruns that allow zoom climbs.

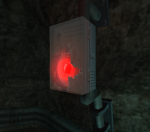
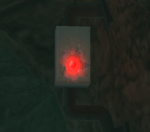
Taking a closer look at the red button/light, I can't tell if it's meant to be one of those "Break glass in case of emergency" buttons or if the glass (or plastic) has been needlessly destroyed. The button suspended near the ceiling, on the other side of the pit, is damaged in exactly the same way. If it is indeed intended as a button and not just a light it's weird to have it suspended so high.

gsdx_20220517131113.png


gsdx_20220517131138.png

The main game has no collision for the metal structure on which the moving platform travels, so you either use the platform or make an acrobatic jump over the pit. A ladder only exists for the way back, with no ladder to help you progress forwards.

The same spot in the Extra Missions work differently. The red light/button can't be pushed, meaning the "horizontal elevator" platform is fixed in its position. Collision has been added to the connecting metal structure however and you can use it as a tightrope. The pit also now has two ladders, one on each side.

running-over-pit.gif

Unless you perfectly line up Vincent beforehand you are unlikely to make the journey across in this way. The flat collision is not many pixels wide and you easily end up on either slope of the metal, gliding down to the bottom of the pit.

Makes sense to assume that this is how players of the online mode would have traversed the area. With no double-jump available you either walk the tightrope or fall down the pit and use the ladder(s). I am unable to Tempsave Teleport to the multiplayer version of the Shinra Manor in such a way that I can traverse the intended walkmesh and collision. But I think it's reasonable to assume that the metal tightrope existed in this manner.

When Tempsave Teleporting to the online mode zones you typically end up as the online player character (o099) albeit in an invisible state. You have no double-jump and your maximum running speed is 5 m/s, which is slower than Vincent's maximum running speed of 6 m/s. Zoom climbing is possible and it would not at all surprise me if this flight/hover technique was possible in the online mode but remained undiscovered throughout the 2006 era. Indeed if zoom climbing had been discovered it would surely have been patched out, followed by the same patch likely being applied on Vincent Valentine as well.

During the beta phase of the online mode it was not possible to raise your reticle while in midair so zoom climbing would not have been possible back then, just like zoom climbing is not possible for Vincent Valentine in the original Japanese release.
 
Last edited:

ForceStealer

Double Growth
lol, you know I never thought to look and see if there was a reason the platform didn't go all the way to the other side. I just chalked it up to video game-ness :P
 
Last edited:
The wastelands hold yet more obscure environment text. This time hidden from the player pretty much entirely.

bridge-cutscene.png

Two portions of this bridge are destroyed during the cutscene when the Shadowfox jumps over the bridge. These destructible parts are actually their own objects, g046 and g047, and it was while unlocking these in the character viewer that I found the hidden sign(s).

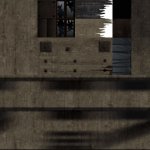
g046/g047 texture file
g046_1.png

Thankfully, the environment version of the sign texture contains the undamaged version.

wasteland-river.png

Enlarged to triple the size:
wasteland-river_zoom-in.png

If I were to transcribe this based solely on what it looks like, I would say "waataland Rivst". But I believe there may be some intentional obfuscation here, some unexpected compression artefacts and/or a language barrier. So I think the intended text is "Wasteland River". This makes sense because the bridge is placed right next to a waterfall that connects to a narrow river.

The readable side of the sign is entirely hidden from view when you roam the area. Only by undoing the environment collision and exploring freely can you get a look at the sign text.

river-bridge_other-side.png
 
Last edited:
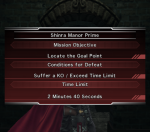
By virtue of how little time you have to complete your objective, Extra Mission #22 (Shinra Manor Prime) is close to being a speedrun by default.

EM22_mission-objective.png

It's right up there with EM11, Collector's Mind, in terms of requiring that you memorize the path and the obstacles, usually meaning several Game Overs before you finally complete the mission for your first time. EM22 is the more interesting/fun of the two missions, I feel. Plus I prefer the BGM used for this stage.

Years ago when I was a Dirge n00b I got a 02:37 IGT in EM22, just barely clearing it. fiel2c got a 02:21 and caue got a 02:20. With my current attempts I have achieved an IGT of 02:01. It is unlikely that I will lower my IGT to 02:00 but I am nevertheless stuck in a grind where I don't feel comfortable uploading a run until I have a better 02:01. Now my hand is resting after two hours of attempts. I write this filler post to dull my frustration.

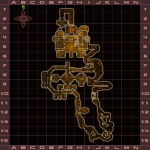
In the Extra Missions, just like in the multiplayer, the entire Shinra Manor is represented with one menu map. The main game has the manor divided up into six menu maps.
EM22_menu-map.png

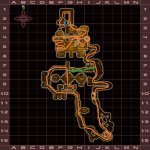
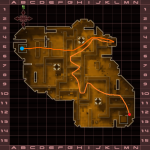
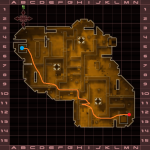
EM22 spawns you in the basement and you have to run through the basement, underground tunnels, up the stairs to the second floor and then down to the lab in the first floor. Here is the path drawn in. The green path represents the zoom climb you can perform to take a shortcut that saves roughly 30 seconds.
EM22_menu-map_drawn-path.png

I am actually pleased that it's looking unlikely for me to break the 02:00 barrier with my current knowledge/strats in a glitchless run. Gives something for either distant-future me or for some other crazy individual to pursue. I expect this barrier to break either when Vincent's movement is figured out to more of an exact science or when someone just happens to instinctually move in the most optimal way possible.
 

Torrie

astray ay-ay-ay
Whoa, this is fascinating. Anything concerning the Shinra manor is of great interest for me as I hope to finish my long-suffering piece of fanfiction featuring this house sometime this year. I wish the map could be explored at a preferred pace instead of rushing headlong attempting to make it in time. How different do you think the manor is compared to its incarnation in Crisis Core? Perhaps there's a level in the main game (DC) or any other side mission where Vincent can walk around the manor, I wonder?
 
I wish the map could be explored at a preferred pace
In the main game, the second half of Chapter 5 to be specific, you can explore the manor at your own pace. ^_^

There are only a few tiny differences between the manor as it appears in DoC's Extra Missions versus how it appears in the main game of Dirge. We're talking the presence of a ladder, some boxes etc. So if you have a savefile with Chapter 5 unlocked you can check out the area.

How different do you think the manor is compared to its incarnation in Crisis Core?
While both versions are unmistakingly the Shinra Manor, the CC and DC versions have some big differences.

CC mostly mimics the iconic basement library the way it looked in the original game. While DC has a basement library as well, it doesn't have any spot that you can point to and say "This is THAT library room from the original game". Meanwhile, the basement in DoC is quite more extensive and includes what I'd call a torture/experiment chair, old data storage facilities, rooms with simple medical beds etc.

The connecting underground tunnels are also more extensive in DoC than they are in OG and CC. The dark mood of these tunnels in DoC fit what we saw in the OG though. The earthen tunnel area (that we see) is smaller in Crisis Core.

As for the actual above-ground manor, the Crisis Core iteration is quite bright and clean. Way brighter than what was in OG. Dirge of Cerberus mimics the original dark tone better, but the building is also way more damaged which could be because of the Lifestream eruption at the end of OG, simple weather and/or destruction caused by Deepground. I'd say the overall architecture of the above-ground manor, the number of rooms and hallways etc is more similar OG<->DoC than it is in OG<->CC.

That's the gist of the differences, as described in text.


EDIT: Lacry's playthrough of DoC actually explores the manor extensively and in high visual quality. See 2:26:26 -> 2:54:31.
 
Last edited:

Torrie

astray ay-ay-ay
Ahh thanks for an extensive reply, Shad, reliable as always :properhug:

And extra thanks for the link, too. I never made it past the very first area in Kalm in my own playthrough due to rigid settings of the emulator and my old simple controller's poor compatibility, and most probably my mental health wasn't best at that time, so I decided to abstain from an objectively dark game. And I must have overlooked that excerpt when I was checking out other people's playthroughs. Now everything is falling into place.
 
Extra Mission #22 "Shinra Manor Prime" in 02:01.021 RTA (02:01 IGT)


Sight Support: Automatic​
W1: Ultima Weapon + Nova L Barrel + Materia Floater Gamma + Manasoul + Thunder Materia (Thunder Lv.3)​


Even though my fingers felt sluggish and busted I decided to try one more session. That's when I got the strong 02:01 time I was hoping for. The run is tainted by the weak finish where I fail a dash-jump, due to how unresponsive my fingers were, but it is objectively a great run.

If you try speedrunning EM22 you will quickly notice how easy it is to bump into walls and boxes. Generally speaking, the environment collision is wider than it looks. Meaning you'll often find yourself cursing when you try to cut a short path only to be promptly denied and slowed down or even entirely stopped in your tracks.

These are undeniable frustrations with a lot of Dirge of Cerberus speedrunning. Yet I have a lot of love for the movement in EM22. The variety of the stage and the intricate memorization required is something I actually enjoy. Like I said earlier, it is way more entertaining than EM11 (Collector's Mind). The intensity of the movement is no doubt why I run out of dexterity after 2-3 hours of attempts in EM22.

Timestamp 00:38 - The cursed three-row barrier
The red barriers embedded in the ground can easily be the source of much timeloss. The by far biggest obstacle here is the three-row barrier.

red-ground-barriers_sky-view.png

The ceiling is especially low where the three-row barrier is positioned. Perhaps that is why getting stuck here is more common than not. Vincent will, primarily, end up in a midair state while on top of the barriers. Attempts to jump ahead will often fail and you may even get pushed back to where you came from. I half-remember losing a full minute to this section alone when I first played this mission a decade ago. You *can* make it across by a simple jump forward but I have never found a consistent method with this.

The most consistent method I found is to aim Vincent's gun inside the wall, then performing a sideways jump across the barrier. With this strategy I make it over the barrier 9 out of 10 times with a single jump. What I managed to accomplish in my final run is rare though: Zero slow-down from the three-row barrier. A perfect, clean sideways jump across. Usually Vincent gets stuck for 0.2-0.5 seconds on top of the weird barrier collision before finally getting pushed to the other side.

Achieving this clean jump is a primary motivator for me to dub this run "good enough" despite the failed dash-jump at the very end of the mission.

Timestamp 00:56 - The Pit
Analogous to the "Cait Ladder Skip" in Ch5-2 of the main game, there is a chance that the game will activate a wall collision that negates any possibility to make the jump to the opposite end. Due to the lack of visualizing tools, I don't know *why* the game sometimes load the collision and why you are allowed passage on some attempts. All I know is that a straight jump ahead, while not sinking too low and not bonking the ceiling too hard, *usually* ended up in me clearing the pit with a double-jump + midair aim (for that extra upwards jolt to extend airtime).

When clearing the pit and turning the corner you will often end up seeing that the next area is yet to load.

em22_area-still-loading.png

You only catch a small glimpse of this event in my final run. Once I actually caught up with the grey ground and the game responded with a "disc-read error" icon in the center, freezing the game until the area loaded in. Speaking of such occurrences...

Timestamp 01:08 - Don't look directly ahead
If you look straight ahead while dash-jumping or city-dashing through this area there is a great likelihood that the game will temporarily freeze to a disc-read error. The amount of time Vincent remains frozen can vary from a few frames and up to almost a full second. The in-game countdown still goes on even when you are in this frozen state.

em22_disc-read-error.png

After losing several great runs to this timeloss I experimented with turning the camera towards the wall to the right. When I did this I never got the temporary game freeze. The challenge is that you are dash-jumping half-blind, losing frames by not optimizing your path forward. But at least you don't risk losing large fractions of a second to gameplay being suspended.

I did not experiment with shifting the camera to look up or down. My speculation is that the areas to your left, leading back towards the basement library, are loading in and out and causing strain on the memory management.


These insistent disc-read errors are what caused me to revisit my PS2 Slim, in hopes of repairing it and comparing gameplay performance there with my default PS2. It's still up in the air if I can repair the PS2 Slim. My suspicion has been intensifying though that the disc-read errors will happen in missions like EM22 regardless of the health of your console.

Makes you wonder. Are missions like Contra Kalm and Shinra Manor Prime poorly programmed from the get-go? Or is it the case that these maps were originally programmed with the HDD and an Ethernet connection in mind, which may have helped in optimizing load-ins? These are the multiplayer maps, after all. That could explain why the Extra Missions are so prone to frame skipping, lag and apparent "disc-read errors".


Timestamp 01:21 - Climbing the wooden staircase
Ascending the way I do is primarily to prevent motion sickness and to avoid disorientation. By aiming at the wall and maintaining a constant frame of reference (rather than spinning the camera as you run) I always have a good idea of how far I've climbed the spiral stairs. When measuring various methods of doing this part, my final method was the fastest...but only in one attempt on emulator. I was never able to replicate that great result. Again, Vincent's movement is still not an exact science for speedrunners.

Timestamp 01:37 - RNG missile
Not getting hit by a missile from the Heavy Armored Soldier B (HASB) closest to you is RNG. I ended up with an extremely close-call in my final run. The chain bonus from destroying the boxes earlier could be used to easily defeat this HASB but ideally this chain bonus needs to be saved for later. If I deflect a missile with a dash I will lose the killchain so that's not ideal either.

Timestamp 01:46 - Second RNG missile
This is what the chain bonus is for: Defeating the HASB at the far end of the hallway with a single shot. This foe will always fire one missile in your direction. With bad RNG this missile can hit you and ruin your run. If your movement is fast you *can* end up in the hallway just in time to dash-deflect the missile. Thankfully the HASB's aim is often terrible enough to shoot the missile straight into the wall which is what happened in my run.
I experimented with using a Fire Lv.3 to defeat the HASB, hoping that the explosion would destroy the enemy missile at the same time. This strategy did not work.

Timestamp 02:04
My fingers refused to obey me and I failed the dash-jump. In my confusion I followed up with a single-jump shortly after. Mind and body were very much tired at this point and it cost me a potential RTA below 02:01.000.


Shinra Manor Prime is a fascinating mission. An IGT of 02:00 is possible for me but a way deeper analysis of Vincent's movement would be necessary to make 01:59 happen.
 
Last edited:
Extra Mission #22 "Shinra Manor Prime" ZCH in 01:24.819 RTA (01:24 IGT)

ZCH = Zoom Climb/Hover

Sight Support: Automatic​
W1: Ultima Weapon + Nova L Barrel + Materia Floater Gamma + Manasoul + Thunder Materia (Thunder Lv.3)​

Just like my zoom climb of Contra Kalm, this one is not heavily optimized. Primarily I just want to show how "Short Basement" works in this mission.

em22_zoom-climb.png

I save 36 seconds compared to my glitchless run though I can easily see the IGT going below 01:20. If you are a fast zoom climber then a time below 01:15 IGT might even be reasonable. You *could* zoom climb over the ceiling when you reach the final corridor, jumping straight to the goal point instead of running the long way round, but this would only save time in a TAS.

As a consequence of the "Short Basement", most of the red EM barriers at the end are invisible. The barrier collision remains active so you must still navigate around them.

em22_zch_red-barriers-invisible.png

Another side-effect of the skip is that, after reaching the goal point, the game will spend two extra seconds on loading before the screen starts fading out. Fascinating.
 
Extra Mission #23 "Rampart Rumble" in 00:40.941 RTA (00:41 IGT)


Sight Support: Automatic​
W1: Sonic Griffon + Gale S Barrel + Materia Floater Gamma + Manasoul + Blizzard Materia (Blizzard Lv.3)​
W2: Ultima Weapon + Nova L Barrel + Sniper Scope + Power Booster Gamma + Cerberus Relief Gamma​
W3: P Hydra Gamma + Guard N Barrel + Materia Floater Gamma + Manasoul + Thunder Materia (Thunder Lv.3)​

PS2: SCPH-50000 | Game: SLPM-66629​

Caue's time in Rampart Rumble was a 01:18 IGT. They followed the intended route: Grabbing the cardkey to the northeast (L-5) so the gates can be lowered and the goal point in the far west (B-5) reached.

EM23_menu-map_intended-route.png

When I did this route I achieved 01:06 IGT, feeling that a 01:05 is possible. A time below one minute is not possible when you take this path.

The funny thing is that even before I tested running fast on the intended route I had already found a cardkey/gate skip that saves 24-25 seconds. No zoom climbing required.


Normally the top of the ramparts only become accessible when you reach the end of the stage. With this acrobatic maneuver, jumping around the wide collision of the red barrier and meleeing your way to the other platform, you reach this higher ground early and completely skip the need for a cardkey.

EM23_menu-map_skipping-cardkey-glitchless.png

While many runs are lost to attempting the gate skip and failing, the most annoying part is honestly what comes after you jump down from the ramparts. From that point on, the game will skip frames a lot and your button inputs have a huge risk of being eaten/ignored. It's curious how I didn't experience problem with button inputs in Shinra Manor Prime despite all the frame skips in that mission. Meanwhile EM23 constantly required that I be on my toes with where it's wiser to hold down your controller's buttons for slightly longer than usual.

The worst case of the game not accepting your inputs is when you reach the goal point. When the Heavy Armored Soldier S spawn in the final room the framerate plummets something fierce. The only way to accomodate is either to firmly press down buttons or to button mash like crazy.

Adding to the annoyances, the goal point in EM23 has an unusually small detection box. So many times I believed I reached the end...only for the game to just keep on going. :wacky: You truly have to reach the inner center of the goal point in order for the mission completion to be valid.

Whether you are playing EM23 "casually" or speedrunning, the main threat are the DG Commanders. They deal damage quickly and accurately. You'll Game Over in less than a second if you stand right in front of them. "Ultima Weapon + Nova L Barrel + Power Booster Gamma" usually means you can defeat them in one shot, though in 1/6 times you'll have to deal out two shots. No doubt this is due to the random bullet spread of the three bullets leaving Vincent's handgun.

The Blizzard materia in my equipment setup is a remnant from when I tried to defeat the first DG Commander with a Blizzard Lv.3 attack. The midair recoil stopped Vincent too much in his tracks though so I resumed to simply employing the handgun here. Blizzard magic is not used in my run.

Achieving a 00:41 IGT is fairly easy when you know how to play the mission. I tried for about 2-3 hours to lower my time to a 00:40 IGT but only got so far as getting an RTA below 00:41.000. The difference between 00:41 and 00:40 is MASSIVE. Hopefully one day I'll get that 00:40 IGT.
 
I am simultaneously happy and disappointed that I just realized how to achieve a 00:40, even a 00:39 IGT, in EM23 without a zoom climb. I've been doing the barrier skip the slow way.

At timestamp 00:19 I run up the incline to give Vincent extra height before I jump backwards and around the red barrier's collision. Doing this maneuver is completely superfluous. You have enough height even when you stand on the lowest part of your jump-off point. This works so long as you can string together midair melee strikes fast enough so to not lose height when you aim towards the other platform. The fast method saves you just below 2 seconds compared to the old method. Meaning that a 00:40 and even a 00:39 become realistic goals for Rampart Rumble.

Another consequence is that this renders the zoom-climb method only marginally faster than the "No Major Glitches" variant. We're talking at most 1-2 seconds faster if you do everything right.

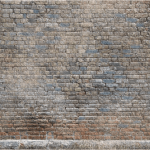
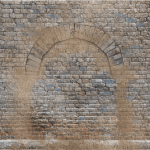
EDIT: The Rampart Rumble area utilizes a lot of 512x512 texture files. For no reason other than I find them pleasing to look at, here are some of the main textures of the zone.
1E8F4452.png


192E20EE.png


F072E14D.png


FE561B10.png


0F017C98.png
 
Last edited:
Duration(s) of Limit Break status: Part 1
Sequel of sorts to my chain bonus post.

When building the chain bonus we dealt with a millisecond counter but now it's all about the frame counter. This frame counter is involved in a ton of processes: Limit Break duration, Mako Point recharge time, the fade-away of items and (defeated) enemies on the field, the idle rotation and blinking of items on the field, countdowns that allow Vincent to perform dashes and melee attacks etc.

When you start a new level/chapter the counter starts from 0 and increments with +1 per frame, so that's a +60 increase every second. By the looks of things, this frame counter is a signed 4-byte integer variable. This means some weird stuff can happen (though not always) when the counter reaches 2147483648 (0x80000000) and higher. To naturally reach 2147483648 you'd have to leave the game idle for 414.252247 days.

As an example of fun behavior at these high values, the blinking/flashing associated with Limit Break states (that are not Galian Beast) will change. Under normal circumstances the character will flash orange on-and-off. But when the frame counter reaches 2147483648, the color changes to blue/turquoise. After an additional 2147483648 frames, the orange color will return.

The enemies in this mission will enter a Limit Break state when their HP is low. This status last until the enemy is defeated.


em40_dg-soldier-behavior.png

The counter is suspended when you pause the game. In DCFFVII International this signed 4-byte variable is located in address 201283A0 and I'll sometimes use that address when referring to this frame counter.
In the original Japanese release, Limit Breaks were activated by spending MP and then MP would gradually be depleted while in the LB (Limit Break) state. We are concerned with the post-original mechanics where LBs are initiated with the Limit Breaker item and LB state is only active for a fixed amount of time.

Limit Breaks available to the player:
- Turk Vincent LB (Tutorial Mode, same style-and-effects as online player character Limit Break).​
- Galian Beast form.​
- Ch11-6 LB, only available during fight against Weiss Empowered when Vincent is drawing on the power of Chaos.​
- Chaos Vincent LB, Ch12.​
The first three Limit Breaks on our list have the same number of frames set aside: 2700 frames (0xA8C in hexadecimal). That's 45 seconds.
The Chaos Vincent LB is the outlier, having only 600 frames (0x258) reserved. That's 10 seconds.


lb-duration-frames.png


Animations when initializing LB state will eat away at these times, especially so in Galian Beast form, but we'll put that aside for now.

Once a limit break has been activated we can find the instructions for these LB durations by searching for the correct array of bytes.
2700-frame LB: C7 05 ?? ?? ?? ?? 8C 0A 00 00
600-frame LB: C7 05 ?? ?? ?? ?? 58 02 00 00

The set of question marks represent the address of a container which may be different between occurrences of Limit Break activation. Cheat Engine accepts "?" as a wildcard to represent an unknown value. I could technically shorten the array of bytes down to "C7 5 ? ? ? ? 8C A 0 0", removing superfluous digits, but for reasons of symmetry I prefer any byte-hex to be written with two digits.

Are we in the clear now to easily replace 2700 with some much, much higher value and extend the LB? Not so!

Two operations are performed on the retrieved 4-byte value before it is actually used to start up a Limit Break. First the value is shifted left 16 times. This can also be expressed as "multiply by 2, 16 times".
shl = shift logical left​

shl-10_explain.png

The result of the above operation is then shifted shifted right 16 times, but under arithmetic logic. This can be written as "signed divide by 2, 16 times". What does basically means is that if you attained a negative number from the shift-left, the result of this next shift-right operation will also be negative.
sar = shift arithmetic right​

sar-10_explain.png

For small values like 2700 or 600 this is not a problem. You end up with the same value you started with.
00000A8C * (2*2*2*2*2*2*2*2*2*2*2*2*2*2*2*2) = 0A8C0000
0A8C0000 / (2*2*2*2*2*2*2*2*2*2*2*2*2*2*2*2) = 00000A8C

But with high values we run into issues. The shift-left could leave us with only zeroes. Let's say we took the hex number 0x77770000 (2004287488 in decimal) and shifted it left 16 times.
77770000 << 10 = 00000000
The shifted bits do not loop back around to the beginning, so we are now left with a Limit Break duration of 0 frames.

There is also a second trap. Let's say we replaced 2700 (0xA8C) with 32768 (0x8000). What will happen?
00008000 * (2*2*2*2*2*2*2*2*2*2*2*2*2*2*2*2) = 80000000
80000000 / (2*2*2*2*2*2*2*2*2*2*2*2*2*2*2*2) = FFFF8000

The shift-left created a 4-byte number where the most significant bit (the bit to the furthest left) was set to 1.
Hexadecimal: 80000000
Binary: 10000000000000000000000000000000

That means it can be interpreted as a negative number, which is precisely what the sar operation does in its arithmetic logic. When a negative number is divided with a positive number, we still end up with a negative number. In most cases, the game will not like this and choose to end the Limit Break either immediately or 1 second after it has begun.

I say "in most cases" because while writing this post I discovered that the code is way more complex than expected. When editing the values for the shift-operations, there are situations where the game will accept negative values for the Limit Break duration and other times when it will not.

There can even occur a "counter-glitch" with the 1-second delay that's intended to mark when your LB state should end. This 1 second is a value of 60 (3C) and also goes through the shift-left and shift-right operations. So when the game shifts this value left 16 times (3C << 10 = 3C0000) , but I have edited the code to not shift right, you end up with a long-lasting Limit Break regardless.


Why are these logical- and arithmetic shifts happening to begin with? Maybe they are obfuscations, meant to make it more difficult for hackers to tap into the power of Limit Breaks. Due to Dirge of Cerberus once having had an online component, I often speculate that the game was programmed with higher security in mind so to prevent cheating in an online multiplayer environment.

It's also entirely possible that the LB code is unintentionally wrapped up in other functions, where the shift-operations have an actual intended purpose.
 
Last edited:
Duration(s) of Limit Break status: Part 2

When a Limit Breaker is used the current frame value in 201283A0 is copied and saved elsewhere. In DCFFVII International, this freeze-frame value is saved in address 20133C64. Following this, the saved frame value is added together with the intended duration of the Limit Break state. So if we used a Limit Breaker in frame 4200 and the LB duration is 2700 frames, the operation 4200 + 2700 = 6900 happens. The result of this addition is then saved in yet another address in memory. The location of this address will be different depending on where in the game you are.

In our example the value of 6900 will, in every frame, be subtracted with the frame counter value in 201283A0. When the result of this subtraction is 0 or lower then the LB state will end.
LB-duration_sub-cmp.png

The by far easiest Cheat Engine method of extending the Limit Break is by increasing the value of 6900 to something much higher. Find the address and you're good to go. Fortunately, all values including-and-between 0x0 and 0xFFFFFFFF are valid.
I enjoy the difference in logic here compared to the 5-second countdown when you build a killchain. In the chain bonus example, the game saves the millisecond when you started building a chain and this "freeze-frame" value is constantly referenced to determine when the 5-second countdown is over.

Meanwhile in our Limit Break example, the moment of starting the event is only used and referenced ONCE: To calculate the future frame when the event shall end, save that frame in a different address and then reference that address constantly when checking if the LB state should still be active. From this perspective, the chain-bonus logic is more oriented towards THE PAST and the Limit Break logic is more oriented towards THE FUTURE.

Allow me to almost negate what I just said and transition to a topic where Limit Breaks focus on the past as a reference.
With the LBs performed by Turk Vincent and Chaos Vincent there is no easy way to extend the duration of the LB state. Galian Beast is different because it requires a full transformation sequence which can only happen when Vincent is grounded. If the beast is not in a grounded state at the frame when the transform-back-to-human (hereby referred to as de-transformation) is meant to happen, the game postpones the scheduled detransformation by 60 frames, i.e. 1 second.

60-frame-postponement.png

Example:
Galian Beast is scheduled to transform back into human Vincent when the frame counter 201283A0 is at value 6900. This is because the scheduled frame for detransformation has been stored in, say, address 209417CC. But what if the beast is in midair when the counter reaches 6900? The game recognizes that the detransformation can't happen. The detransformation is rescheduled to 6960 and this value is entered into 209417E4, an address in the vicinity of 209417CC.

What if Galian Beast is somehow in midair again when we reach 6960? Re-schedule to 7020 and place this value in 209417CC. This ping-pong of rescheduling, with the new value alternating between addresses 209417CC and 209417E4, will continue so long as you remain in beast form.

To prevent the player from maintaining beast form indefinitely, or at least to prevent them from enjoying the Galian Beast's powers, there is a secondary "End of Limit Break" timer: The one that disables most of Galian Beast's moveset when you reach the initial detransformation frame (frame 6900 in our example). Melee attacks, jumping and fireballs will be disabled. The dash is not disabled so it *can* be used to interrupt the detransformation.

This moveset-disabling timer looks TO THE PAST, the frame value that was saved in address 20133C64 at the moment of initiating the Limit Break. The main frame counter value in 201283A0 is subtracted with the moment of transformation saved in 20133C64. When the result of this subtraction equals 2701 or higher, the melee/jump/fireball is not allowed. Note that this whole function is only called when you try to perform any of these actions that can end up being locked away.

compare-with-2701.png

In our earlier example, Vincent transformed in frame 4200. So once the main counter reaches 6901, and the result of the subtraction is 6901 - 4200 = 2701, part of Galian Beast's moveset is locked.
While the full scope of the reasons behind Infinite Galian Beast (IGB) glitch in Chapter 3 is far from explained, our newfound knowledge helps provide some context.


Quick recap: By ending Chapter 2 while in Galian Beast form, the game's pointers will not update properly when you transition to Chapter 3. The obscure effect is that if you transform into Galian Beast and enter the cutscene with the dying WRO member, you will leave the cutscene with beast form active indefinitely. Any cutscene in Ch3 will work to trigger the glitch, so long as it is your FIRST cutscene in the chapter (not counting the initial cutscene with Shalua). The glitch ends after you've manually exited the LB by pressing L1+R1. IGB does not last beyond Ch3.

IGB is useful in the original Japanese release. Beast form stops consuming MP and you can enjoy all the benefits of the Limit Break for as long as you like. The above video depicts this version of the glitch.

In the post-original versions, Galian Beast form will remain but the jump/melee/fireball get locked away after the 2701 frames are up. This renders the IGB glitch kind of weak.

The game *does* calculate at what point you are supposed to transform back to human. But the function to check that 2700 frames have passed is never accessed while in IGB. Even if you wait for the frame counter at 201283A0 to loop all the way around, waiting 2.27 years for it to do so, Galian Beast form will remain.

There is however one effect that will occur in the post-original versions if you wait for 1.134 years (414.25 days). The jump, melee and fireball commands will be restored! The result of the subtraction between 201283A0 and 20133C64 will end up at values below 2701 once more, thanks to the frame counter values being treated as negative. This effect lasts for 414.25 days, until the frame counter loops back around to positive values.

Ending this post with a neat sidenote. One fun trick I learned months ago, while trying to trigger glitched Limit Break states, is that it's relatively easy to maintain Galian Beast form by repeatedly climbing a ladder. The ability to climb ladders is not among the commands that get locked away when you are supposed to transform back into human. The beast can only climb *up* ladders and will automatically always move upwards until you either reach the top or otherwise disembark. So you can't stay still on the ladder and postpone the detransformation that way. You have to repeatedly climb and disembark.

There is no real benefit to this ladder-exploit but I appreciate it more now that I know about the "re-schedule +1 second" mechanic for the end of beast form.
 
Last edited:
Duration(s) of Limit Break status: Part 3

Galian Beast: When the animations are said and done

From the moment that you use the Limit Breaker it takes 79 frames (1.316 seconds) before the game decides "Limit Break status has begun". Vincent spends these 79 frames performing a flexing pose. It is at the end of this animation that the current frame value in 201283A0 is saved in 20133C64. The value 2700 is added together with the current frame counter value, determining when the Galian Beast form is scheduled to end.

moment-of-transformation.png

The sound effect plays to signal the transformation has begun. It is only now that we start seeing the animations eat up time from the ultimate duration of the limit break.

A purple sphere envelops Vincent and after a while his model turns invisible. It is at this time that the main frame counter of 201283A0 actually pauses, though by now 70 frames have already passed. We have lost 1.16 seconds from the total duration of Galian Beast form.

moment-of-pause.png

The fact that the frame counter has been paused is a great thing. The amount of time spent in this animation state, with the swirling glow of the purple sphere, varies immensely depending on when- and where you transform. This is true even on emulator and below are some timings observed on emulator.

When transforming in a calm area like the wastelands, you may spend only 2 seconds in the "paused state" part of the animation. But in a resource-heavy place like the WRO HQ, the pause-state might last for 5 seconds. These times depends a lot on your current camera angle and how much the game is struggling with maintaining a constant framerate. Extra Mission #29, Trick Arc, has a lot of enemies and A LOT of electromagnetic barriers. The pause-state alone in your transformation sequence can easily last 6-9 seconds in EM29 on emulator. This is consistent with an experience in EM29 I had on console many years ago, where a Galian Beast transformation (or it might have been a transformation back to human, I don't remember which) easily took over 15 seconds. Thanks to the main frame counter being paused for all this time we don't actually lose any of the time that will be spent in beast form.

The general rule is that your first transformation into Galian Beast takes the longest. If you use another Limit Breaker while in the same stage, the game will typically be able to draw on the previous instance and make the metamorphosis happen faster.

The frame counter at 201283A0 resumes after the purple sphere has dissipated and Galian Beast is about to exit their flexing pose.

moment-of-end-pause.png

It takes 123-124 frames before the player is allowed free control again. Ultimately then, we "only" lost 70 + 123 frames from the total Limit Break duration of 2700 frames. 193 frames (3.216 seconds) lost, giving us a final "effective" LB duration of 2700 - 193 = 2507 frames (41.78 seconds).

As described in previous posts, you can extend the beast form by +1 second for every time the player is not in a grounded state when the detransformation is supposed to happen. This is barely useful though since by this point melee, jump and fireballs will have been locked away.
 
Last edited:
Duration(s) of Limit Break status: Part 4 (final)

Turk Vincent
lb_turk-vincent.png
The Limit Break (LB) is initiated on the very same frame when you use the Limit Breaker item. The flashy animation that temporarily prevents player action only lasts for 34 frames (0.567 seconds). This renders the effective/actual duration LB time as 2700 - 34 = 2666 frames (44,43 seconds)


Ch11-6 Vincent
lb_ch11-6.png
The LB is initiated on the very same frame when you use the Limit Breaker item. This time the animation lasts for 81 frames (1.35 seconds) before player control is given. Actual LB duration is thusly 2700 - 81 = 2619 (43.65 seconds)


Chaos Vincent (Ch12)
lb_chaos-vincent.png

The LB is initiated on the very same frame when you use the Limit Breaker item. What makes this LB stand out is that it doesn't use a custom "Limit Break transformation" animation for Vincent's model. All Chaos Vincent does is use the normal "stand still" animation. Not only that but you can still move Vincent around with the left analog stick, covering ground while Chaos Vincent is standing perfectly still. This awkward state looks more like an oversight in development than anything else.

Though you can move around during LB initiation, you still can't dash, jump, melee, crouch or use the guns. This lasts for 32 frames (0.53 seconds) before full player control is granted. With 600 frames (10 seconds) being assigned for this LB, the amount of time you can actually get use out of it 600 - 32 = 568 frames (9.467 seconds)

---

Mentioned in the first post in this "Limit Break duration" series, a character in an LB state (not counting Galian Beast) will blink blue/turquoise when the frame counter reaches values 0x80000000 and higher. This is only faintly noticed with Ch11-6 Vincent but clearly visible for Turk Vincent and Chaos Vincent.

tv_turquoise.pngcv_turquoise.png

There are clearly many unexpected consequences to letting the frame counter reach negative/signed values. I noticed just now that if the frame counter is this high during Ch11-6, the fight against Weiss Empowered, Vincent starts out immune to Weiss's bullets! For some reason it's like Vincent has a constant shield raised. This is not normal. Vincent takes damage from sword slashes but never gets knocked back. The bullet-shield eventually goes away for reasons I am not sure of.

The frame counter creates beautiful chaos at these high values when the game has "run" for 414.25 days.
 

Each of the two Bull Heads in Cait Sith's stealth segment (Ch5-2) has 10000 HP and a DEF stat of 255. Due to DEF being an unsigned 1-byte integer, 255 is the highest possible DEF value.

Cait Sith always deal 0 damage when attacking the Bull Heads, regardless of how powerful your attack is. My initial expectation was the game would use the same variable that makes Arch Azul impervious to bullets. This is not the case.

ch5-2_bull-head_dmg_memory-viewer.png

A pointer variable is retrieved. Though the address may differ, the value is always 0x0020C40B. This value is moved into EAX and XOR'd with itself, inevitably leading to a result of 0. This is the amount of damage you will deal on the Bull Head. It overwrites the previously estimated damage output that was stored in [pcsx2.exe+609C50].
0020C40B ^ 0020C40B = 00000000

One method of working around this is to replace "XOR" with "OR". This means the value will stay at 0x0020C40B, meaning you'll deal 2147339 damage per strike. You'll even circumvent the usual 9999 damage cap, since by this point all the damage cap checks have already happened.
0020C40B | 0020C40B = 0020C40B

What is curious is that a different function will be accessed if you load a savestate and then proceed to attack the Bull Head. The same effect as the function displayed above will occur, but it's written in a more pliable manner.

ch5-2_bull-head_dmg-function-after-savestate.png

This is the first time I encounter an entirely different disassembly showing up for the same event as a result of using save states. No idea why the emulator acts this way. Though at least with this variation I can just replace 00000000 with whatever damage value I want. In the video I replaced it with 00000FFF, which is how I deal 4095 damage per scratch.

Defeating the Bull Head grants no EXP. There doesn't seem to be any EXP event whatsoever, meaning you don't even "get" 0 EXP, it's just a complete absence of points. The same is true for any DG Soldiers that are defeated here in Ch5-2.

As the video demonstrates, the Bull Heads are not what blocks you from proceeding. An invisible box that reaches all the way up to the ceiling is the actual blockade. Jumping inside this box when the Bull Heads are present indicates no active collision from the Bull Heads, though it's possible the tight space and Cait Sith's size is negating any potential enemy collision. No matter what, these two Bull Heads will never attack.

in-the-invisible-box.png

Cait Sith's STR and DEF stats are derived from Vincent's at this point in the game. So if Vincent is Lv1, then Cait adopts the Lv1 STR/DEF/DEX/INT stats. Cait Sith will also carry any killchain bonus that Vincent had when the sewers segment (Ch5-1) ended.

If we bypass the "Set damage output to 0" instruction, can Cait deal any considerable damage without additional cheats? Nope. Even with Vincent at Lv50, with a STR stat of 100, Cait will deal 1 damage per scratch when he has no chain bonus to draw from. Only with an active chain bonus could Reeve's robot deal substantial damage.
 
Last edited:

Weiss the Immaculate (e000) is an unwinnable boss fight in Ch11-5. After Vincent gets KO'd in this fight you transition to Ch11-6 where you fight Weiss Empowered (e066), who can be defeated. In the original Japanese release you were forced to expend any active auto-life status (Phoenix Down) in the Ch11-5 fight before advancing but this was fixed in post-original versions so the battle ends upon KO regardless of auto-life status.

Weiss the Immaculate has 30000 HP. Though the player can inflict damage upon Weiss, and the displayed damage digits are accurate, the boss's HP bar in the HUD never changes. Weiss's remaining HP is capped so it can never be reduced to lower than 1. This ensures that the battle is unwinnable even if the player somehow managed to survive long enough to deal damage that would constitute a win.

What does this failsafe look like under the hood?
damage-procedure-on-the-immaculate.png
Weiss the Immaculate's remaining HP is copied and a value of 1 is subtracted from this copy. This is preparation for the scenario where your shot would normally have defeated Weiss.

A bit further down we see the projected damage output compared with Weiss's current HP. If the attack is powerful enough to defeat this boss, then a branch will be called where the attack itself does not dish out damage. Using the value gained from the earlier subtraction, this is what ends up happening:
Weiss's remaining HP - (Weiss's remaining HP - 1) = 1
You can see then how if his HP is already 1 when this event occurs, the result will still be 1.
1 - (1 - 1) = 1

In my video I have invincibility activated for Vincent and a constant 99-chain bonus. The latter helps deal massive damage and shows that Weiss the Immaculate simply won't go down. I pause the game and change the instruction "eax,-01" to instead be "eax,00". So in the next damage event we get...
1 - (1 - 0) = 0

This technically counts as a win and the battle ends, albeit without any death animations by the boss and with zero acknowledgement in subsequent cutscenes- and gameplay. Nothing changes...mostly. Defeating Weiss the Immaculate *does* add +1 to your total count of enemies defeated. Most bosses don't add to your "Total Enemies Defeated" counter since the fight ends when their internal HP reaches 10000 or lower, NOT when it reaches 0. This is also why defeating bosses usually don't count as a "chain build" event. But because we lower Weiss the Immaculate's HP to 0, you will spot in the lower left of the HUD that "ITEM" changes to "CHAIN", showing that this target counts towards chain building.


With most bosses I can use Cheat Engine to find the address for a boss's HP, set that HP to 0 and instantly win the fight. Those battles are basically checking every frame to see if the conditions for victory have been achieved. Other bosses, like Dragonfly PT or Weiss the Immaculate, need an actual damage infliction event to result in victory for the player.

If I force the Immaculate to have 0 HP (by freezing the address value at 0) then he simply continues to roam the field and the battle continues endlessly. Ergo, the only way to properly "win" the fight was to edit the game's instructions and then attack Weiss.
 
Last edited:
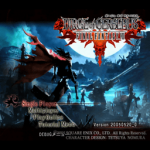
Found a switch to trigger some menus/transitions in the Beta Version. Address 204C0DA0 is usually set to value 0xFFFFFFFF, but changing it activates the following screens.

0 - Chapter name card
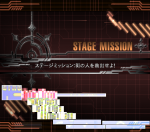
1 - Stage Mission
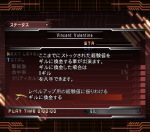
2 - Stage Results -> Point Conversion
3 - Game Over: Select Restart for "Point Conversion" or select "Title Screen".
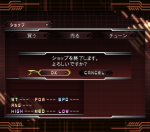
4 - Shop
5 - Menu map

Still no actual zones being loaded, so no real gameplay, but even tiny advances like these are appreciated.
gsdx_20220611114137.png
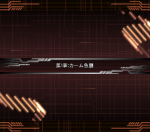
第1章:カーム急襲​
Chapter 1: Raid on Kalm​

The final game doesn't spell out the chapter number when this "Chapter Title" screen shows up.


Usually the screen will be triggered with the game start menu still partially present.
gsdx_20220611113531.png
ステージミッション:街の人を救出せよ!​
Stage Mission:Rescue people in the city!​

The final game does not use the raw text "Stage Mission:" when describing the mission.


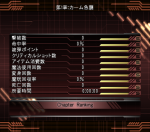
gsdx_20220611114221.png
撃破数​
命中率​
被弾ポイント​
クリティカルショット数​
アイテム消費数​
魔法使用回数​
変身回数​
魔晄回収率​
死亡回数​
所要時間​
Targets Destroyed​
Accuracy Rate​
Damage Sustained​
Critical Hits​
Items Used​
Magic Casted​
Number of Transformations​
Mako Collected​
Times KO'd​
Time Expired​

変身回数 [Number of Transformation] was renamed リミットブレイク回数 [Number of Limit Breaks] for the retail release.
Though this is the Beta Version disc, you are ranked for "Magic Casted". This ranking was not used in the original Japanese version, and replaced "Number of Limit Breaks" in the post-original releases.

The ranking category missing from the Beta Version is the チェイン数 [Killchains] ranking.

gsdx_20220611114242.png
Perhaps through having found the stage ranking menu and the point conversion menu I can confirm address locations for stuff like total gil, EXP gained etc.


gsdx_20220611114259.png
Nothing in the shop.
 
Last edited:
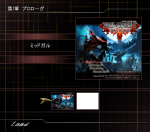
Hopefully this is an actual stepping stone to loading gameplay and not a dead-end. I gained access to the checkpoint menu in the Beta Version.

beta-version_checkpoint-menu.png

Normally when you select Single Player you get a text message reading:
現在シングルプレイを起動できません。​
Auto-translate: Single Player can not be started right now.​

By changing the value in address 2051C582 you can skip the message and get to the checkpoint menu instead. Selecting either of the two available "checkpoints" just leads to a blank screen. Nothing seems to actually load. Using this same method, you can "successfully" select Tutorial Menu but all you get is a dark void. With the amount of data present on the disc I am convinced that it's possible to load up at least Chapter 1. The question is just how many steps are required to get there.

The preview image in the checkpoint menu marks the first time we've seen the text "DEBUGメニュー" [DEBUG Menu] on screen. It is present below "Tutorial Menu".

0C0589E7.png

I wonder if you moved the Title Screen cursor down to DEBUGメニュー or if it was accessed by other means.


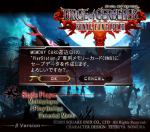
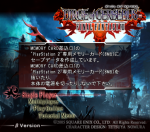
Address 2051C582 is linked to many processes. Changing this value usually make the game claim that the wrong disc is inserted, which softlocks the game. You can even activate an inquiry to create a memory card save...and it works! An actual savefile is created.

beta-version_create-savefile.png


beta-version_creating-savefile.png


beta-version_savefile.png

Once the memory card save has been created the screen blacks out again. If you reset and enter the checkpoint menu with this savefile present, only the Prologue checkpoint is available for selection. The same thing as before happens when selecting this "New Game" option.
 
Thanks to reaching the checkpoints menu, the associated checkpoint titles were also unlocked in RAM. Every chapter from beginning to end is represented here. Comparing this text with the retail release shows that the checkpoint names were mostly finalized by this point.

- Google spreadsheet highlighting differences
All of the Shera, the Train Graveyard and the Central Complex constituted "Chapter 7" in the Beta Version. This offsets later chapters to have a smaller number than their retail counterpart by 1.

The "Chaos Vincent vs Omega" chapter is called Chapter 11 in the Beta Version, later renamed "Final Chapter".

Four checkpoints were created for the retail version, decreasing the time interval between auto-saves.
2:Chapter 3 - Little Survivor:Edge
7:Chapter 8 - Warzone:Central Complex
9:Chapter 10 - Possession: Deepground
10:Chapter 11 - Aerial Beasts:Mako Reactor 0

The following naming changes occurred. Upper row is Beta Version and lower row is retail version.
4:Chapter 5 - Solid Cait:Shinra Manor
4:Chapter 5 - Solid Cait:Mako Reactor 0
I have trouble imagining the plot would take Cait Sith to Shinra Manor, so I assume this to be just a mistake.

8:Chapter 8 - Murder Machine:Shinra Building
8:Chapter 9 - Twins:Shinra Building
This is where you fight the Black Widow TW (Twins).

10:Chapter 10 - Genocider:Mako Reactor 0
10:Chapter 11 - Encircling Doom:Mako Reactor 0
There is some ambiguity here as to whether "Encircling Doom" or "Aerial Beasts" were invented for the retail release. Thus it is also unclear if "Genocider" was superseded by one or the other.

12:Final Chapter - Ending:Midgar
11:Final Chapter - Zenith:Memory Fragments
"Memory Fragments" leads to the Event Viewer in the original Japanese release. I wonder if this "Ending" chapter would have literally just played the ending FMVs or if it was always intended as a gate to theater mode.

Instances of Shift-JIS font "WRO" were replaced with ASCII-type "WRO". Shift-JIS "0" was replaced with the kanji "零" for the number zero.

The kanji 棟 [Building] was originally used to describe the Spiraling Tower and Central Complex, though this changed to 塔 [Tower].
 
Last edited:
Dirge of Cerberus is planned to be in the Final Fantasy Relay Race late this August. This will be DCFFVII's second appearance in an FF Relay, last time being back in November 2018.

As runners prepare for the event there's been a surge in energy and brainstorming within the community. Today, new strategies helped NT take the WR and achieve the first sub-1h20m time in Any%.

NT_1-19-28_WR_resized.png

NT stopped the timer at 1:19:29.76. Frame advance retimed it to 1:19:28.95. The previous record was the 1:20:24 set by City Hall back in December 2021.

A time below 1h19m is very feasible for top runners and so a 1:18:XX is now the coveted minute-mark. What are the new strategies that have optimized the speedrun?

Reroute in Ch10, Shinra's Dark Secret
Several cardkeys are preserved in this chapter with the help of zoom climbs. The old route involved defeating the Gargoyles at the beginning (Ch10-1), taking the cardkey from the Heavy Armored Soldier S (HASS) and then zoom climbing over a medium-tall EM barrier.

On July 18 I demonstrated the route change of hovering over the scene trigger for the Gargoyles. Not only does this skip the lengthy Gargoyle section, but the next EM gate will not have been raised so you can just run straight ahead. Preserving a cardkey is then relegated to the SOLDIER room (aka the "Ninja Room", since there is a history of runners refering to SOLDIER foes as ninjas) in Ch10-3, just before the Potoin and the HASS. The strategy has been improved to entirely skip the trigger for the HASS and just run to the next area.

The reroute saves 25 seconds.

7-chain Thundaga on Neo Azul in Ch9, An Empire in Ruins
For years players of Normal mode have built a huge killchain, maximum of 14, right before the elevator boss room so that Neo Azul can be defeated in one headshot under ideal conditions. This headshot can be tricky because only the upper half of Azul's head actually counts as the hitbox for a critical headshot.

On July 23, 'Ex Hard' runner ZZ_Yoshi suggested using Thunder Lv.3 (colloquially known as Thundaga) on Neo Azul instead. This was confirmed the better strat. You only need a 7-chain or higher to one-shot Neo Azul with this magic attack. Several seconds are shaved off from the chain setup AND runners no longer need to carefully aim at the boss with a headshot.

Flight over sniper plaza in Ch3, Silent Edge
When you reach the plaza with the Meteorfall Monument, known by runners as "sniper alley" or "sniper plaza", there is a cutscene that spawn the snipers for this area. Speedrunners power through this huge space, shoot down one sniper, and then perform a zoom climb over a medium-tall EM gate so to entirely skip the escort mission that'd normally take place here.

I calculated long ago that hovering over the scene trigger for the snipers is not worth it, as you lose 1 second on the setup for the zoom hover compared to just running down the stairs and activating the cutscene. Now that players are a bit more accustomed to zoom hovering I dared suggest something crazy: Hovering over the scene trigger AND maintaining your flight all the way over the northern gate.


This saves 8 seconds compared to doing the old route in the fastest way possible. Vincent's maximum running speed is 6 meters/second and the same max speed is true when in the air. Dash-jumping gets you to 6.5 m/s and city-dashing can get you all the way up to 6.8 m/s. The long "slow" hover over the plaza still wins out over dashing across and zoom-climbing from the ground at the gate.

Gaining height in a zoom climb requires very fast button mashing and quickly become strenuous. Thanks to the player's high starting position in this new strategy, jumping off from the stacked boxes, you get to jump over the gate while only maintaining a medium-paced button mash. Maintaining concentration over a long hover is its own challenge on the brain but is definitely easier on the stamina.

Flight over Heavy Armor gate + Crab gate in Ch8-1-1, Midgar Assault
Midgar Assault is a tricky chapter when it comes to cardkeys. Each EM gate set your cardkey count to 0 and the gates will only accept cardkeys if certain enemies have been defeated. This contributed to the route staying the same for Ch8-1 even after the discovery of zoom climbs/hovers.

The stage involves some waiting. You have to wait for a Heavy Armored Soldier S to drop down so you can get their cardkey to use on the gate, hereby referred to as "Heavy Armor gate". You then have to shoot down four soldiers, wait for the Red Saucers to spawn, Thundaga the Red Saucers to get the cardkey and advance. Speedrunners call the Red Saucers "crab bots", ergo why this EM gate is now called "Crab gate". Simply hovering over one gate at a time would not save time compared to the normal downtime in the stage.

For the confident runner there is an advanced-level zoom climb however... Simply hover both gates.

If performed perfectly this strategy saves 15 seconds. It puts great stress on the runner due to the intense button-mashing required for climbing, followed by maintaining focus during an extended horizontal hover, but it is the new standard for anyone looking to save as much time as possible.

My initial draft for the zoom climb was needlessly complicated and involved jumping onto the Heavy Armor gate, giving players a rest before they jump and hover over to Crab gate. I stuck to this visualization because not giving the player time to breathe seemed unreasonable. But NT rightly pointed out that stopping on the Heavy Armor gate was a superfluous step. Thus I made the demonstration video and the Heavy+Crab hover is now part of the route.

(More stuff in the next post)
 
Last edited:
The 1-cycle Dragonfly GL fight
(Fight starts at 27s)

Easily one of the most "swag" strategies I have ever created in Dirge of Cerberus. The old method involved staggering the Dragonfly GL twice. The new strategy means you only stagger the boss once, ergo "1-cycle", and it saves 14 seconds. This has allowed speedrunners to clear Ch1, Sea of Flames, in under 6m30s.

In the video I stagger the Dragonfly GL before destroying the first two boxes. NT suggested staggering the boss after destroying the two boxes and this has become the standard, as it gives the player more time to setup the chain and attack the weak spot of the Dragonfly GL.

With a 2-chain the Fire Lv.1 attack is strong enough to destroy boxes in a single shot. Thus you destroy boxes in quick succession to build up a 7-chain. Destroying the last three boxes is finicky because of the Dragonfly GL's large hitbox.

dragonfly-gl-hitbox_left-side.png

From the left side of the lamppost the boss will often be in the way, preventing any fireballs from going under the wing. If however you move to right side of the lamppost it becomes way more consistent to hit all three boxes with Fire Lv.1. On top of that you are able to deal some damage on the boss with the same fireball that help you get the 7-chain.

dragonfly-gl-hitbox_right-side.png

The 1-cycle fight requires a lot of practice. After having worked the strategy into your muscle memory you can consistently clear the battle super quickly AND feel super cool doing it. Players sacrifice the second Phoenix Down in the boss stage, a Hi-Potion, and sometimes the Limit Breaker as a result of no longer getting to run around the whole stage. Fortunately this doesn't disrupt the rest of the run.


The Arachnero auto-lock solution: Long Barrel + Power Booster on W3, no sniper scope
The mechanics of the Arachnero fight was solved back in December 2019, allowing for 2-cycle battles (becoming 3 cycles in less idealized scenarios). A persistent problem with the battle however was that shooting the shield with Sight Support on Automatic meant the auto-lock would jitter between Arachnero and the Phalanxpheres (the homing laser rods). This makes you miss your shots often enough that players opted to switch to Semi-Automatic aim for this battle alone, so to have a decent chance at a 2-cycle fight, then switch back to Automatic when the battle is over.

Being a speedrun it is of course undesired to spend extra time in the menu. Remember that runners of Normal mode don't play with a memory card, so any change in the Config menu also means they have to select OK on the "unable to save any data" prompt when leaving said menu.

NT (username "NT1_Evolution" on speedrun.com) then had a brilliant idea. What if auto-locks works slightly different when you zoom into first-person mode, even when not wearing the sniper scope? His theory was correct. The auto-lock jittering does not occur in first-person.

By setting up Weapon 3 (W3) with Long Barrel and Power Booster the player still has the gun power to defeat Arachnero quickly, but they can now zoom in to first-person and easily aim at Arachnero. Aiming with W1 was the only option before but that slot holds the sniper scope, which means any first-person zoom will give you tunnel vision and make the task more difficult.

Players have obligatory menuing in Ch1, Sea of Flames, and Ch5, Shinra Manor. By working new equipment changes into any of these two, rather than introducing new menuing like was done in the Arachnero fight, players save several seconds. NT is now also equipping Long Barrel on all three weapon slots back in Ch1. Power Booster is acquired in Ch5, which is when it's equipped to W1 and W3. The W2 slot gets Materia Floater, Materia Booster and Thunder Materia for the Thundaga strats.
 
Last edited:
I achieved a 1h18m50s (I split half a second too early). For the moment I hold the WR in Dirge of Cerberus Any%.

dcff7_any_standard_1h18m50s_Shademp_2022-07-30_snapshot.png


NT or City Hall will dethrone me any day now. Feels amazing still to have achieved the first 1:18:xx and to have advanced so quickly. I spent the last week training segments, getting livesplits set up. This WR is my first completed full run with splits.

2022-07-30_Shademp-WR_crop.png

Good parts of the run
- Shrike Thundaga achieved for great EXP.
- Limit Flex to defeat Rosso in one shot.
- Weiss Empowered never performed the time-consuming "chair move" where he retreats to the throne.
- Good Crystal Feelers RNG.

Bad parts of the run
- Second try on some zoom climbs (no massive penalties).
- Activated bugs in Beginnings (Ch11), extending my time in the room by 26 seconds.
- Recently I've switched my city-dashing technique from R1 to using L1 instead. I am still not entirely used to this which is why I sometimes melee or just have wonky movement.
- Accidentally pause the game sometimes because Menu is on R3. It easily happens when I tilt the right analog stick that I press it down, thus opening the menu.
- Miscellaneous.
 
Top Bottom