
You are using an out of date browser. It may not display this or other websites correctly.
You should upgrade or use an alternative browser.
You should upgrade or use an alternative browser.
The Lifestream - Free Company (An FFXIV Thread)
- Thread starter Joe
- Start date
- Status
- Not open for further replies.

Lex
Administrator
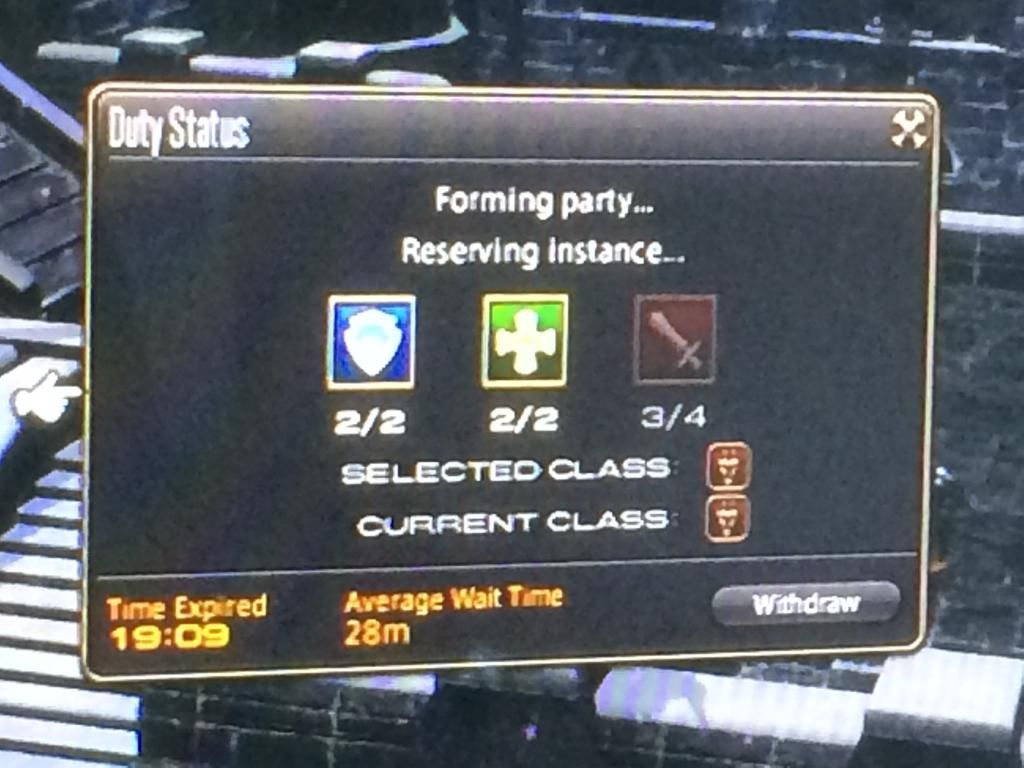
Do you guys know anything about Guildhests? I remember doing them back when I first started playing but I only have guildhests up to level 15 no matter what NPC I talk to (the ones that offer the guildhests). Are there high level guildhests somewhere that I've missed? Or is there some way to unlock them that I've missed?
Drax
Pro Adventurer
- AKA
- Benoist; Captain Highwind
I have no idea why I rearranged the chest alphabetically, but I did. It is also completely full, I took a lot of the runoff, and it's sitting with my retainer. I tried to just keep 99 of everything and took the runoff (except I left all the mythril ore, that stuff's pretty hard to get)
Box 1: Animal Stuff
Box 2: Mining Ore, Sand, Minerals
Box 3: Botany Stuff, some crafted items, tools and weapons, Infant Imps ( )
)
I'll keep my eye on the chest and feed the items from my retainer back in when the numbers drop. It was just getting way too hard to find things, and some items were collapsible to save space. I wish Square would put a Sort button in there.
EDIT: So I guess what I'm saying is: Everything in the chest is always free for grabs, but if you see 99 of something, take liberally it will more than likely be restocked
Box 1: Animal Stuff
Box 2: Mining Ore, Sand, Minerals
Box 3: Botany Stuff, some crafted items, tools and weapons, Infant Imps (
)I'll keep my eye on the chest and feed the items from my retainer back in when the numbers drop. It was just getting way too hard to find things, and some items were collapsible to save space. I wish Square would put a Sort button in there.
EDIT: So I guess what I'm saying is: Everything in the chest is always free for grabs, but if you see 99 of something, take liberally
it will more than likely be restocked
Last edited:
Lex
Administrator
It makes me sad when you get a really good group of people on a PuG and they're all on different servers ;-;.
I've put 59k in the chest from Marcus, another 200k will follow at some point. I've started doing the endgame stuff with my Dragoon while levelling my marauder. I really like playing as the marauder for some reason :/. Also I started levelling a conjurer.
Should probably get into the crafting classes at some point, but cba. I'm thinking about mining.
Ami
Playing All The Stuff!
- AKA
- Amizon, Commander Shepard, Ellie, Rinoa Heartilly, Xena, Clara Oswald, Gamora, Lana Kane, Tifa Lockhart, Jodie Holmes, Chloe Price.
Thanks for clarifying the chest thing. I'll probably take stuff at some point, but I'll continue to contribute gil in the meantime since putting items in is a no go at the moment. I'm just quite low on gil right now, as crafting is so expensive. Once I get to higher levels, of course I'll be able to get more in there.
AvecAloes
Donator
Lex said:It makes me sad when you get a really good group of people on a PuG and they're all on different servers ;-;.
This SO HARD.
Drax
Pro Adventurer
- AKA
- Benoist; Captain Highwind
Thanks for clarifying the chest thing. I'll probably take stuff at some point, but I'll continue to contribute gil in the meantime since putting items in is a no go at the moment. I'm just quite low on gil right now, as crafting is so expensive. Once I get to higher levels, of course I'll be able to get more in there.
I'm definitely going to finish this crafting guide soon. I've got to proof-read it, then add pics and example videos. It should make it very easy to craft and let the gil skyrocket.
Drax
Pro Adventurer
- AKA
- Benoist; Captain Highwind
TBH, I'm wondering if we should go back through it and get rid of the really basic stuff level 1 stuff like copper and tin ore, also maybe the regular versions of the level 1 animal items (bat fangs, beastkin blood), but definitely keep the HQ animal stuff.
Or maybe just junk the regular items and keep the HQ stuff?
Or maybe just junk the regular items and keep the HQ stuff?
Lex
Administrator
Garuda hard mode is absolute chaos. But so fun <3
Those of you who've played the end-game content: advice for farming gear for Titan? I just beat Garuda HM twice with an iLVL of 52 (I survived quite well even though I probably had the worst gear out of everyone, people were dropping around me like flies) but I want to farm decent gear for Titan because I know he's a nightmare. Any suggestions?
EDIT: Brayflox Longstop and Halatali hard mode apparently drop level 70 armour. Guess I'm farming those before I fight Titan. One thing that's on my mind though is that what's really dragging my iLvl down is the accessories :/. I can't seem to get decent accessory drops no matter how hard I try.
The key to making money lies in selling the random equipment people need on their relic quests btw. If we can craft the weapons using a blacksmith and farm and affix the relative materia for each weapon (all in all with the right levelled people it shouldn't take too long) we can make about 300k a night easy.
Last edited:
Lex
Administrator
Like 280k. No one is online/ playing therefore there is no money
I haven't started levelling any crafting classes yet but I've been seeing some interesting loot from dungeons, it's just hard to get high level drops that aren't untradeable.
For the first time today I organised my inventory. Because I don't craft and the company chest is full of crafting stuff I tossed all the crafting stuff into my retainer's inventory. Today I sat and organised it.
Then I organised my weapons and sorted out the ones I could sell. Then I used the market board to determine how much to put each item up for. I haven't really made a whole lot of money out of it. All in all, this process took three hours. Three hours of alphabetising and writing down the exact names of objects and looking them up and coming up with a reasonable price, because this game doesn't have a goddamn sort button and when putting items up for sale the system is so annoying I could smash the screen.
I had to use a mouse. There's no way I could have sat and done that with the controller. Actually controlling the game (attacks, movement, camera etc) is still better with the controller though. Menuing was awkward at first but I got used to it.
Drax
Pro Adventurer
- AKA
- Benoist; Captain Highwind
And the guide is done! \o/
There are many ways to go about crafting, but this will get the job done and explain a lot without the need for trial and error. I'm not saying we all need to be crafters and gatherers, but naturally, the more of us there are, the easier it will be for the company. The money will grow quicker, and it will be much easier to prep for endgame content, PvP, company rank listing, etc. Very rarely will you have to spend cash in the shops, and your gil will climb.
The objectives are conveniently divided into 3 parts: 1) general understanding of what the crafting and gathering jobs are, their gear, and how the jobs complement each other, 2) how to drop the crafted items at levemete locations efficiently, and 3) an in-depth look at the action commands needed to gather and craft.
So with that said, let's begin (click to open each chapter):
These are my quick names for Disciples of the Hand (crafters) and Land (gatherers.) In other words, crafters are carpenters, blacksmiths, armorers, goldsmiths, leatherworkers, weavers, alchemists, and culinarians. Gatherers are simply the 3 jobs that gather materials--miner, botanist, and fisher.


Yes, these are my stats as of this writing.
e-peeeeeeeeeen!
Almost everything found in the shops can be gathered and crafted, so virtually everything needed to make level 50 armor and under can be made from scratch, without having to buy anything at all. The world is your oyster. There is gear that can't be crafted, like the Unique Untradeable gear that you find in Raids, Story Quest rewards, or buy with points (seals) in Grand Companies. Even so, with high-quality (HQ) material and the right materia melded to them, you can still have some pretty nice specs.


Try to level your jobs evenly:
Every job in the game maxes out at level 50. Leveling crafters and gatherers can be a very symbiotic relationship; it does no good to craft if you don't have the required level of materials, and it does no good to gather if the level of your gathering equipment is low.

A lvl 16 Carpenter will need a Botanist at lvl 12 to gather those logs to make that lumber.
However, the game is scaled to where, if your gathering levels are between 20 and 30, you can gather material well into the level 40 crafting jobs. A gatherer with a level between 10-15 should be fine for crafters in their first 20 levels, so it would probably be a good idea to grind a little in each of your gathering jobs to get them there first. Gathering levequests are mundane, but jobs level up quick for the first 15 levels, so this is a good time to use those quests.


Visit your local levemete for cash jobs. Also, what is with this game and music puns?
The other good thing about gathering is that the more you mine, fish, and harvest, the more the jobs grind themselves, especially when gathering material that requires higher job levels. Lower % rates of obtaining material means that they will be harder to get, and therefore earn more EXP. This is good, because after lvl 15, levequests for gatherers become very slow and the EXP isn't very good. It's much more efficient to earn EXP and get crafting material at the same time.

The relationship between the crafting jobs themselves can also be dependent on each other. Around the level 20's, the game will start pushing you to level up other crafting jobs. For example, a lvl 23 weaver will need a material that only a lvl 18 alchemist can produce. So if you're working on all jobs (which I recommend), it's a good idea to keep them all within a 5-10 level range of each other.

That's great that I'm a lvl 40 Weaver, but if my Goldsmith is lower than lvl 34 that Woolen Robe ain't happening.
Which brings me to my next point--
As you level up one job, keep your crafting and gathering equipment for other jobs:
The tools for the jobs are specific (a miner's pickax can't be used by a fisherman), but the clothes and jewelry can be used again to catch up other jobs. As level allows, all crafters can use the same crafting gear, and all gatherers can use the same gathering gear. Also, the equipment usually falls into ranges, which also makes things easier. A lvl 20 weaver can pass his lvl 16 bracelet off to a lvl 17 alchemist that needs to catch up.
This saves crafting the same equipment over and over, and many other important things such as--
Converting old equipment and materia melding:

When all of your crafting jobs are in the 20s, chances are none of those jobs will need all of that level 10-15 crafting equipment it had used before (but check to make sure.) Odds will also say that, because of consistent use from passing between jobs, the old, lower-level equipment will have a conversion rating of 100%. This means the old equipment is ready to be turned into materia that can be melded into the new gear's range of equipment, boosting its stats even more. If you haven't unlocked materia-melding yet, stop everything and work on completing the Mutamix mission in Thanalan, found here.
Another thing to remember is, try to meld materia into the next available equipment to maximize the stats. Don't save it for equipment much higher in level. Also, don't try to do the opposite--the game reduces materia stats if you put a high level materia on low level equipment.


Left: the different stat levels between ma"tier"ia (ha!), and Right:
that lvl 27 cowl is too low for the materia, bringing the stat to zero. It wouldn't even be worth fitting.
Finally, when a job levels up past the need for its primary and secondary tools, materia-meld them if they are at 100%. Sometimes though, the conversion percentage didn't have time to reach 100, or the tools say they're flat-out nonconvertible. In that case sell them, it will save so much inventory space, as you won't need them again (unless of course you want to drop them in the community chest for other people :3)

Level 1 tools are almost always nonconvertible.
I don't know what this lvl 28 tool's problem is though.
Try to craft HQ equipment for everything:

Regular quality vs. High quality, and their stat-differences.
You want your entire inventory to sparkle.
High-quality will boost your stats significantly. And because you really just need to make, say, one piece of HQ lvl 20 crafting gear for all crafting jobs, it pays to do the prep work. Even if your crafting levels can only make a regular quality item, do it (it will still help your stats), but strive for making a HQ version as soon as possible so that your lower level jobs will catch up easier. Don't forget to meld or sell the regular equipment to keep your inventory cleaner.
Between the materia-melding and HQ equipment, levequests will be much easier, and grinding will go much quicker. With a basic understanding of the jobs and their gear, now we can get to--
Yes, these are my stats as of this writing.
e-peeeeeeeeeen!
Almost everything found in the shops can be gathered and crafted, so virtually everything needed to make level 50 armor and under can be made from scratch, without having to buy anything at all. The world is your oyster. There is gear that can't be crafted, like the Unique Untradeable gear that you find in Raids, Story Quest rewards, or buy with points (seals) in Grand Companies. Even so, with high-quality (HQ) material and the right materia melded to them, you can still have some pretty nice specs.
Chest gear vs. making gear yourself
Try to level your jobs evenly:
Every job in the game maxes out at level 50. Leveling crafters and gatherers can be a very symbiotic relationship; it does no good to craft if you don't have the required level of materials, and it does no good to gather if the level of your gathering equipment is low.
A lvl 16 Carpenter will need a Botanist at lvl 12 to gather those logs to make that lumber.
However, the game is scaled to where, if your gathering levels are between 20 and 30, you can gather material well into the level 40 crafting jobs. A gatherer with a level between 10-15 should be fine for crafters in their first 20 levels, so it would probably be a good idea to grind a little in each of your gathering jobs to get them there first. Gathering levequests are mundane, but jobs level up quick for the first 15 levels, so this is a good time to use those quests.
Visit your local levemete for cash jobs. Also, what is with this game and music puns?
The other good thing about gathering is that the more you mine, fish, and harvest, the more the jobs grind themselves, especially when gathering material that requires higher job levels. Lower % rates of obtaining material means that they will be harder to get, and therefore earn more EXP. This is good, because after lvl 15, levequests for gatherers become very slow and the EXP isn't very good. It's much more efficient to earn EXP and get crafting material at the same time.
Mining for that Silver Ore would give me slightly more EXP
than if I went for those Ice Shards.
than if I went for those Ice Shards.
The relationship between the crafting jobs themselves can also be dependent on each other. Around the level 20's, the game will start pushing you to level up other crafting jobs. For example, a lvl 23 weaver will need a material that only a lvl 18 alchemist can produce. So if you're working on all jobs (which I recommend), it's a good idea to keep them all within a 5-10 level range of each other.
That's great that I'm a lvl 40 Weaver, but if my Goldsmith is lower than lvl 34 that Woolen Robe ain't happening.
Which brings me to my next point--
As you level up one job, keep your crafting and gathering equipment for other jobs:
The tools for the jobs are specific (a miner's pickax can't be used by a fisherman), but the clothes and jewelry can be used again to catch up other jobs. As level allows, all crafters can use the same crafting gear, and all gatherers can use the same gathering gear. Also, the equipment usually falls into ranges, which also makes things easier. A lvl 20 weaver can pass his lvl 16 bracelet off to a lvl 17 alchemist that needs to catch up.
This saves crafting the same equipment over and over, and many other important things such as--
Converting old equipment and materia melding:
Spiritbond is at 100%, that baby is ready to convert.
When all of your crafting jobs are in the 20s, chances are none of those jobs will need all of that level 10-15 crafting equipment it had used before (but check to make sure.) Odds will also say that, because of consistent use from passing between jobs, the old, lower-level equipment will have a conversion rating of 100%. This means the old equipment is ready to be turned into materia that can be melded into the new gear's range of equipment, boosting its stats even more. If you haven't unlocked materia-melding yet, stop everything and work on completing the Mutamix mission in Thanalan, found here.
Another thing to remember is, try to meld materia into the next available equipment to maximize the stats. Don't save it for equipment much higher in level. Also, don't try to do the opposite--the game reduces materia stats if you put a high level materia on low level equipment.
Left: the different stat levels between ma"tier"ia (ha!), and Right:
that lvl 27 cowl is too low for the materia, bringing the stat to zero. It wouldn't even be worth fitting.
Finally, when a job levels up past the need for its primary and secondary tools, materia-meld them if they are at 100%. Sometimes though, the conversion percentage didn't have time to reach 100, or the tools say they're flat-out nonconvertible. In that case sell them, it will save so much inventory space, as you won't need them again (unless of course you want to drop them in the community chest for other people :3)
Level 1 tools are almost always nonconvertible.
I don't know what this lvl 28 tool's problem is though.
Try to craft HQ equipment for everything:
Regular quality vs. High quality, and their stat-differences.
You want your entire inventory to sparkle.
High-quality will boost your stats significantly. And because you really just need to make, say, one piece of HQ lvl 20 crafting gear for all crafting jobs, it pays to do the prep work. Even if your crafting levels can only make a regular quality item, do it (it will still help your stats), but strive for making a HQ version as soon as possible so that your lower level jobs will catch up easier. Don't forget to meld or sell the regular equipment to keep your inventory cleaner.
Between the materia-melding and HQ equipment, levequests will be much easier, and grinding will go much quicker. With a basic understanding of the jobs and their gear, now we can get to--
As I said before, the gathering levequests are pretty tedious (go here, gather this in time limit, repeat), but crafting levequests can have quite a bit of strategy. Doing them right can catch you up 5-10 levels in a few hours, or let you grind on fewer levequests to save on your daily quest allowances (I think these replenish by 5 every 24 hours).

That might look like a big number for leve allowances, but you'd be surprised how quickly they burn away.
Also, only ONE Final Fantasy music reference out of all these music puns? C'mon.
Know which levequests you want, and plan your warp points accordingly:
This will save you a lot of time, sanity, and money.
There are usually 3 types of levequests per group of levels, in this format:
-Deliver 3-5 items to this person, located at a Capital City (like Gridania or Ul'dah)
-Deliver 1 item to this person, located at a Capital City
-Deliver 1 item to this person, located somewhere in a Capital City's region (like Quarrymill in Gridania, or Camp Drybone in Ul'dah)

Your 3 flavors of levequests per level group. Yum, worms.
To make this easier, let's just use an example and real numbers:
I'm a level 20 leatherworker, and I'm looking at the lvl 20-25 levequests
Example 1. Deliver 1 Hard Leather Cesti to Maisenta, located at Black Rabbit Traders in Gridania (20,500 XP reward)
Example 2. Deliver 5 pieces of Aldgoat Leather to Maisenta, located at Black Rabbit Traders in Gridania (10,800 XP reward)
Example 3. Deliver 1 Goatskin Pot Helm to Juliembert, located at Quarrymill (31,000 XP reward)
(Even though I pulled these numbers out of my head, they are still pretty close to what you will see.)
Example 1 is good for jumping 5-10 levels really fast. Set your home point to Gridania, then set your favorited destinations to places as close as possible to where the gathering materials are at. In this case, you'll need Aldgoat Leather, Beast Sinew, and Bronze Ingots, so the base ingredients will be Aldgoat Skin, Alumen, Beast Sinew, Copper Ore, and Tin Ore. It would be best then, to set warp points to:
-Camp Drybone in Eastern Thanalan (where Myotragus Billies/Nannies drop Aldgoat Skin, with an Alumen mine conveniently nearby)
-Quarrymill in South Shroud (for Antelope Stags which drop Beast Sinew)
-and finally, Black Brush Station in Central Thanalan (for copper and tin ore).
This will put you closest to each of the mining and farming locations as possible, in case you need to bounce back to these places if you need more material. If more ingredients are needed from other locations, remember that you can only have 3 favorited locations at any one time, so prioritize if you have to (i.e., which ingredient is the biggest pain to get.) Don't forget you can also use the airships for a cheap 120 gil, which puts you at a Capital City if there are ingredient locations near it. Fun fact, the airship cutscene is skippable (circle button on PS3/4 gamepad). But overall, I think Square was nice and kept required ingredients in generally close areas when planning out the crafting recipes, so 3 favorite locations is probably the norm.
(*If you're wondering how I know all of these ingredients, yes, I do know them by heart at this point. But you can also use the Gamer's Escape site database or the in-game gathering log, which shows the general locations for the ingredients.)


Notice how much cheaper it would be if I wanted to travel to Western or Eastern Thanalan from my persent location (Gridania).


Traveling by airship, basically a teleport with a really long cutscene.
Now, personally I like to travel to these locations by mount, once, to set the locations, then I'm not out the initial money. However, if you're okay parting with the money to save time, spending the 500-600 gil to warp to these locations first is cool too. You'll make it back tenfold from the leve money anyway.


Traveling by mount and setting teleports like a badass.
Now here's where the math comes in, and something very important to remember: crafting HQ items in levequests doubles the EXP and gil earned as a reward. So for Example 1 you can get 41,000 EXP in just one shot. It's a good thing to shoot for, but you'll find your inventory flooding with regular quality items that need to get used up too.

5/5 HQ lumber turned in, as requested. Check out those double points.
There are gathering actions that can increase the rate of getting HQ materials, but it costs action points (GP). Even without using GP, it's usually pretty easy to get 15-20 HQ items per 50 regular items mined or harvested. Don't bother trying to get HQ animal items on purpose, Square has some kind of weird drop rate in place, so it's very random and you will be at it for hours. Luckily during crafting, the HQ percentage of non-animal material is enough to make up for the loss.

You will spend 45 minutes fighting these deer over and over, just to get 5 pieces of HQ antelope horn.
Worth it for personal gear crafting, not so much for levequests.
Back to the math: theoretically, if you turn in HQ items every time, it will probably take 6-8 items to climb a level. So for 5 levels (to get to lvl 25 and find the next story mission for crafting,) that's 30-40 HQ items needed. Obviously that's what burns up your leve allowances, because that is, at 1 HQ item each, 30-40 levequests. But it is good for gaining levels the fastest, because it's easy to gather a lot of the material, craft a bulk of items (in this case 30-40), then use the in-town crystals to slingshot back and forth between the levemete desk and drop box area, which is the quickest part of the process (and the most fun.)

At 23,724 EXP per HQ item turned in, that would be 8-9 HQ items total to reach lvl 34 for this leatherworker.
About 5 more left to go in this case.
With all that said, let's move on to the next example. Every technique used in Example 1 can be applied to Example 2, but it will take longer, much more material to gather and probably more prep time making the items, because each quest is asking for 3-5 items instead of one. However, Example 2 has two advantages. The first is that the items being crafted are easier to make, because they are a few recipe levels lower and usually require less types of material--typically found at one site location. In this case, the ingredients for Aldgoat Leather are in the same location, the Myotragus Billies and Nannies are right next to the Alumen site.
There are some nice levequests later that ask for Walnut Lumber, which is made from Walnut wood and nothing else. The alchemist and culilnary jobs excel in these type of quests, because usually making food and potions produces 3-5 of them at a time. You really want to pick quests like Example 2 for those jobs.


Left: Get used to these coordinates in Eastern Thanalan, this game loves Aldgoat Leather.
Right: Alchemists and Culinarians can grind quests the fastest because they can make multiple items at once.
The second advantage is that Example 2 will not eat up your leve allowances. Typically they give you the option of continuing to drop more items, for a total of 3 times. It's a really good grinding quest for that reason. In this case, delivering 15 pieces of Aldgoat Leather would give you 32,400 XP. Or, if you double it with HQ items: 15 pieces at 64,800 XP; almost 24,000 more XP than Example 1. So that cuts your leve usage down really close to 50%, roughly 25 levequests instead of 40. It's worth the extra work and has a light footprint.

You can complete 3 orders in levequests like Example 2,
tripling your EXP.
Example 2 also has its drop box in Gridania, so it's also easy to slingshot between the levemete and drop zone. This is very common in Example 1 and 2, and I have yet to see it change.
I never bother with Example 3 because it's usually out of the way, requires additional warping, and it's usually equal to Example 2's EXP or a little more. Much better use of time slingshoting between desk and drop box than to waste time traveling to another town. Speaking of,
Take the time to have all of Ul'dah, Gridania, and Limsa's aetheryte crystals activated:
Especially Limsa's, that place is a maze. To get from the levemete to the drop box, you will have to warp from Aftcastle's crystal to Aetheryte Plaza and back again.


Limsa's Levemete and Drop Box route.
Prepare to stare at a black screen so many times during warping.
Ul'dah and Gridania are the easier of the three, but it still helps warping around town instead of running. In Ul'dah, the levemete is in the Quicksand/Adventurer's Guild, and the drop box is literally out a back door leading into the Market/Ruby Road Exchange (took me forever to realize that.)


Ul'dah's Levemete and Drop Box route.
The nicest setup of the three.
Gridania is similar--levemete is Carline Canopy/Adventurer's Guild, the drop box is just outside past the Aetheryte Plaza (Black Rabbit Traders).


Gridania's Levemete and Drop Box route.
Up the hill, through the plaza.
Fun fact, when running back to the Adventurer's Guild from the drop box, there is a small enclosure between the building's columns that lets you run through it and down the cliff. This will save time from having to run all the way around the gazebo structure. You will still have to climb the hill afterword though to get back to the drop box.

Ahoy! A crack in the invisible walls.
That might look like a big number for leve allowances, but you'd be surprised how quickly they burn away.
Also, only ONE Final Fantasy music reference out of all these music puns? C'mon.
Know which levequests you want, and plan your warp points accordingly:
This will save you a lot of time, sanity, and money.
There are usually 3 types of levequests per group of levels, in this format:
-Deliver 3-5 items to this person, located at a Capital City (like Gridania or Ul'dah)
-Deliver 1 item to this person, located at a Capital City
-Deliver 1 item to this person, located somewhere in a Capital City's region (like Quarrymill in Gridania, or Camp Drybone in Ul'dah)
Your 3 flavors of levequests per level group. Yum, worms.
To make this easier, let's just use an example and real numbers:
I'm a level 20 leatherworker, and I'm looking at the lvl 20-25 levequests
Example 1. Deliver 1 Hard Leather Cesti to Maisenta, located at Black Rabbit Traders in Gridania (20,500 XP reward)
Example 2. Deliver 5 pieces of Aldgoat Leather to Maisenta, located at Black Rabbit Traders in Gridania (10,800 XP reward)
Example 3. Deliver 1 Goatskin Pot Helm to Juliembert, located at Quarrymill (31,000 XP reward)
(Even though I pulled these numbers out of my head, they are still pretty close to what you will see.)
Example 1 is good for jumping 5-10 levels really fast. Set your home point to Gridania, then set your favorited destinations to places as close as possible to where the gathering materials are at. In this case, you'll need Aldgoat Leather, Beast Sinew, and Bronze Ingots, so the base ingredients will be Aldgoat Skin, Alumen, Beast Sinew, Copper Ore, and Tin Ore. It would be best then, to set warp points to:
-Camp Drybone in Eastern Thanalan (where Myotragus Billies/Nannies drop Aldgoat Skin, with an Alumen mine conveniently nearby)
-Quarrymill in South Shroud (for Antelope Stags which drop Beast Sinew)
-and finally, Black Brush Station in Central Thanalan (for copper and tin ore).
This will put you closest to each of the mining and farming locations as possible, in case you need to bounce back to these places if you need more material. If more ingredients are needed from other locations, remember that you can only have 3 favorited locations at any one time, so prioritize if you have to (i.e., which ingredient is the biggest pain to get.) Don't forget you can also use the airships for a cheap 120 gil, which puts you at a Capital City if there are ingredient locations near it. Fun fact, the airship cutscene is skippable (circle button on PS3/4 gamepad). But overall, I think Square was nice and kept required ingredients in generally close areas when planning out the crafting recipes, so 3 favorite locations is probably the norm.
(*If you're wondering how I know all of these ingredients, yes, I do know them by heart at this point. But you can also use the Gamer's Escape site database or the in-game gathering log, which shows the general locations for the ingredients.)
Notice how much cheaper it would be if I wanted to travel to Western or Eastern Thanalan from my persent location (Gridania).
Traveling by airship, basically a teleport with a really long cutscene.
Now, personally I like to travel to these locations by mount, once, to set the locations, then I'm not out the initial money. However, if you're okay parting with the money to save time, spending the 500-600 gil to warp to these locations first is cool too. You'll make it back tenfold from the leve money anyway.
Traveling by mount and setting teleports like a badass.
Now here's where the math comes in, and something very important to remember: crafting HQ items in levequests doubles the EXP and gil earned as a reward. So for Example 1 you can get 41,000 EXP in just one shot. It's a good thing to shoot for, but you'll find your inventory flooding with regular quality items that need to get used up too.
5/5 HQ lumber turned in, as requested. Check out those double points.
There are gathering actions that can increase the rate of getting HQ materials, but it costs action points (GP). Even without using GP, it's usually pretty easy to get 15-20 HQ items per 50 regular items mined or harvested. Don't bother trying to get HQ animal items on purpose, Square has some kind of weird drop rate in place, so it's very random and you will be at it for hours. Luckily during crafting, the HQ percentage of non-animal material is enough to make up for the loss.
You will spend 45 minutes fighting these deer over and over, just to get 5 pieces of HQ antelope horn.
Worth it for personal gear crafting, not so much for levequests.
Back to the math: theoretically, if you turn in HQ items every time, it will probably take 6-8 items to climb a level. So for 5 levels (to get to lvl 25 and find the next story mission for crafting,) that's 30-40 HQ items needed. Obviously that's what burns up your leve allowances, because that is, at 1 HQ item each, 30-40 levequests. But it is good for gaining levels the fastest, because it's easy to gather a lot of the material, craft a bulk of items (in this case 30-40), then use the in-town crystals to slingshot back and forth between the levemete desk and drop box area, which is the quickest part of the process (and the most fun.)
At 23,724 EXP per HQ item turned in, that would be 8-9 HQ items total to reach lvl 34 for this leatherworker.
About 5 more left to go in this case.
With all that said, let's move on to the next example. Every technique used in Example 1 can be applied to Example 2, but it will take longer, much more material to gather and probably more prep time making the items, because each quest is asking for 3-5 items instead of one. However, Example 2 has two advantages. The first is that the items being crafted are easier to make, because they are a few recipe levels lower and usually require less types of material--typically found at one site location. In this case, the ingredients for Aldgoat Leather are in the same location, the Myotragus Billies and Nannies are right next to the Alumen site.
There are some nice levequests later that ask for Walnut Lumber, which is made from Walnut wood and nothing else. The alchemist and culilnary jobs excel in these type of quests, because usually making food and potions produces 3-5 of them at a time. You really want to pick quests like Example 2 for those jobs.
Left: Get used to these coordinates in Eastern Thanalan, this game loves Aldgoat Leather.
Right: Alchemists and Culinarians can grind quests the fastest because they can make multiple items at once.
The second advantage is that Example 2 will not eat up your leve allowances. Typically they give you the option of continuing to drop more items, for a total of 3 times. It's a really good grinding quest for that reason. In this case, delivering 15 pieces of Aldgoat Leather would give you 32,400 XP. Or, if you double it with HQ items: 15 pieces at 64,800 XP; almost 24,000 more XP than Example 1. So that cuts your leve usage down really close to 50%, roughly 25 levequests instead of 40. It's worth the extra work and has a light footprint.
You can complete 3 orders in levequests like Example 2,
tripling your EXP.
Example 2 also has its drop box in Gridania, so it's also easy to slingshot between the levemete and drop zone. This is very common in Example 1 and 2, and I have yet to see it change.
I never bother with Example 3 because it's usually out of the way, requires additional warping, and it's usually equal to Example 2's EXP or a little more. Much better use of time slingshoting between desk and drop box than to waste time traveling to another town. Speaking of,
Take the time to have all of Ul'dah, Gridania, and Limsa's aetheryte crystals activated:
Especially Limsa's, that place is a maze. To get from the levemete to the drop box, you will have to warp from Aftcastle's crystal to Aetheryte Plaza and back again.
Limsa's Levemete and Drop Box route.
Prepare to stare at a black screen so many times during warping.
Ul'dah and Gridania are the easier of the three, but it still helps warping around town instead of running. In Ul'dah, the levemete is in the Quicksand/Adventurer's Guild, and the drop box is literally out a back door leading into the Market/Ruby Road Exchange (took me forever to realize that.)
Ul'dah's Levemete and Drop Box route.
The nicest setup of the three.
Gridania is similar--levemete is Carline Canopy/Adventurer's Guild, the drop box is just outside past the Aetheryte Plaza (Black Rabbit Traders).
Gridania's Levemete and Drop Box route.
Up the hill, through the plaza.
Fun fact, when running back to the Adventurer's Guild from the drop box, there is a small enclosure between the building's columns that lets you run through it and down the cliff. This will save time from having to run all the way around the gazebo structure. You will still have to climb the hill afterword though to get back to the drop box.
Ahoy! A crack in the invisible walls.
Okay, that should cover all the prep work, now we can actually talk about how to craft and what actions we want. I won't go into gathering much--it's basically get the best gear, try to use HQ-increasing actions, and eventually in the 40-50 levels you can unlock an action that lets you gather 2 items instead of one. This learned command stacks, and there are mining/botany sites out there that already allow double drops, so you can get 4 items per swing (making 16-20 drops total.) Really cuts the tedium, especially when mining shards.


Since I'm nice, here's one such double yield location for Botanist in Central Thanalan (if your stats are high enough.)
When you earn the Byregot's Ward action, use it to quadruple your lightning shard yield.
The game does a pretty good job of explaining the Gathering jobs as you go along, like the Stealth and Prospect commands, but most of their Crafting command descriptions can get pretty vague, probably on purpose so that people can crack the formulas on their own.
So, back to crafting then. It's very much gambling, except you have a lot of control adjusting parameters by using the action commands. In fact, a lot of it is resisting the temptation to punch early, as it's usually the game's ploy to bring out its lovely failure rate.
You'll find making regular items is easy. In fact, that's all you'll be able to do in the first few levels. Later, the touch actions come into play and the door to HQ items finally opens. So let's take a look at the crafting menu:

Your prime objectives are to raise the Progress Bar (top) and Quality Bar (bottom) by any means necessary.
The key to getting HQ items is simple in theory: the closer you get to a 100% rating in the Quality bar, the more likely you will get a HQ item. Filling the bar up to a complete 100% will give you HQ without question. Your success rate is pretty good in the 75-90% range, but sometimes when the game knows you're on a role, even getting a 98% will drop you like a sack of potatoes. But, getting over 50% is always the goal; remember this, as there is an action that can exploit this further (I'll explain later.)
It's also important to remember: using HQ ingredients will raise the Quality bar by a set amount. The more HQ you use, the more the bar will start off with a percentage already filled, making it easier to raise the bar to 100% with actions.
Located just above the Quality bar is the Progress bar. It is what is needed to actually make the item, using Synthesis actions. Depending on your gear and crafting levels, the bar will climb by a certain amount with each synthesis action until it reaches the total amount of necessary points, shown to the right of the bar. If you don't want to make a HQ item (or can't), you can just concentrate on raising this bar.
Also remember that when using actions to raise the HQ rate, points are needed to make the item itself. It does no good to get a 100% HQ rate if you can't make the item, and you will watch as all your hard work explodes into glittery bits when your durability points (DP) reach zero. Speaking of: DP is your action points, whether it's performing HQ actions (known as Touch Actions) or making the item itself (Synthesis, or Progress Actions.) When making the smaller materials or components (iron ingots, aldgoat leather, growth formula beta) you're usually given 40 DP. Normally, each action requires 10 DP, giving you 4 turns. When actually constructing the more complicated stuff like armor, weapons, and gear, you're usually given 60-80 DP, giving you 6-8 turns in one go. There is also another action that can affect this that I will go into later.

DP points. Make them count, when you reach zero and the item isn't finished,
you can lose some of the used ingredients.
So that explains DP and the 2 horizontal bars in the middle, but what is that text in the bottom left of the menu that keeps saying things like good/excellent/poor/normal? That is the actual roulette wheel of crafting: Condition status. Each time you make any action, even if it doesn't expend DP, that wheel will change so keep an eye on it. It probably helps synthesis actions the same way, but it is really good for touch actions:

-Normal: your HQ percentage increases at the standard rate. If your gear and level say it increases 10 percentage points, that's what you get.
-Good: you get a moderate jump in HQ rate, maybe a 140-150% increase of your normal point climb. After this turn shows up, the roulette wheel will always become Normal again in the next turn.
-Excellent: Happens very rarely, but when it does, try to take it. This baby jumps the HQ rate to a 170-190% increase of your normal point climb. With good gear, it can fill your Quality bar up to a complete 100%.
-Poor: Only, and always, shows up in the next turn after Excellent. Your percentage points only increase at maybe a 20-30% amount of your usual point climb.
Your stats and gear affect your parameters like so:
Craftmanship: Affects Synthesis. The higher the Craftmanship, the more your Synthesis will climb to the required points.
Control: Affects HQ rating. The higher the Control number, the higher HQ rate you can get.
CP: HQ, or Touch Actions, will use up Crafting Points/CP (similar to GP and Gathering.) You can no longer use HQ Actions when CP is at zero.


Craftmanship helps Progress, Control helps Quality, and CP is needed for actions that increase Quality.
It helps to balance all 3, and it's very tempting to try to build your stats so that you have a lot of CP (more CP = more room for HQ Actions). But don't neglect Craftmanship or Control, as you can get more bang in a smaller number of turns. I guess my favorite now is building up the Control level, since the HQ can climb with fewer turns. Having good gear and adequate levels is usually sufficient for Craftmanship. Plus, your CP will be sufficient if you equip a lot of HQ jewelry, as they usually specialize in raising CP stats.
So with all that said, let's look at some of the actions and make a few crafting palettes in the action menu. I haven't unlocked everything, but these should start everybody off right:
The Actions:

Basic Synthesis: the first action learned in all classes. It increases your synthesis (progress), and needs to be used to make anything and everything. Later levels unlock the stronger Standard Synthesis, which gives your progress a higher jump. Uses DP.

Basic Touch: works like Synthesis, but increases your touch action. Standard Touch gets unlocked later, which increases HQ rate even more. Uses DP and CP at the same time.

Master's Mend: resupplies DP by so many turns. You get a more powerful version later, but these are really only good for the beginning levels until you unlock the Leatherworker's Waste Not Action, which does it so much better. Uses CP only.

Steady Hand: You should be trying your best to keep this action activated during the whole process. It greatly increases you success rate for everything, and it's basically your buffer when using the riskier actions like increasing HQ. You should have this buff activated before using any Touch Actions. Uses CP and lasts for 5 turns, so that's something to consider when using other buffs (using other actions uses up your turns, even if they're buffs. Sucks, I know.)

Inner Quiet: You want to start your crafting off with this. As you increase your HQ rate, it adds a small bonus that varies in number. Uses CP.

Observe: It took me forever to figure out what this does, but it is very powerful if used right. You should use it as one of your last actions as you finish up an item--usually the second to last, as the last action will be a Progress action and will need this buff to bring it all together. It increases the success rate of getting a HQ item, even if your HQ rate is at 50% (or even at 20% sometimes!). It's best used as a way to get a HQ item if you can't get a high HQ% rate, or if you just want more insurance to get a HQ item. If you can get a better HQ% or 100% using touch actions, do that instead and don't even bother using Observe.

Great Strides: Another one that I'm not entirely sure what it does yet. It's still a good buff to activate, and noticeable when you don't have it activated. Says it doubles the next Touch action, and says it lasts for 3 steps. I think it disappears as soon as you use a Touch action, so I guess it's best to hope for a Good or Excellent Condition to show up during the 3 steps that it's active. Or you can just activate it and blow it on a Normal Condition immediately, it still doubles the HQ in that turn.
Actions that are unlocked with certain classes, that you'll need later:

Waste Not: My favorite action. For 4 turns, it halves 2 of your DP turns into 4, giving you a total of 6 DP turns instead of 4. 7 if you plan it right, because 5 DP remaining still counts as a turn. Unlocked from leatherworker class. Try to get it as soon as possible, it trumps any master's mend actions. Feel free to replace those with it, you won't be needing them any more, as Waste Not requires less CP and allows more DP turns. I hear in the level 40s, there's a stronger Waste Not that divides DP even further.

Careful Synthesis: Another good one, unlocked from Weaver class. A fairly moderate jump in Progress points, has a very high success rate. This is the 'slow but steady' synthesis action, I use it a lot when making things like those stubborn dew threads, when I'm at a good level to make HQ raise quick and quite a lot of DP left over. This can replace your Standard and Normal Synthesis as soon as you get it.

Rumination: Unlocked from Carpenter. Very handy. It is used after Inner Quiet is in effect. For every Touch Action used to increase HQ rating, the Rumination button will glow (the icon will have a dashed outline around it). Activating Rumination will then convert, into CP, however many HQ points were accumulated up to that point, beginning with the time Inner Quiet was first in effect. Inner Quiet will leave as a result, which is why it's best to have Inner Quiet activated first before using any Touch Actions. Good for last-minute restoration of CP gauge, which you will be doing a lot in my strategies. And honestly, because it starts the bonuses, Inner quiet should be the first action you activate before anything else.

Rapid Synthesis: Unlocked from Armorer. The failure rate is very high, but when it goes through your progress sky-rockets. It's very common to complete the progress bar in one turn using this action. I use this a lot for the more complex gear that has 60-80 DP, because I can concentrate more time to raising the HQ rate and allow a few turns to getting Rapid Synthesis to work at the end.
There are other actions unlocked in the other classes, but I've found these to work best for me in most situations.
So let's start applying these actions on the field:
In each palette that I'm about to describe, I'm using my first actions to try to raise the HQ meter as much as I can, then finish off with using Progress actions to make the item. A lot of guides that I've read before try to use their first actions getting the Progress meter to climb, then concentrate on raising their HQ. That's fine in the beginning crafting levels, but they really short themselves out of maximizing the Waste Not ability, because activating that command will not work when DP is at 10 or less--it will not subdivide that 10 DP into 4 extra turns. The action will be useless, and more than likely there will go your strategy. Using Waste Not in the beginning along with a bunch of other buffs saves you a lot of frustration, smoother Touch actions, and less use of DP.
With the basic plan in mind, let's make a palette for beginners:
Around levels 10-15 in any class, you should have a set like this already at your disposal:
Basic Synthesis
Basic Touch
Master's Mend
Steady Hand

This lets you get the job done. Begin with steady hand, then try to raise the HQ with a few basic touches. You might need to use Master's Mend to resupply DP at this point, then you might be able to use some basic touches again before using the last of your DP for basic synthesis to make the item.
Example Video (Sorry about the out of sync audio):
When you unlock the special actions from the other classes, add them to your set as soon as possible for all jobs. Replace Master's Mend with Waste Not, replace Basic Synthesis with Careful Synthesis, add Rapid Synthesis.

This gives you much better advantages. Start with Steady Hand, then Waste Not. Build up with standard touch actions, and finish off with careful synthesis actions when your DP starts to fall by 10. Reactivate Steady Hand as soon as it disappears to keep your success rate going.
As you continue in levels, you'll get Standard Touch, Inner Quiet, and Observe unlocked. Put these in your set, but have both basic and standard touch available; don't replace one with the other, you'll use both.

Start off with Inner Quiet, activate Steady Hand, then Waste Not. By the time all this is done you will have 4 turns left of Steady Hand. Use up Waste Not turns with Standard Touch, reactivate Steady Hand, then try to use a standard touch and basic touch. If, in those last few turns you start off with a normal condition, use your basic touch first. More than likely Good or Excellent will show up in the next turn, which is perfect for using the stronger Standard Touch. If you don't have enough DP for touch actions, just use careful synthesis actions to finish the crafting. You'll eventually level up enough to be able to use 2 touch actions like I've described.
As you get further along in leveling, just about all of the other skills should be available. Add Great Strides and Rumination to complete the set.

Now you can fly. Start off with Inner Quiet, activate Steady Hand, Waste Not, then Great Strides. You should have 3 turns left of Steady Hand and Waste Not. Hopefully, condition is good for the next turn as you will use Standard Touch. Then use Standard Touch 2 more times. This should fill up Rumination, so use the last of your CP to reactivate Steady Hand, then activate Rumination to refill your CP. If the next turn shows Good or Excellent condition, use Standard Touch, if not, use Basic Touch. Hopefully Good or Excellent shows up in the next step, if not use Standard Touch anyway. Use the last of your DP to use Careful or Rapid Synthesis to complete the item. Protip: it usually takes 2 remaining DP turns at this point to complete an item. If you still have a touch action and some CP available, you can bait a Good condition out in the next few steps. In other words, if the current turn is Normal condition, use a careful synthesis to 'lure' the good or excellent condition out in the next step. Sometimes this will work, if it does use a touch action. Then complete the item with a synthesis action.
And there we go, everything I can think of about crafting.
-share your gear with your other jobs,
-convert gear into materia when it's obsolete,
-triangulate your warp points to save time and money when gathering,
-use the action commands like I've described
It should go a lot quicker and easier, no matter your level. Happy crafting!
Since I'm nice, here's one such double yield location for Botanist in Central Thanalan (if your stats are high enough.)
When you earn the Byregot's Ward action, use it to quadruple your lightning shard yield.
The game does a pretty good job of explaining the Gathering jobs as you go along, like the Stealth and Prospect commands, but most of their Crafting command descriptions can get pretty vague, probably on purpose so that people can crack the formulas on their own.
So, back to crafting then. It's very much gambling, except you have a lot of control adjusting parameters by using the action commands. In fact, a lot of it is resisting the temptation to punch early, as it's usually the game's ploy to bring out its lovely failure rate.
You'll find making regular items is easy. In fact, that's all you'll be able to do in the first few levels. Later, the touch actions come into play and the door to HQ items finally opens. So let's take a look at the crafting menu:
Your prime objectives are to raise the Progress Bar (top) and Quality Bar (bottom) by any means necessary.
The key to getting HQ items is simple in theory: the closer you get to a 100% rating in the Quality bar, the more likely you will get a HQ item. Filling the bar up to a complete 100% will give you HQ without question. Your success rate is pretty good in the 75-90% range, but sometimes when the game knows you're on a role, even getting a 98% will drop you like a sack of potatoes. But, getting over 50% is always the goal; remember this, as there is an action that can exploit this further (I'll explain later.)
It's also important to remember: using HQ ingredients will raise the Quality bar by a set amount. The more HQ you use, the more the bar will start off with a percentage already filled, making it easier to raise the bar to 100% with actions.
Located just above the Quality bar is the Progress bar. It is what is needed to actually make the item, using Synthesis actions. Depending on your gear and crafting levels, the bar will climb by a certain amount with each synthesis action until it reaches the total amount of necessary points, shown to the right of the bar. If you don't want to make a HQ item (or can't), you can just concentrate on raising this bar.
Also remember that when using actions to raise the HQ rate, points are needed to make the item itself. It does no good to get a 100% HQ rate if you can't make the item, and you will watch as all your hard work explodes into glittery bits when your durability points (DP) reach zero. Speaking of: DP is your action points, whether it's performing HQ actions (known as Touch Actions) or making the item itself (Synthesis, or Progress Actions.) When making the smaller materials or components (iron ingots, aldgoat leather, growth formula beta) you're usually given 40 DP. Normally, each action requires 10 DP, giving you 4 turns. When actually constructing the more complicated stuff like armor, weapons, and gear, you're usually given 60-80 DP, giving you 6-8 turns in one go. There is also another action that can affect this that I will go into later.
DP points. Make them count, when you reach zero and the item isn't finished,
you can lose some of the used ingredients.
So that explains DP and the 2 horizontal bars in the middle, but what is that text in the bottom left of the menu that keeps saying things like good/excellent/poor/normal? That is the actual roulette wheel of crafting: Condition status. Each time you make any action, even if it doesn't expend DP, that wheel will change so keep an eye on it. It probably helps synthesis actions the same way, but it is really good for touch actions:
-Normal: your HQ percentage increases at the standard rate. If your gear and level say it increases 10 percentage points, that's what you get.
-Good: you get a moderate jump in HQ rate, maybe a 140-150% increase of your normal point climb. After this turn shows up, the roulette wheel will always become Normal again in the next turn.
-Excellent: Happens very rarely, but when it does, try to take it. This baby jumps the HQ rate to a 170-190% increase of your normal point climb. With good gear, it can fill your Quality bar up to a complete 100%.
-Poor: Only, and always, shows up in the next turn after Excellent. Your percentage points only increase at maybe a 20-30% amount of your usual point climb.
Your stats and gear affect your parameters like so:
Craftmanship: Affects Synthesis. The higher the Craftmanship, the more your Synthesis will climb to the required points.
Control: Affects HQ rating. The higher the Control number, the higher HQ rate you can get.
CP: HQ, or Touch Actions, will use up Crafting Points/CP (similar to GP and Gathering.) You can no longer use HQ Actions when CP is at zero.
Craftmanship helps Progress, Control helps Quality, and CP is needed for actions that increase Quality.
It helps to balance all 3, and it's very tempting to try to build your stats so that you have a lot of CP (more CP = more room for HQ Actions). But don't neglect Craftmanship or Control, as you can get more bang in a smaller number of turns. I guess my favorite now is building up the Control level, since the HQ can climb with fewer turns. Having good gear and adequate levels is usually sufficient for Craftmanship. Plus, your CP will be sufficient if you equip a lot of HQ jewelry, as they usually specialize in raising CP stats.
So with all that said, let's look at some of the actions and make a few crafting palettes in the action menu. I haven't unlocked everything, but these should start everybody off right:
The Actions:
Basic Synthesis: the first action learned in all classes. It increases your synthesis (progress), and needs to be used to make anything and everything. Later levels unlock the stronger Standard Synthesis, which gives your progress a higher jump. Uses DP.
Basic Touch: works like Synthesis, but increases your touch action. Standard Touch gets unlocked later, which increases HQ rate even more. Uses DP and CP at the same time.
Master's Mend: resupplies DP by so many turns. You get a more powerful version later, but these are really only good for the beginning levels until you unlock the Leatherworker's Waste Not Action, which does it so much better. Uses CP only.
Steady Hand: You should be trying your best to keep this action activated during the whole process. It greatly increases you success rate for everything, and it's basically your buffer when using the riskier actions like increasing HQ. You should have this buff activated before using any Touch Actions. Uses CP and lasts for 5 turns, so that's something to consider when using other buffs (using other actions uses up your turns, even if they're buffs. Sucks, I know.)
Inner Quiet: You want to start your crafting off with this. As you increase your HQ rate, it adds a small bonus that varies in number. Uses CP.
Observe: It took me forever to figure out what this does, but it is very powerful if used right. You should use it as one of your last actions as you finish up an item--usually the second to last, as the last action will be a Progress action and will need this buff to bring it all together. It increases the success rate of getting a HQ item, even if your HQ rate is at 50% (or even at 20% sometimes!). It's best used as a way to get a HQ item if you can't get a high HQ% rate, or if you just want more insurance to get a HQ item. If you can get a better HQ% or 100% using touch actions, do that instead and don't even bother using Observe.
Great Strides: Another one that I'm not entirely sure what it does yet. It's still a good buff to activate, and noticeable when you don't have it activated. Says it doubles the next Touch action, and says it lasts for 3 steps. I think it disappears as soon as you use a Touch action, so I guess it's best to hope for a Good or Excellent Condition to show up during the 3 steps that it's active. Or you can just activate it and blow it on a Normal Condition immediately, it still doubles the HQ in that turn.
Actions that are unlocked with certain classes, that you'll need later:
Waste Not: My favorite action. For 4 turns, it halves 2 of your DP turns into 4, giving you a total of 6 DP turns instead of 4. 7 if you plan it right, because 5 DP remaining still counts as a turn. Unlocked from leatherworker class. Try to get it as soon as possible, it trumps any master's mend actions. Feel free to replace those with it, you won't be needing them any more, as Waste Not requires less CP and allows more DP turns. I hear in the level 40s, there's a stronger Waste Not that divides DP even further.
Careful Synthesis: Another good one, unlocked from Weaver class. A fairly moderate jump in Progress points, has a very high success rate. This is the 'slow but steady' synthesis action, I use it a lot when making things like those stubborn dew threads, when I'm at a good level to make HQ raise quick and quite a lot of DP left over. This can replace your Standard and Normal Synthesis as soon as you get it.
Rumination: Unlocked from Carpenter. Very handy. It is used after Inner Quiet is in effect. For every Touch Action used to increase HQ rating, the Rumination button will glow (the icon will have a dashed outline around it). Activating Rumination will then convert, into CP, however many HQ points were accumulated up to that point, beginning with the time Inner Quiet was first in effect. Inner Quiet will leave as a result, which is why it's best to have Inner Quiet activated first before using any Touch Actions. Good for last-minute restoration of CP gauge, which you will be doing a lot in my strategies. And honestly, because it starts the bonuses, Inner quiet should be the first action you activate before anything else.
Rapid Synthesis: Unlocked from Armorer. The failure rate is very high, but when it goes through your progress sky-rockets. It's very common to complete the progress bar in one turn using this action. I use this a lot for the more complex gear that has 60-80 DP, because I can concentrate more time to raising the HQ rate and allow a few turns to getting Rapid Synthesis to work at the end.
There are other actions unlocked in the other classes, but I've found these to work best for me in most situations.
So let's start applying these actions on the field:
In each palette that I'm about to describe, I'm using my first actions to try to raise the HQ meter as much as I can, then finish off with using Progress actions to make the item. A lot of guides that I've read before try to use their first actions getting the Progress meter to climb, then concentrate on raising their HQ. That's fine in the beginning crafting levels, but they really short themselves out of maximizing the Waste Not ability, because activating that command will not work when DP is at 10 or less--it will not subdivide that 10 DP into 4 extra turns. The action will be useless, and more than likely there will go your strategy. Using Waste Not in the beginning along with a bunch of other buffs saves you a lot of frustration, smoother Touch actions, and less use of DP.
With the basic plan in mind, let's make a palette for beginners:
Around levels 10-15 in any class, you should have a set like this already at your disposal:
Basic Synthesis
Basic Touch
Master's Mend
Steady Hand
This lets you get the job done. Begin with steady hand, then try to raise the HQ with a few basic touches. You might need to use Master's Mend to resupply DP at this point, then you might be able to use some basic touches again before using the last of your DP for basic synthesis to make the item.
Example Video (Sorry about the out of sync audio):
When you unlock the special actions from the other classes, add them to your set as soon as possible for all jobs. Replace Master's Mend with Waste Not, replace Basic Synthesis with Careful Synthesis, add Rapid Synthesis.
This gives you much better advantages. Start with Steady Hand, then Waste Not. Build up with standard touch actions, and finish off with careful synthesis actions when your DP starts to fall by 10. Reactivate Steady Hand as soon as it disappears to keep your success rate going.
As you continue in levels, you'll get Standard Touch, Inner Quiet, and Observe unlocked. Put these in your set, but have both basic and standard touch available; don't replace one with the other, you'll use both.
Start off with Inner Quiet, activate Steady Hand, then Waste Not. By the time all this is done you will have 4 turns left of Steady Hand. Use up Waste Not turns with Standard Touch, reactivate Steady Hand, then try to use a standard touch and basic touch. If, in those last few turns you start off with a normal condition, use your basic touch first. More than likely Good or Excellent will show up in the next turn, which is perfect for using the stronger Standard Touch. If you don't have enough DP for touch actions, just use careful synthesis actions to finish the crafting. You'll eventually level up enough to be able to use 2 touch actions like I've described.
As you get further along in leveling, just about all of the other skills should be available. Add Great Strides and Rumination to complete the set.
Now you can fly. Start off with Inner Quiet, activate Steady Hand, Waste Not, then Great Strides. You should have 3 turns left of Steady Hand and Waste Not. Hopefully, condition is good for the next turn as you will use Standard Touch. Then use Standard Touch 2 more times. This should fill up Rumination, so use the last of your CP to reactivate Steady Hand, then activate Rumination to refill your CP. If the next turn shows Good or Excellent condition, use Standard Touch, if not, use Basic Touch. Hopefully Good or Excellent shows up in the next step, if not use Standard Touch anyway. Use the last of your DP to use Careful or Rapid Synthesis to complete the item. Protip: it usually takes 2 remaining DP turns at this point to complete an item. If you still have a touch action and some CP available, you can bait a Good condition out in the next few steps. In other words, if the current turn is Normal condition, use a careful synthesis to 'lure' the good or excellent condition out in the next step. Sometimes this will work, if it does use a touch action. Then complete the item with a synthesis action.
And there we go, everything I can think of about crafting.
-share your gear with your other jobs,
-convert gear into materia when it's obsolete,
-triangulate your warp points to save time and money when gathering,
-use the action commands like I've described
It should go a lot quicker and easier, no matter your level. Happy crafting!
Last edited:
Lex
Administrator
^That's an excellent guide. I'll be following it at some point soon
So me and satsu were talking in the FC chat and were thinking to make a bit of money we could sell some of the harder-to-get stuff that's sitting in the company chest? I've made another 200k ish that I can plop into our gil reserves.
I'm deferring judgement to you Monk because you put a lot of it in there and know more about it than I do. Could we spend a bit of time crafting rarer items from what's in there to sell at a higher profit for example? I have no idea
Drax
Pro Adventurer
- AKA
- Benoist; Captain Highwind
Oh animal stuff will go easy, a very steady stream of cash
Regular animal stuff, depending on the animal, would probably sell pretty decent. HQ would definitely sell, that stuff takes hours, even days to get a good amount. It's not something easily farmed, and demand would be high.
Dew threads have been my bane to craft--I see high quality versions of those selling really good. Aldgoat leather, undyed velveteen, (and a few others I can't remember right now,) would sell really good in bundles because they're used a lot.
As for making more expensive items out of what's there, as long as it's high quality I see it selling, especially if we made crafting and gathering gears. Jewelry too, whether it's for DPS or crafting. That would eat up a lot of the minerals.
I'll try to poke my head in there and see what I can smash together. I can probably take a lot of the regular quality items and make HQ from them to sell.
Last edited:
Ami
Playing All The Stuff!
- AKA
- Amizon, Commander Shepard, Ellie, Rinoa Heartilly, Xena, Clara Oswald, Gamora, Lana Kane, Tifa Lockhart, Jodie Holmes, Chloe Price.
I'll be onboard with the crafting soon.
Done with Murdered: Soul Suspect the other night and The Wolf Among Us last night, so shall be heading back on this weekend!
Done with Murdered: Soul Suspect the other night and The Wolf Among Us last night, so shall be heading back on this weekend!
- Status
- Not open for further replies.