
JORG versus Post-JORG
The following changes are true for all versions after the original Japanese release, unless exceptions are stated. The categories of changes are listed in no particular order.
– Disc 2 FMVs “BIGLIGHT” and “FF_DAIKU”
– Added Scenes
– Final Screen
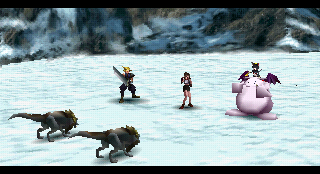
– Added Bosses
– Red & Green Arrows
– Changes to pre-rendered backgrounds
– Added Sidequest, Materia & Items
– Battle Interface & Materia Menu
– Magic & Summon Changes
– Enemy AI
– Encounter Data
– Minigames
– Glitches & Bugs
– Miscellaneous
Disc 2 FMVs “BIGLIGHT” and “FF_DAIKU”
JORG:
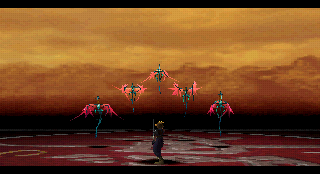
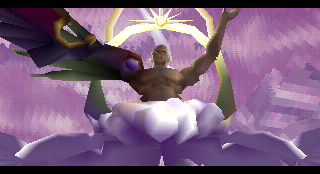
When Cloud hands over the Black Materia and the Northern Crater crumbles, everyone but Cloud escape on the Highwind. The FMV (called “BIGLIGHT” in the game files) initiates, with Sephiroth’s theme “Those Chosen By The Planet” still playing. The ground of the crater crumbles into the deep. Tifa, on the Highwind deck, stands by the railing and looks back at the scene.
Post-JORG:
The FMV has now been substantially edited and changed name from “BIGLIGHT” to “FF_DAIKU”. The PC versions still call the file “BIGLIGHT”. The sequence now includes the five Weapons emerging from the crater. Cinematic versions of Tifa, Barret, Cid, Red XIII and Nanaki are shown reacting to this. The shockwave from Ultima Weapon flying away in close proximity to the Highwind knocks Tifa out.
Like in JORG, FFVII International will have Sephiroth’s theme still playing in-game during the FMV. All other versions have the theme cancelled right before the FMV begins.
Added Scenes
JORG:
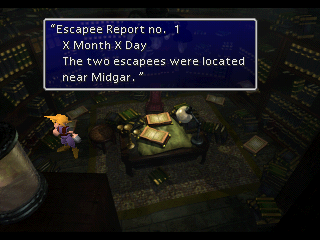
The only way to get a hint of how Cloud came to Midgar and what Zack’s ultimate fate was is to read the reports in the Shinra Mansion. The player has to deduce themselves that the referred to escapees are Cloud and Zack. The pods Zack and Cloud were kept in has fingernail scratchings that tell how the two escaped. Snapshots below taken from the English game for easy readability.


Post-JORG:
With help of some new scenes the blanks are filled in and character motivations explained.
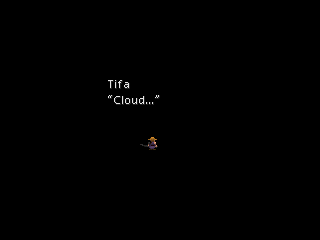
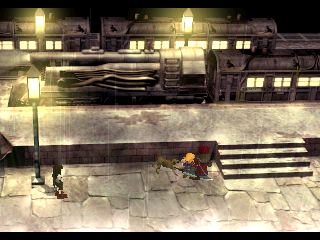
In JORG, after the FMV where the Northern Crater crumbles, the game immediately jumps to Tifa and Barret in the Junon infirmary.
Post-JORG, two events are shown before the jump to Junon. Tifa chases after Cloud in a black space, which then cuts to a flashback of her finding Cloud at the Sector 7 train station. Tifa’s motivations are explained in-depth here in a way that was never revealed in JORG and we get to see Cloud’s shattered mind reshaping itself, ultimately forming his false memories.
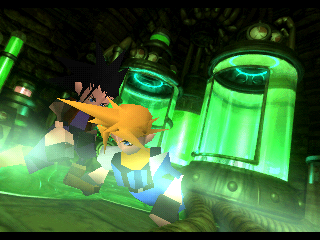
After Cloud has returned to the party on disc 2, a flashback can be triggered by entering the Shinra Mansion basement. What was only hinted at in JORG is here fully shown and explained. It is clarified that Zack dressed Cloud in the SOLDIER outfit and that Cloud’s mercenary title from the game’s beginning stems from Zack’s idea for them both to become mercenaries.
Final Screen

What happens after the “500 Years Later” FMV differs depending on version.
JORG & PC:
The game is stuck on a black screen in JORG. In the PC version you are brought back to the desktop.
Post-JORG (Minus PC):
The Final Fantasy prelude theme starts to play and an infinitely looping field where stars soar by acts as the final screen. The only way to exit is to reset or shut off the console.
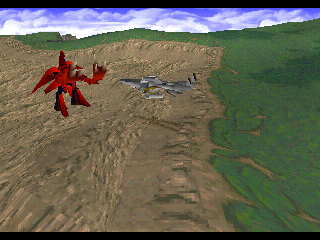
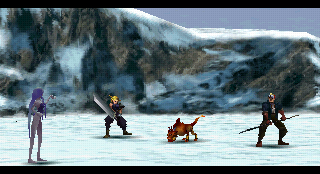
Added Bosses
JORG:
When walking up to Diamond Weapon, the FMV is instantly triggered where the creature starts walking toward Midgar, completely ignoring Cloud and the other who were just prepared to do battle with it.
In the Japanese Original, only three Weapons are ever shown to exist: Sapphire Weapon, Diamond Weapon & Ultima Weapon. The name of the first two are not given in the game itself.
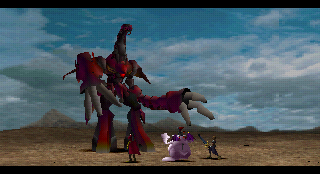
Post-JORG:
When walking up to Diamond Weapon on the overworld, the battle with Diamond Weapon triggers. From Diamond Weapon you can steal the Yuffie-compatible weapon “Rising Sun”, which was only available in JORG as an item hidden in the code. Via this battle you can also confirm Diamond Weapon’s name.
After the battle is over and plenty of experience has been received, the FMV starts where the creature sets its eyes on Midgar and ignores the party.
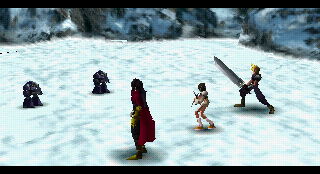
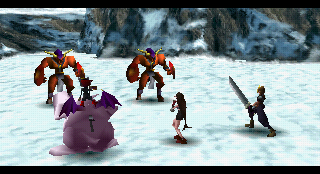
After the Japanese Original two Weapons were added: Emerald Weapon & Ruby Weapon. These appear very briefly in the FF_DAIKU FMV. The addition of two new weapons is even reflected in the game script of all post-JORG versions.
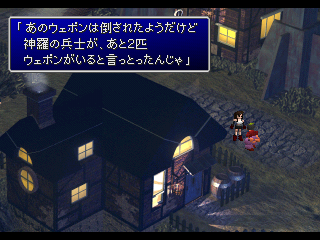
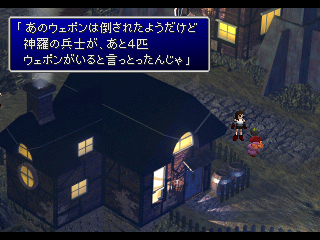
NPC counting the number of Weapons remaining after Sapphire Weapon’s demise
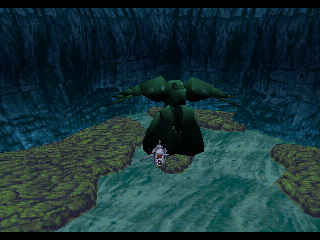
Emerald Weapon is found underwater and will appear at random spots for each submersion, sometimes being stationary and other times swimming around. Unless you have the Underwater materia, a 20-minute countdown begins. When the counter reaches zero, the player gets an instant Game Over.
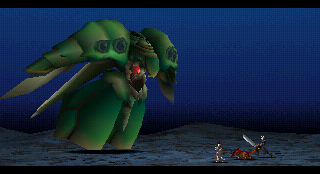
Defeating Emerald Weapon nets you a considerable amount of experience and the newly implemented item “Earth Harp”. See sidequest section for more detail.
After Ultima Weapon (who is erroneously called Ultimate Weapon in the English game) has been defeated, Ruby Weapon becomes an available boss in the Corel Desert. Touch its head either when on the Highwind or when riding a chocobo and the battle will initiate.

Aside from gaining much experience, defeating this tough boss will grant you the post-JORG item “Desert Rose”. See sidequest section for more detail.
BONUS INFO: When changing a JORG file into an FFVII International save, be aware that if this is done after Ultima Weapon has been (finally) defeated then Ruby Weapon will never appear on the world map. The trigger for Ruby Weapon’s arrival can only happen if Ultima Weapon is defeated when playing the JINT version.
Red & Green Arrows
JORG:
When on a field, pressing select will cause a hand to appear above Cloud’s head. This is true for all versions.
Post-JORG:
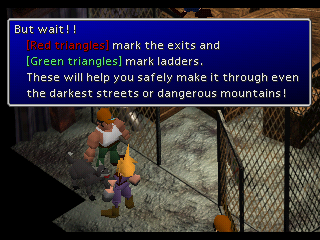
Red arrows now show all the doorways to other areas, while green represents a part of the environment that can be climbed.
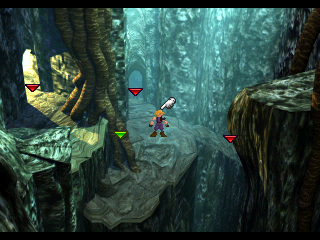
As a natural consequence, the beginner’s tutorial in the Sector 7 Slums now also includes a mention of the red and green arrows.
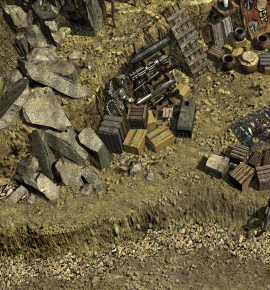
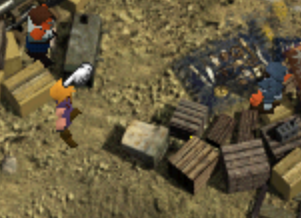
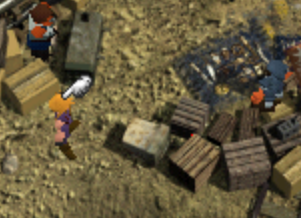
Changes to pre-rendered backgrounds
Backgrounds were retouched to help make the player less confused as to where they could and should walk. JORG is always placed to the left and post-JORG always to the right. The name within parantheses next to the area name is the map’s file name.
 ‹-›
‹-› 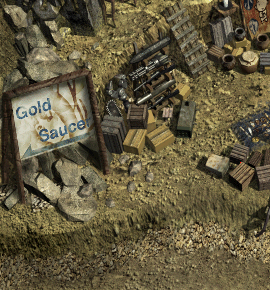
Without a red arrow to point the way and without a sign, some players might not have found the path to Gold Saucer in the initial release. Notice also how a shadow effect has been added both above and below the sign. Strangely enough, more rocks have been added to the soil which is supposed to be a walked path.
EXTRA: If you squint your eyes or enlarge the image, you will notice that one box has a yellow dot in JORG which is then changed for a red dot post-JORG.
These dots clearly are not meant to be there and were likely born from when the background layers were being edited.
 ‹-›
‹-› 
At first the differences appear to be the same between the standard maps for North Corel versus the one for the scenario when the train has partially busted the place. Notice though that in the post-JORG image extra rocks have not been added to the soil. If anything the addition of rocks would have made more sense here than in the normal map.
Focus your eyes and one small difference is spotted in the post-JORG game. Two pixels worth of red is now spotted on one of the houses. These two pixels of red are not present in JORG.
 ‹-›
‹-› 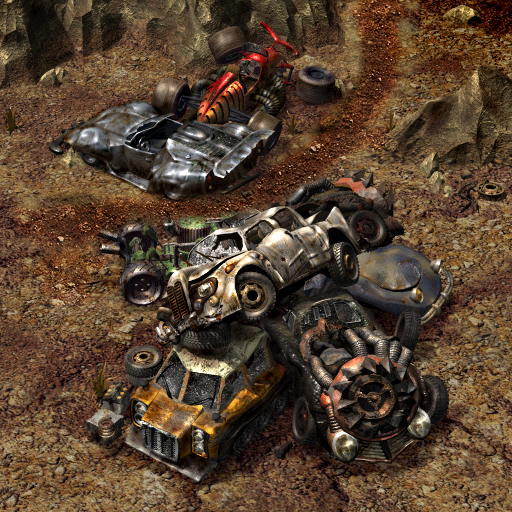
The path is made clear post-JORG. The retouch is slightly sloppy, due to the green vehicle suddenly becoming partially buried beneath the newly drawn ground texture, when the perspective does not suggest that the green vehicle is in any way beneath the ground.
Though only likely to be spotted when switching between these two images at quick speed, the yellow car’s hull is slightly darker in post-JORG. Whether because of changes due to formatting or actual image editing, the vehicles in overall appear to have microscopic changes here and there, generally making them darker. Again, this is unlikely to be spotted without switching back and forth between JORG and post-JORG.
 ‹-›
‹-› 
The path to the lower right appears blocked in JORG. Many players probably got stuck here. With red arrows plus the amended background, the illusion has been eliminated post-JORG.
Here, too, some sections appear darker or lighter when compared in the minutest detail. The random nature of these changes suggest poor formatting, with the post-JORG image having a microscopically smaller resolution.
 ‹-›
‹-› 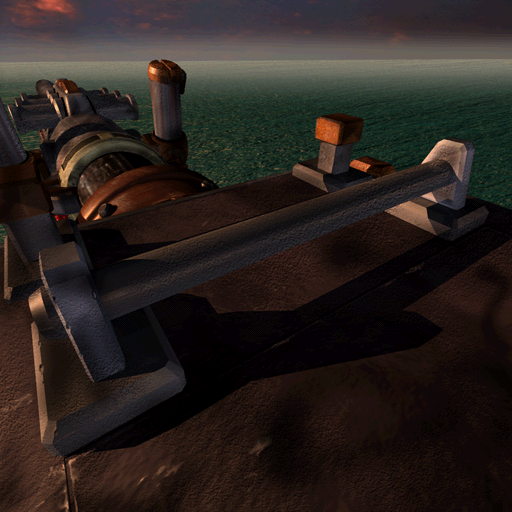
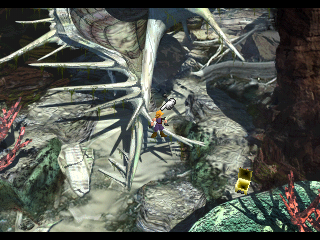
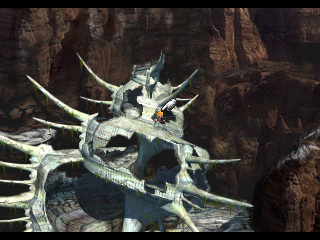
Though the perspective already suggests that one can walk under the metal bar, having it removed shows much better the area that Tifa is able to walk on. To accomodate the changed graphics, the walkmesh (the 3D area the player roams) was edited to fit the revealed perspective of the cannon. A single slope was essentially changed into two separate, steeper slopes.
The screw-like formation at the top appears partially obscured in JORG, as though part of the sky layer had been imposed over it. This error is fixed post-JORG.
 ‹-›
‹-› 
Despite being a hidden map, this one is a worthy mention. The boring, completely black 512×512 pixel map was replaced with the neat 320×240 background post-JORG. Only for the PlayStation releases though, as the black 512×512 map is what is used for the PC ports as well. Whether you are playing the PlayStation post-JORG editions or the PC ports however, the red arrows of the field won’t all show up where they should when activated. In short, the PS post-JORG debug room hub is a lot easier to navigate thanks to its map design.
Added Sidequest, Materia & Items
JORG:
Yuffie’s weapon “Rising Sun” exists in the game code as an unused item.
Aside from five materia that exist as unused in all versions, JORG holds a sixth unused materia called “Underwater Respiration”/”Breathe Underwater” (すいちゅうこきゅう, Suichuu Kokyuu). This Independent materia is glitchy and with no complete function.
Post-JORG:
The added boss Diamond Weapon holds Yuffie’s “Rising Sun” as an item you can steal.
The “Underwater Respiration” materia has been upgraded to the functional “Underwater” (せんすい) materia, as part of the newly added sidequest.
The room that was empty in JORG now has an NPC in the form of an old man who wants three items before he can go on a journey to pray for the souls of his recently deceased friends.
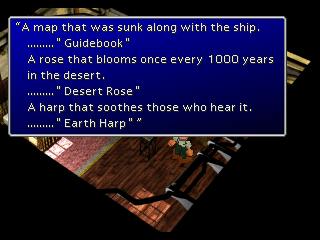
Guide Book, Desert Rose and Earth Harp are all post-JORG items which did not exist at all in JORG, not even as unused beta items.
Guide Book is found by morphing the enemy “Ghost Ship”, which can be encountered in the underwater tunnel that leads to the reactor, into this item. In JORG the ghost ship could not be morphed into an item. The Guide Book is then traded in for the Underwater materia, which removes the countdown for the Emerald Weapon battle.
Defeating Emerald Weapon gives you the Earth Harp, for which three powerful materia can be exchanged. These are “Master Summon”, “Master Magic” and “Master Command”.
In Cosmo Canyon, both JORG and post-JORG, these materia can be gained by approaching the Huge Materia (if you managed to collect these) in the observatory and having them morph the appropriate mastered materia into a single “Master” materia. In JORG this was the only method of receiving Master Materia.
Defeating Ruby Weapon gives you the Desert Rose, for which the old man will give you a Gold Chocobo. The chocobo unfortunately has very low stats and won’t be as good for racing as a Gold Chocobo made by the player.
Once the sidequest is over, the old man leaves on his journey. The room is now empty, just as it was in JORG.
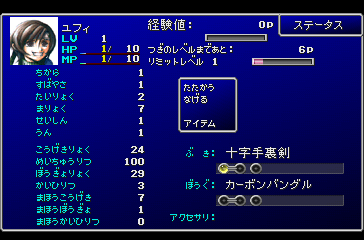
Battle Interface & Materia Menu
Corel Reactor
This area has its own battle background, based on its field background.
The battle area appears to represent the platform to the lower right on the field map. The elevation renders the reactor number “27” on the same level as the character models.
The battle now takes place on a lower platform, right next to the reactor. This adds a level of consistency both because battles will generally be initiated from this general area on the field and because two Shinra soldiers are encountered right outside the reactor on disc 2, rather than on the platform to the lower right. The major inconsistency is that the ground the battlers are standing on does not exist in the field map.
With the use of battle background viewer “Zangan”, we can get a more full view of this area (LINK). Unfortunately the program only works for the PC version of FFVII so we can’t currently get a full view of the JORG background.
Debug Battle Background
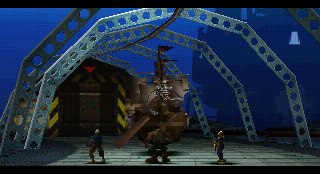
Just like the hidden field “STARTMAP” deserved a mention, so does this hidden battle background.
With mountains in the distance and the Shinra logo on the ground, this is one quite epic background.
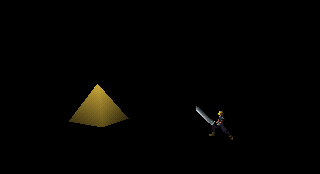
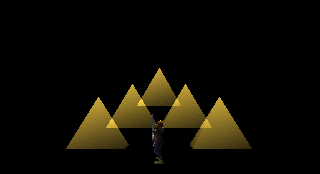
Everything is now completely dark. Add to that, the debug enemies have been replaced by pyramids.
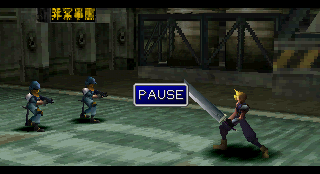
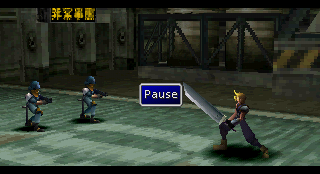
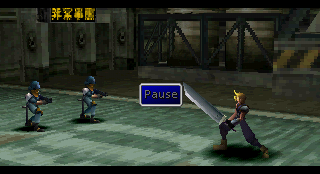
JORG:
Pressing the Pause button stops the action and the music. There is no text window displayed to indicate that the game has indeed been paused.
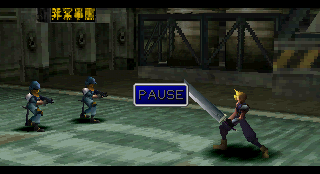
Post-JORG:
Pressing the Pause button does what it is supposed to do, though now with the addition of a text window that reads “Pause”, with the font blinking white and grey.
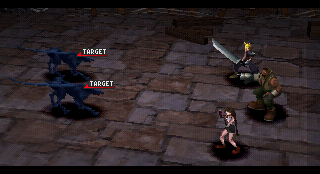
FFVII International versus English game
Pressing R2 will cause each targettable enemy to have a “Target” marker above them. This feature was not present in JORG.
JORG:
The only way to switch materia between party members is to have the character in your party, remove that materia and then equip it with your desired character. This means that whenever there is no PHS function available, switching materia with those not in your party is impossible.
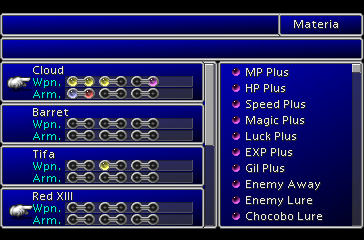
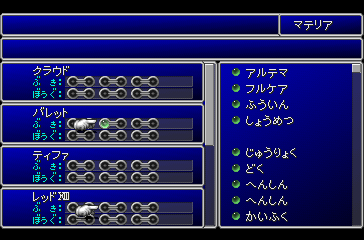
Materia types are grouped in the order from top to bottom in the following order: Magic, Support, Command, Independent & Summon. This is true for all versions.
When pressing “Arrange” in the materia menu, the materia for each type is not arranged according to a preset list. If the materia list is arranged and then a new materia is added, whether it be because one was found/bought/de-equipped, the next time the list is arranged, that materia will be placed at the very bottom of its materia group.
In short, most recently added materia is placed at the bottom and then retreats to a higher spot in the list if other materia is added instead.
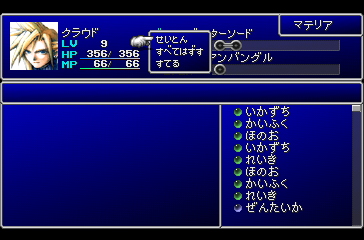
Cursor on “Arrange” option; materia arranged accordingly
The exception is that if a materia is instantly removed from the list and then brought back (equipped then de-equipped), with no use of the Arrange function, the materia will find the spot it most recently belonged to. This is true for all versions.
Post-JORG:
The “Exchange” option has been added. With this, the materia of any recruited member can be instantly swapped. Single materia or a full row of materia can be exchanged both between and within a character’s slots, allowing for much easier customization. “Arrange” now orders each materia according to a preset hierarchy.
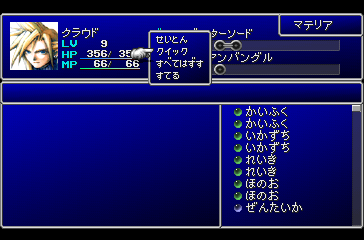
Cursor on the new “Exchange” option
 ‹-›
‹-› 
FFVII International versus English game
Magic & Summon Changes
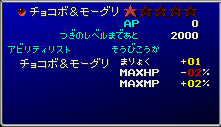
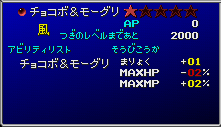
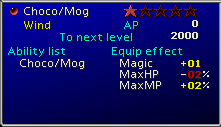
JORG:
The two summons Choco/Mog and Typhon (Typoon in English PS version) have no Wind element assigned to neither their materia or respective summon attacks. Choco/Mog’s both summon attacks, ‘Deathblow!!‘ and ‘Fat-Chocobo‘ are Non-Elemental. There exists no materia which can be paired with Elemental to achieve Wind elemental effects.
JORG versus JINT versus ENG
Post-JORG:
Choco/Mog and Typhon now have the Wind element assigned to their respective materia. In FFVII International alone, Choco/Mog’s summon attack ‘Deathblow!!’ now has the Wind element assigned to it. The attack ‘Fat-Chocobo’ remains Non-Elemental even in JINT. The summon description in JORG refers to it as being Non-Elemental, while JINT describes Choco/Mog as using a Wind attack, even though Fat Chocobo is still Non-Elemental.
JORG:
This Enemy Skill’s damage multipler is as follows: Number of escapes times caster’s level = Damage
Post-JORG:
Damage multipler has been simplified to: Number of escapes = Damage
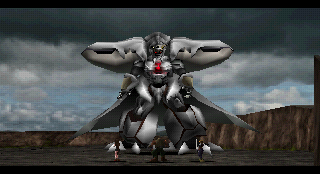
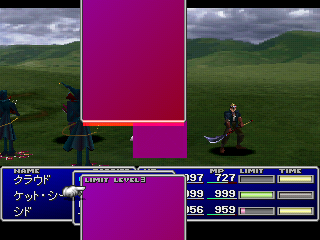
Enemy AI
This table shows the moveset in which differences are displayed between JORG and Post-JORG.
| JORG | Post-JORG |
| Slow: The battle always begin with Safer Sephiroth casting Slow on all party members. | Wall: The battle always begin with Safer Sephiroth casting Wall on himself. |
| Pale Horse: Percentage-based damage that removes most HP of one party member. Can inflict Sadness. | Pale Horse: Magic attack on one party member. Can inflict Sadness, Frog & Small. |
| Flare: Non-Elemental magic attack on one party member. | Shadow Flare: Non-Elemental magic attack on one party member. |
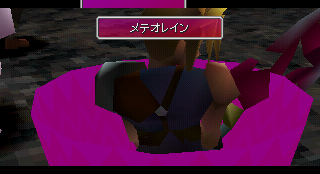
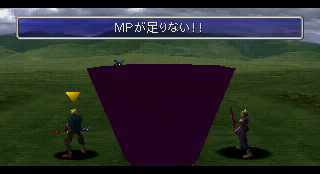
| Super Nova: Magical attack on all party member. Can inflict Confusion and Silence. Animation is roughly 25 seconds long. Often used right after Pale Horse, which can leave that party member vulnerable to dying from Super Nova. | Super Nova: Reduces party members’ HP to 1/16 of max. Can inflict Confusion, Silence and Slow. Animation is now roughly 2 minutes long. Still often used in conjunction with Pale Horse, but is pretty much not threatening due to Super Nova being unable to kill anyone. |
| Death Sentence: Party member receives a countdown to KO’d status. | Heartless Angel: Reduces all party members’ HP to 1. |
HP modifiers appear to be the same across all versions:
+30,000 Max HP, 2 Att, 20 Def, 5 MAt, 16 MDf per character at L99
+80,000 Max HP if you cast Knights of Round on Jenova*SYNTHESIS
For each time you killed Bizarro Sephiroth’s head, Safer Sephiroth’s HP will be 100 lower than his Max HP, for a maximum of 24900 lower.
At maximum power, Safer*Sephiroth will have:
400,000 Max HP, 246 Att, 260 Def, 140 MAt, 308 MDf
Note: Aeris does not count while calculating the above.
*HP Modifier data from Absolute Steve’s FFVII FAQ
Perhaps most famous is how the cinematic qualities of Super Nova was vamped up considerably after the initial release. GarlandTheGreat has uploaded the following video showing Safer Sephiroth’s original Super Nova, as well as some other battle differences.
All data from the JORG version of Safer Sephiroth were acquired from playing the game, due to there being no tools which can read the battle data for the Japanese game. By reading the English versions, both PlayStation and PC, one can confirm in those version that Slow, Death Sentence and Flare have been completely removed from Safer Sephiroth’s moveset.
Status inflictions of Pale Horse and Super Nova vary here between versions and I am confident of the JORG data being accurate, even though it was acquired manually.
Some attack data for Safer Sephiroth is still universal across versions of FFVII:
– Wing Slash (Lacks name in-game) [1 Enemy, Phys Atk, 10389 Base Damage, Causes 100% Paralysed & Darkness]
– Deen [All Enemies, Mag Atk, 2128.125 Base Damage]
– Break: [1 Enemy, Mag Atk, Cost=86MP, Earth Element, 8512.5 Base Damage, Can inflict Petrify]
– DeSpell: [1/All Enemies, Mag Atk, Cost=20MP, Despells]
Attack data from Absolute Steve’s FFVII guide.

Sephiroth can cure himself here using the “Bizzarro Enegy” [ リバース、エナヅー = Bizarro/Reverse Energy] move. In JORG, Sephiroth either performs no animation at all or only flaps his wings slightly. Post-JORG, Bizzaro Sephiroth raises his wings and points them toward each other.
Two of its attacks share the same name: “Refuse” [ 廃棄汚染 = Disposal of contaminants/waste ]. One attack has Brain Pod spitting out a green mass (left image), while the other has some more complex animations. Let’s call the former RefuseA and the latter RefuseB.
JORG:
RefuseA inflicts Berserk and RefuseB inflicts Confuse. With no defense against these crippling status effects, even a decently levelled party may quickly be defeated here. The point after Cloud’s fight with Rufus, where Cloud is alone, is a very dangerous point where one can easily be defeated without getting the chance to make even a single move.
Post-JORG:
RefuseA inflicts Sleep and RefuseB inflicts Poison. These status effects are slightly less crippling than what was in JORG, making this portion of the game less filled with risk.

Described also in the “Glitches & Bugs” section.
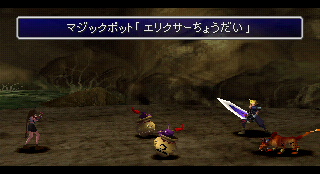
JORG:
Magic Pots can be damaged and defeated even without giving them Elixirs first. They will be shouting for Elixirs, but either due to a glitch or because the function isn’t there at all, Elixirs aren’t actually necessary.
If all the three Movers are defeated at the same time, then the death animation will be performed for only one of them. Defeated one at a time, the death animations will trigger properly.
Post-JORG:
It is now required that you give an Elixir to a Magic Pot in order to inflict damage on it. The glitch with the Mover trio’s death animation has also been fixed, so that now all three perform their death animations even when defeated simultaneously.
Encounter Data
In JORG some areas have encounter data that was completely removed for later releases. The battles themselves remain in the data, just not the battle rate and reference to battle IDs.
The two battles shown below are unused post-JORG. The number stands for the Battle ID.
#325: Guard Hound ——— #326: Guard Hound 2x
#1: テスト0「ガードハウンド」A-D
[Test 0 “Guard Hound” A through D]
This one is actually not in the Encounter Data and is only triggered due to a glitch. The exact nature of this glitch is unknown and we can only estimate the chance of the battle happening, which ranges between 1/5 and 1/10.
The enemies of this debug battle have plenty of HP; 30000 each. Unless one has learned the Enemy Skill ‘Laser’ by this point, one can expect a lengthy battle if it is triggered on disc 1 when the party is (typically) not yet at high level. The reward is fairly great however for one who persists and defeats the monsters that never fight back: Per enemy is granted 1000 EXP, 100 AP, 10000 gil. With a certain probability, one or more Potions may be received.
GarlandTheGreat has uploaded a video showing this test battle.
When attacking the enemies, the following dialogue windows will appear:
| Japanese | GlitterBerri’s Translation |
| モンスター「いたいでするー」 | Monster: It huuurts~ |
| モンスター「ごめんってば、もうやめてぇ」 | Monster: I said I was sorry, cut it out already! |
| モンスター「うラ〜、いたいやんけえ、わレ〜」 | Monster: Ooo~, you’re hurting me~ |
#684: Bandersnatch 3x ——— #685: Snow Golem
#686: Bandersnatch 2x ————— #687: Snow
#688: Snow Golem 2x ——— #697: Magnade 2x
All these battles are available in other areas of the Great Glacier, meaning that they are not unused post-JORG.
Having compared a dozen random fields, one can spot in the data that the encounter rate was lowered with a few percentages from JORG to Post-JORG. Whether this is true for only a dozen or hundreds of fields is still unknown. It is possible a separate downloadable document will be created in the future, covering all the changes in encounter rate.
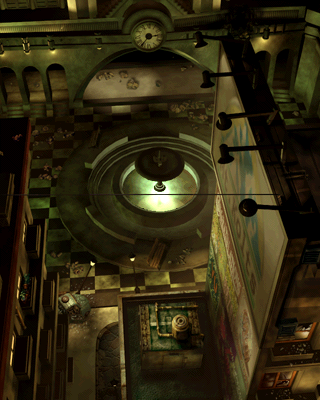
When falling down from the clock room, a battle with two Ancient Dragons is triggered. Before this fight, the game decides what theme to play.
JORG:
Boss battle theme “Fight On!” plays.
Post-JORG:
Normal battle theme “Let The Battles Begin” plays.
Minigames
This section includes not only the Gold Saucer minigames but also the clock puzzle in the Ancient Temple and the body temperature “game” on Gaea’s Cliff.
JORG:
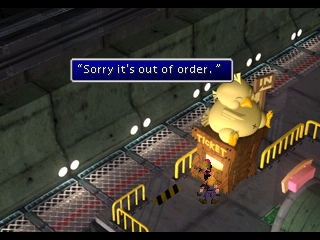
Whenever Gold Saucer is available, the option exists for Cloud to go on this ride with any given character in the current party.
Post-JORG:
During all of disc 2 and on disc 3, until you have reached the bottom of the Northern Crater (the penultimate map before the point of no return), the ride is not available. The cashier will say “Sorry it’s out of order“, which is a text entry that did not exist at all in JORG.
JORG & PC:
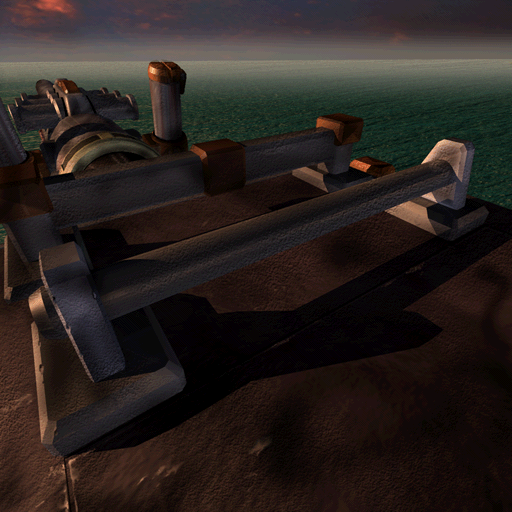
The zeppelin propeller is a target which can grant some amount over 25000 points if is blasted correctly. Shademp’s record with the zeppelin propeller: 25680.
A difference here between JORG and PC is that the former can’t display than four digits during the minigame itself, so when the score reaches ten thousand and higher, the fourth digit will display random graphics and numbers from the display texture file. The PC version accomodates for the fifth digit by expanding the score display.

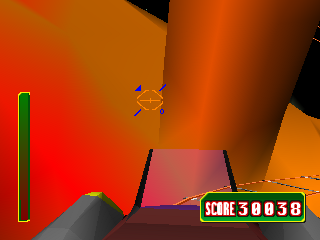
JORG versus PC
It is currently very difficult to create a decent estimate of the maximum possible score.
Post-JORG (minus PC):
The zeppelin propeller is now no longer a target or grants only zero points. The estimated max score of the minigame is 8185, though it is possible some targets are still unknown.
The Snowboarding and Submarine minigame hold many more differences between versions, not just the general ones between JORG and post-JORG. These disparities will be divulged in full on another page.
Post-JORG
If Tifa or Cid is in your current party, there is a 37.5% chance that they will ask to ride the snowboard. If you agree, they will be the snowboarders, which is something that could never happen in JORG. The story-driven snowboarding on the northern continent is only possible when Cloud is the leader. If Tifa and Cid is in your party, Cid can never ask to be the one to play because the game always checks Tifa first.
When unlocking and playing Time Attack, a ghost will be available to show how well you fared last time. Post-JORG, the ghost “???” can be unlocked. This turns out to be a cactuar. The two other ghosts, available in all versions, is that of a mog either on a snowboard or on a sleigh.
When toggling between ghosts in the menu, the ghost image changes in real-time, even before an actual selection has been made. In JORG, the ghost will not change until the selection has been made.
Differences are covered more in-detail in the Minigames page.
JORG:
In the obligatory story-driven mission as well as the near-identical level in Gold Saucer, defeating the leader submarine takes 24 hits while the small red and yellow subs need 8 hits. Mines are powerful enough to destroy the player sub in four hits.
Post-JORG:
In the obligatory story-driven mission as well as the near-identical level in Gold Saucer, defeating the leader submarine takes 12 hits while the small red and yellow subs need 4 hits. Mines have been halved in power, meaning that eight mine hits are now required to destroy the player submarine. Submarine speed has been increased by a factor of approximately 1,35.
Individual differences exist between post-JORG PlayStation versions and the PC release, with the PC port containing many JORG traits.
JORG:
The keeper of time will initially only allow you to move the arrows in set intervals, which are not clearly spelled out and requires the player’s experience to figure out. If the player falls down the hole three times, the minigame is made easier and the player can now move the long arrow around freely.
Post-JORG:
By default, the player can move the long arrow freely. A flag is set to make the game think you have fallen down the hole three times, ergo why the more difficult version of this minigame is not available.
To see how JORG’s version of the minigame appears in the English game when modded back, watch this video from 0:00 to 1:44.
On your way up over Gaea’s Cliff you must repeatedly press the Square button in order to keep up your body temperature. If the body temperature goes down to 26 degrees, Cloud will faint and wake up in Holzoff’s cabin. The maximum body temperature is 38 degrees and the rate at which the body temperature drops is the same across all versions.
JORG:
13 presses of the Square button equals a body temperature increase of 1.
Post-JORG:
6 presses of the Square button equals a body temperature increase of 1. The minigame is notably less demanding of button mashing than it was in JORG.
Glitches & Bugs
Described also in the “Enemy AI” section.
JORG:
Magic Pots can be damaged and defeated even without giving them Elixirs first. They will be shouting for Elixirs, but either due to a glitch or because the function isn’t there at all, Elixirs aren’t actually necessary.
If all the three Movers are defeated at the same time, then the death animation will be performed for only one of them. Defeated one at a time, the death animations will trigger properly.
Post-JORG:
It is now required that you give an Elixir to a Magic Pot in order to inflict damage on it. The glitch with the Mover trio’s death animation has also been fixed, so that now all three perform their death animations even when defeated simultaneously.
The W-Item materia has different glitches depending on version.
JORG:
If the first item has been selected and “used” on a target but the player then decides to quit the W-Item selection completely, the picked item will be permanently gone even though it wasn’t technically used. The only way to retrieve the item is for the battle to be won/exited before the W-Item command is used.
The failed attempt to fix this glitch might be what caused the post-JORG version of the glitch.
Post-JORG:
The glitch from JORG remains but now another one has been added. For each time you are about to use the second item but choose to go back to the item list instead, the first item you selected will be returned/duplicated. The process is repeatable and so each time you return to the item list, the first item will be duplicated.
Extensions of this glitch exists, where even items which can’t be selected via the item list can be duplicated. See the following videos uploaded by BrutalAl:
– Extended W-Item Glitch: Morph Method
– Extended W-Item Glitch: Throw Version
JORG:
Here is how to acquire a Level 1 Yuffie using the countdown glitch: Soft reset the game (R1+R2+L1+L2+Select+Start) when the Reactor #1 bomb is counting down. The glitch also works if you reset the game while the countdown during the North Corel Huge Materia mission is happening.
*In case you are emulating the game and using a keyboard: To bypass the problem that the keyboard can’t register this many keys being pushed, change controller configurations so that one key occupies multiple buttons. For example one key can represent all four shoulder buttons.*
Load a save on the overworld and trigger battles in a forest. When the battle loads, a counter at the top left will read 00:00 and the battle ends automatically. This glitch will continue for each battle until you leave the overworld. When Yuffie is encountered, the battle with her ends and her recruitment event begins.
For those who don’t remember the appropriate actions to recruit Yuffie and/or can’t read Japanese, here are the actions that must be performed: Talk to Yuffie, pick lower dialogue option, talk to Yuffie, pick upper option, lower option, upper option and finally the lower option.
Yuffie will then join your team on Level 1. At the time of joining, her remaining HP and MP are at minimum.
Post-JORG:
The glitch no longer exists. The only way to have a Level 1 Yuffie post-JORG is to boot up FFVII International and load a JORG save with a Level 1 Yuffie in it.

JORG:
When Cait Sith has defeated his 1000th enemy, he learns a Level 3 Limit Break that is unnamed in all menus. In the limit menu, the cursor can only move to one Level 3 limit break, which lacks description, but in-battle there are actually two glitch-filled limit breaks available.
Building up Cait Sith’s Level 3 limit bar requires more HP to be depleted than for any other limit break accessed in the game. From Terence Ferguson’s Party Mechanics Guide, we can calculate roughly how much HP must be depleted.
In comparison, Tifa’s Lv4 limit break requires that 187.9% of her HP is depleted. She takes the longest to build up her limit bar, not counting Cait Sith’s Level 3 limit break, requiring almost double her max HP to be lost.
In contrast, Cait Sith’s Level 3 limit break demands that 3184,18% of his MaxHP be depleted. He must thusly lose almost 32 times that of his Maximum HP. With the status Fury, the required HP loss can be halved to 1529,09%. With good use of the HP<->MP materia and manipulation of enemies, the process of building up the limit bar can be made even shorter.
Cait Sith does have data for the growth of a Level 4 limit bar, but currently there is no known way of unlocking a Level 4 limit break without the use of cheats. If unlocked, it would require that 4236,72% of Cait Sith’s MaxHP be depleted.
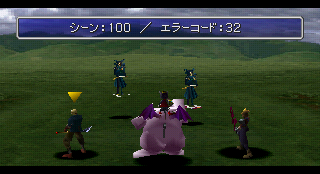
With a full limit bar we can observe the two Level 3 limit breaks in battle. When the limit list is accessed, the limit window stretches below the battle menu. The rest of Cait Sith’s limit window is seen flickering from the top of the battle screen, stretching down a great length. When this happens, all 2D animations and the majority of other battle effects turn glitchy, turning all purple like the limit window. This glitch extends to the “limit break surge” effect, right before an attack is used. Effects will remain purple until the battle is over.
When selecting Cait Sith’s first Level 3 limit break, which lacks both name and description, it can select only himself and no other target. When the selection is made, the limit break surge animation happens but is then quickly followed by the message “Not enough MP!!“. The required MP lies somewhere in and between 10000-65535 MP. This might be bypassed with help of a cheat code, but an easier method is to use Mime which ignores MP.
When MP is ignored and the limit break activated, the battle essentially freezes as it waits for Cait Sith to perform an action which doesn’t exist. It is even impossible to escape from the battle, because the glitchy limit break is still first in line, waiting to happen.
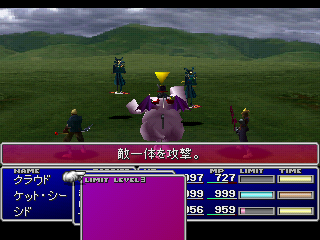
Moving the cursor up one step in the limit window, instead of down as one might expect, reveals the second glitchy limit break. This one has a description:
敵一体を攻撃 = Attack an opponent / Attack one enemy
When actually selecting the limit break, it is selecting all targets, both party members and enemies, rather than just one enemy. Making the selection freezes the game in a more dramatic fashion than the first limit break did. A message appears, expressed in three text windows.
| Japanese | Fan Translation |
| システムエラーが発生しました | A system error has occurred |
| シーン:X / エラーコード:32 | Scene: X / Error code: 32 |
| L1+R1+SELECT でリセットしてね | Press L1+R1+SELECT to reset |
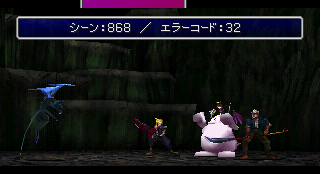
If a battle error of this type appears in the English game , it will usually read like this:
| Data Error |
| Scene:X/Code:32 |
| Press L1+R1+Select for Reset |
No action can be performed. In the first limit break the characters could at least initiate a “flee” running animation, but that is impossible here. The number beyond “Error Scene:” is the Battle ID, here represented by an X.
To press “L1+R1+Select” for reset is of course false. It is only possible to do a soft reset outside of battle and that requires the L2, R2 and Start to be pressed as well.
Post-JORG:
Cait Sith’s Level 3 limit break can no longer be unlocked. It can be transferred from JORG to JINT and the glitchy actions will be the same, but the limit breaks must still be unlocked in JORG.
JORG:
If the slots are currently rolling when a battle ends, the sound will continue even when the victory fanfare plays. The sound ends when the battle spoils menu pop up.
Post-JORG:
The slots/reels are exited and silenced immediately before the victory fanfare starts.
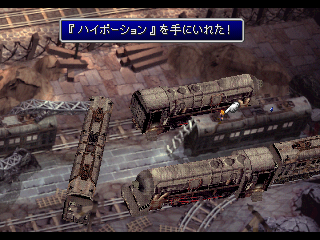
JORG:
Normally, the player will be frozen in place when picking up an item. In both train graveyard fields, this is not so in JORG. The player can move around freely when the receipt line has appeared and the item, if it has a model, is still visible.
Post-JORG:
All items properly disable the player’s mobility when picked up.
Note: This glitch requires that Cait Sith is not in your current party.
JORG:
When Cait Sith jumps down the shaft he will sometimes get stuck inside it, standing and waving. The player can talk to Cait Sith again, triggering a similar version of the previous scene where the shaft was opened, then Cait Sith will finally disappear.
Post-JORG:
The glitch has been removed and Cait Sith always disappear properly when jumping down through the ladder shaft.
Miscellaneous
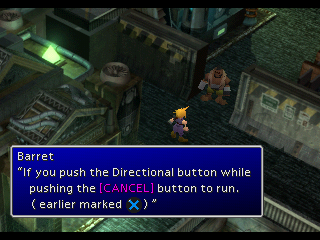
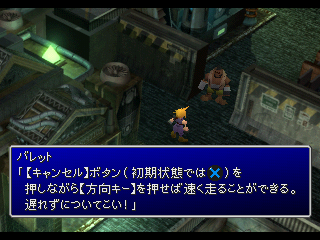
JORG:
After naming Barret, he immediately runs off without saying anything.
Post-JORG:
After naming Barret, he tells you to hold down the CANCEL button to run.
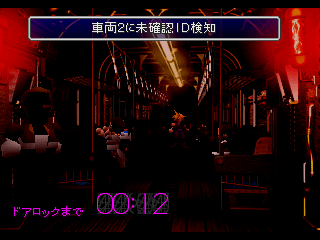
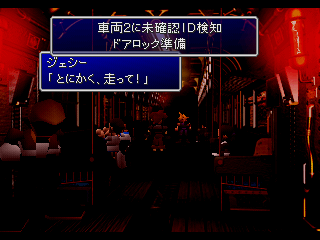
JORG:
When entering a new car and a message says that the one behind you has just locked down, the following sound effect is played: SFX#51. All other cues related to the train messages use SFX#59.
The “train speaker” messages are always only displayed one row at a time. Train messages will appear while the player is running and the countdowns for lockdown are happening.
Post-JORG:
The sound effect that was used in JORG, just after a lockdown, is no longer present here. SFX#59 remains used.
The train speaker messages, during escape, are now displayed in bigger text messages, showing two rows at a time. Train messages no longer appear while countdown is going on, unless the car that the player is currently inside gets locked down. Some superfluous train messages that were used in JORG are now no longer in use (see Unused Text Part 3 for more info on the entries that become unused post-JORG).
JORG:
The Mayor won’t allow you to pick a password unless you’ve left the main 62nd floor screen twice; either by visiting the libraries or leaving the floor.
Post-JORG:
You may pick an answer immediately after the challenge is given.
JORG:
When receiving the keycard, only a sound indicates that it has just been given as there is no receipt line. The employee does not move from his spot.
Post-JORG:
A receipt line has been added and the Shinra employee now runs away to the 67th floor after giving you the keycard.
Post-JORG:
Beginner’s Hall – The red and green triangles are now explained.
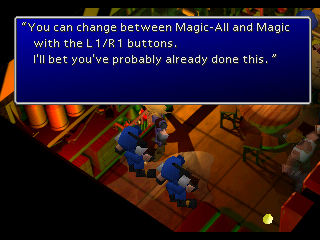
Expert’s Hall – The tutorial now mentions that one can toggle between all-targets or one-target selections with magic (given that an All materia is properly equipped) by pressing L1/R1. This is something that JORG forgot to mention.
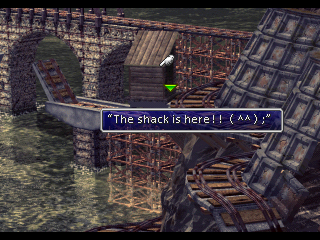
On your way to North Corel, the team will wait for Cloud to pull a switch to lower the bridge.
Post-JORG:
If the player meet up with the others at the bridge, the game zooms over to the shack and clearly points out its location. This event does not exist in JORG.

Two piano keys don’t make the proper sound and are involved in the hint for where the second dial number is.
JORG:
When pressing R1/L1+Square or R1/L1+Circle, the pressed key sounds broken. This is all that happens.
Post-JORG:
When pressing the appropriate broken keys, the sound is also accompanied by a white flash, making the hint/mystery all the more apparent. In FFVII International, the broken keys are the same is in JORG, but in the English game they have been changed to Square and R1/L1+Triangle. This change for the English game is made to match with the hint in Hojo’s letter.
NOTE: In the German, French and Spanish versions, none of the piano keys are broken or even accompanied by a white flash.
JORG:
Each jump is controlled by the player, requiring a total of 12 pressed jumps with the directional button to reach the top or bottom. At all times, up to the top, the player is in control of where they go.
Post-JORG:
The jumps up or down the shell happen automatically after the first jump. Close to the top, where the player character is completely or partially obscured, the game takes control over the character and takes him/her up to the top and finally out of the shell.
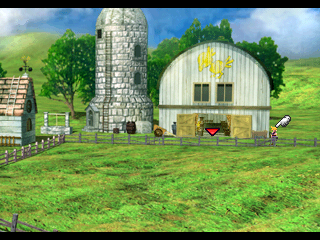
JORG:
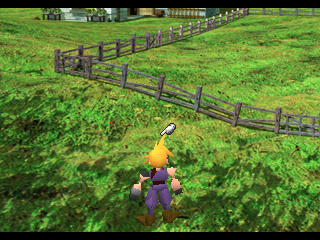
At all points in the game, when entering Chocobo Farm via the overworld, you start out at the bottom of the screen. When catching, feeding and breeding chocobos, this can become tedious because of the distance between your starting point and the stables.
It is impossible to exit the farm via the upper right section of the screen, as the player will instead face an invisible wall.
Post-JORG:
Initially the starting point is the bottom of the screen, just like in JORG, but it is now possible to exit the farm via the upper right section.
After your first stable is bought, the player character will now instead turn up at the top right of the screen when entering via the overworld. This puts the character right next to the stables, removing the annoyance factor that was in the original release.
